



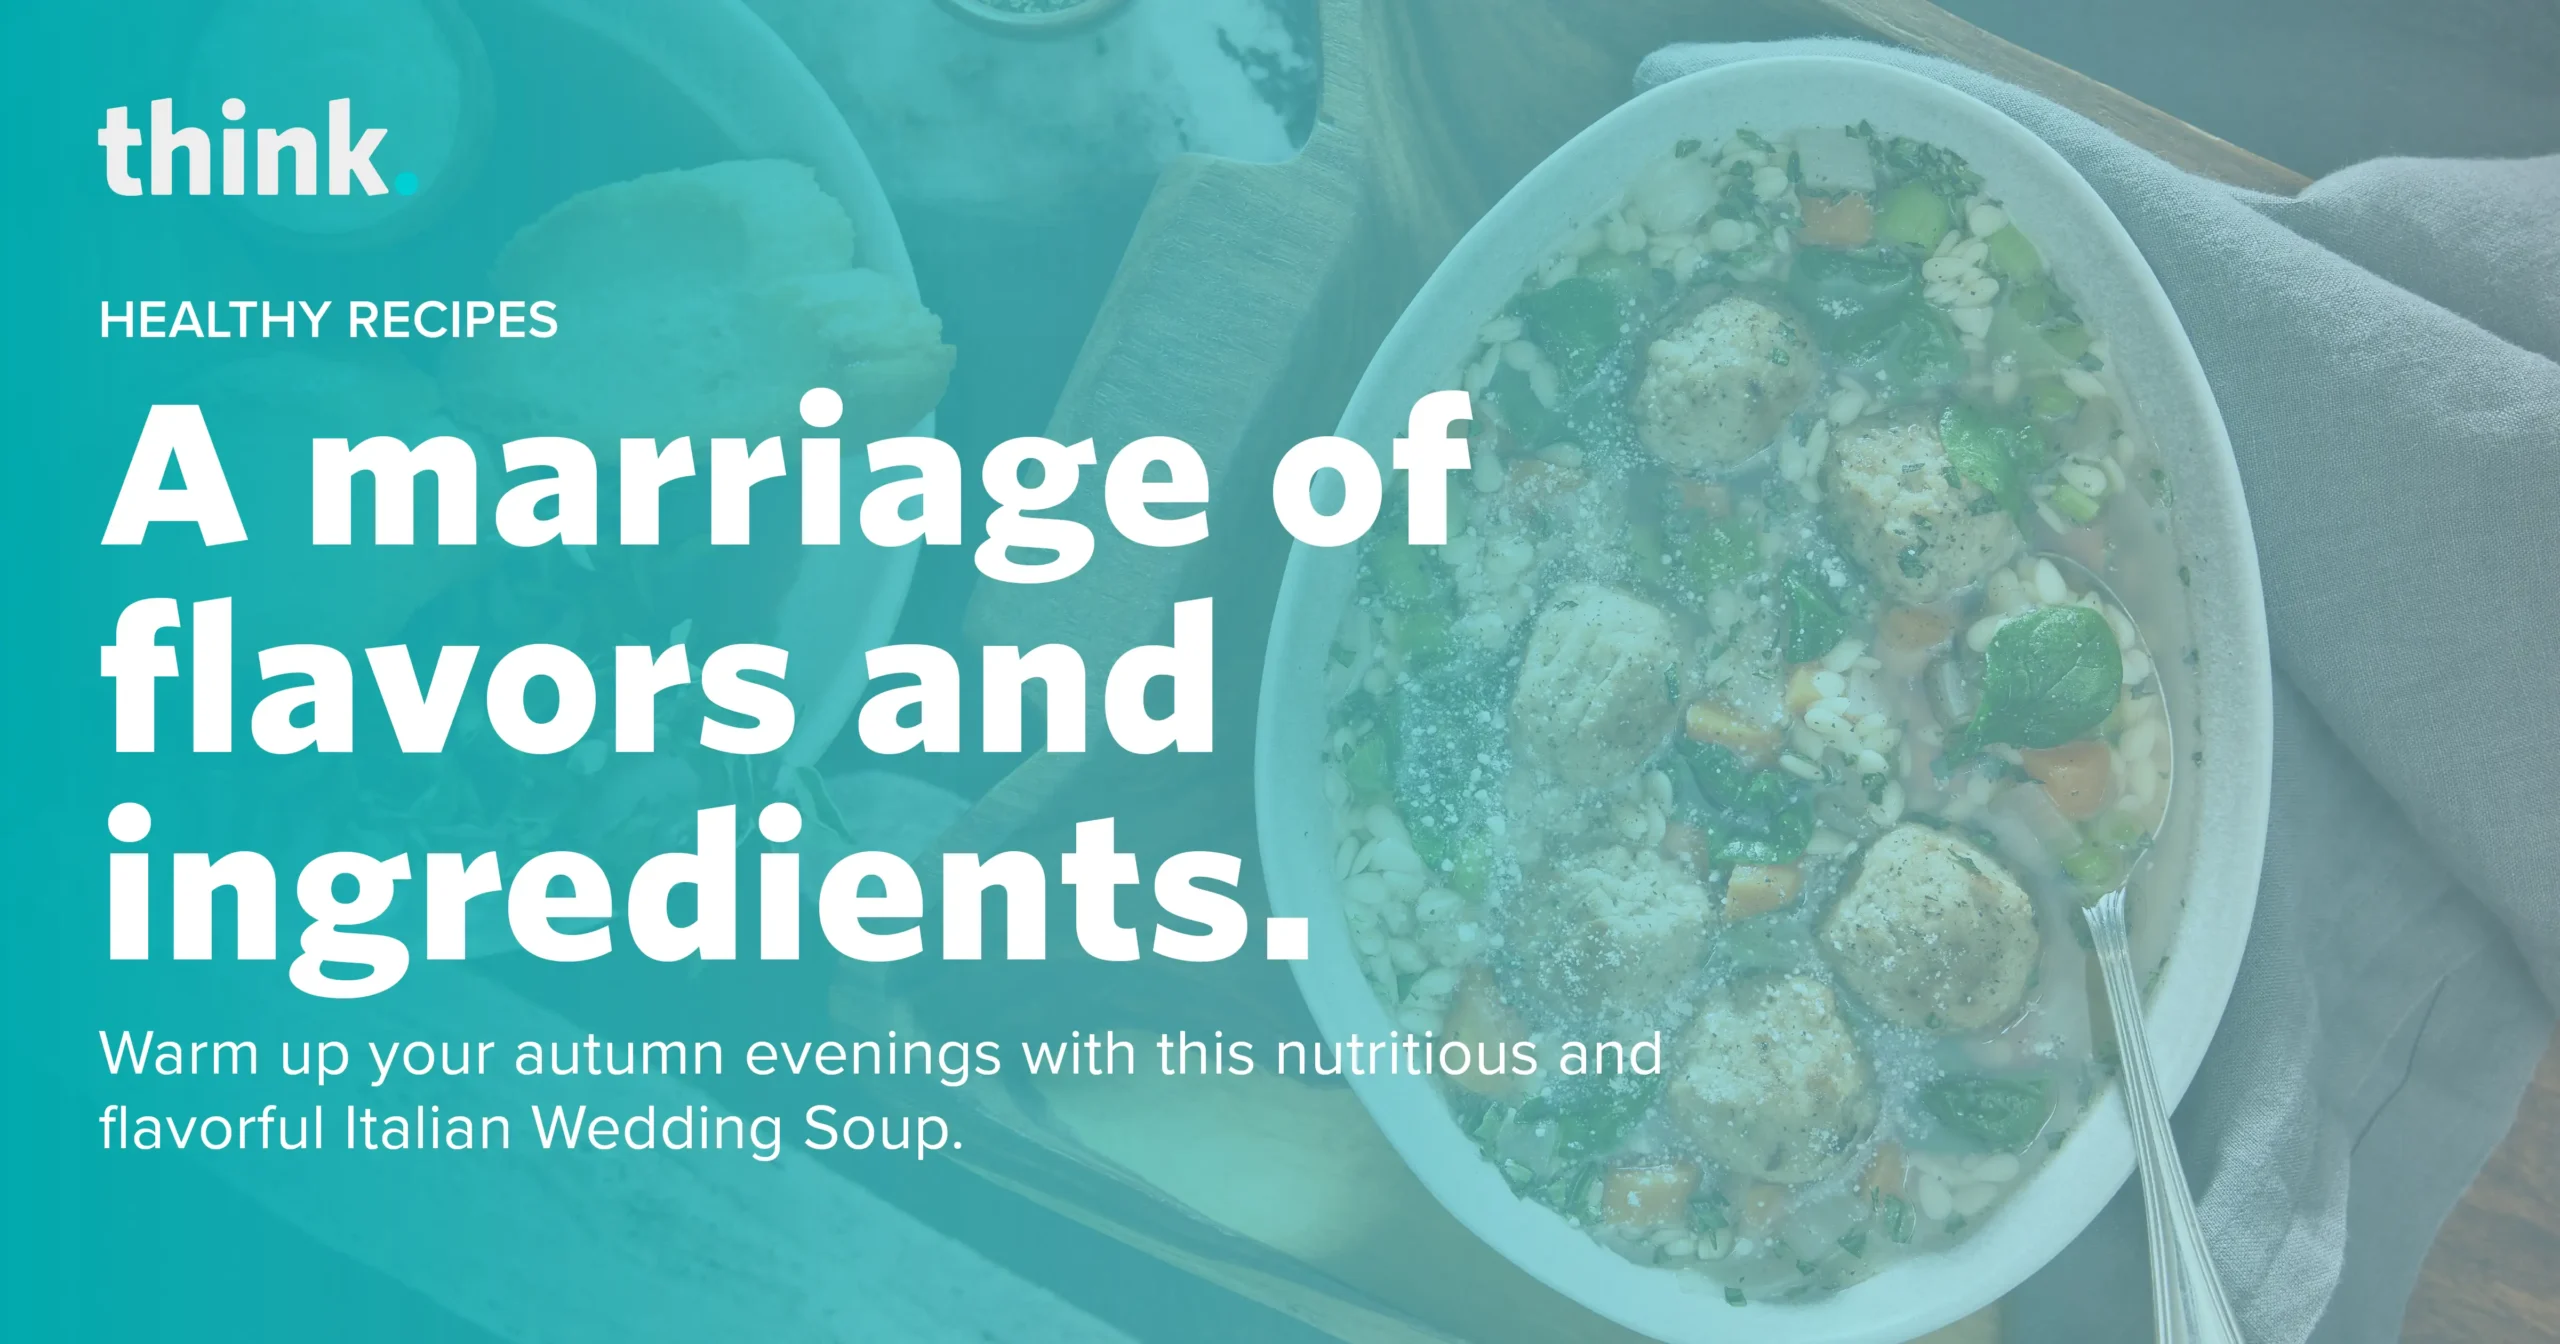
Embrace Fall with our Hearty Italian Wedding Soup.

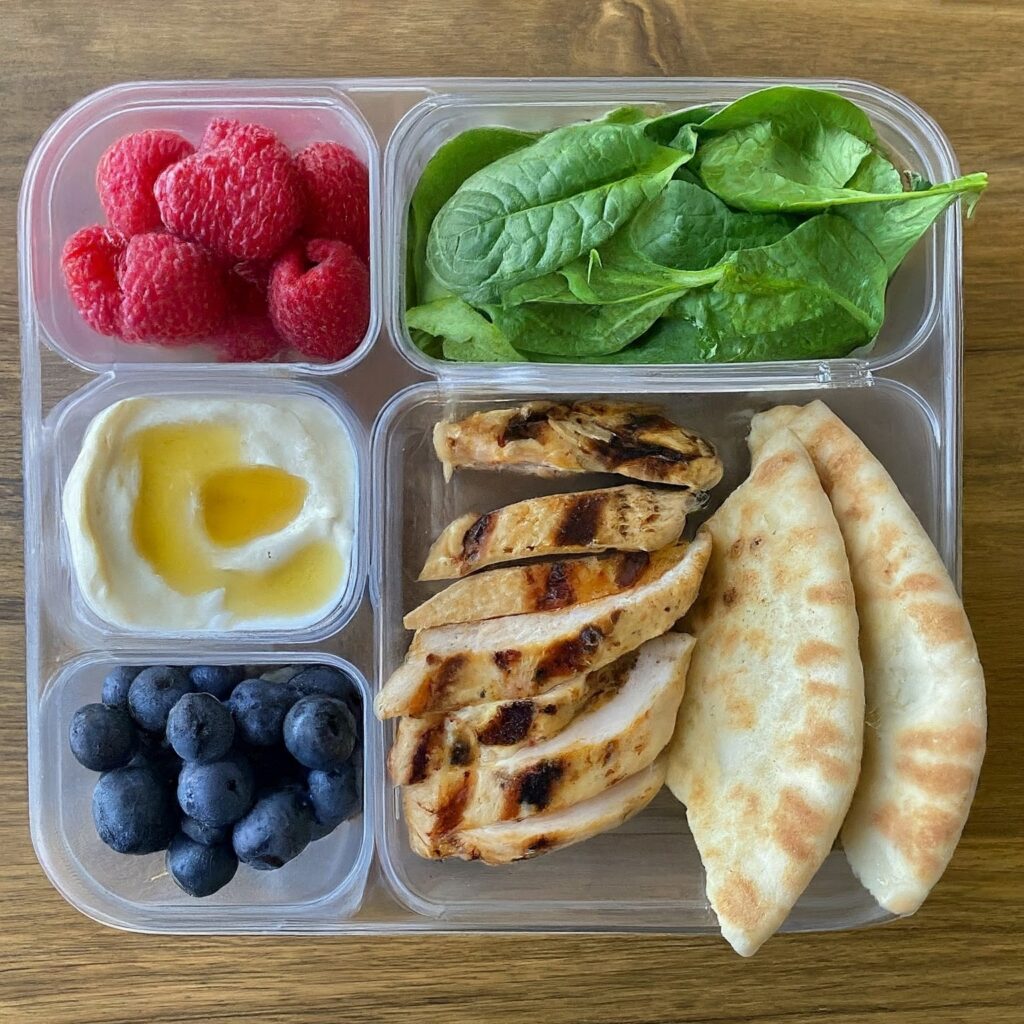
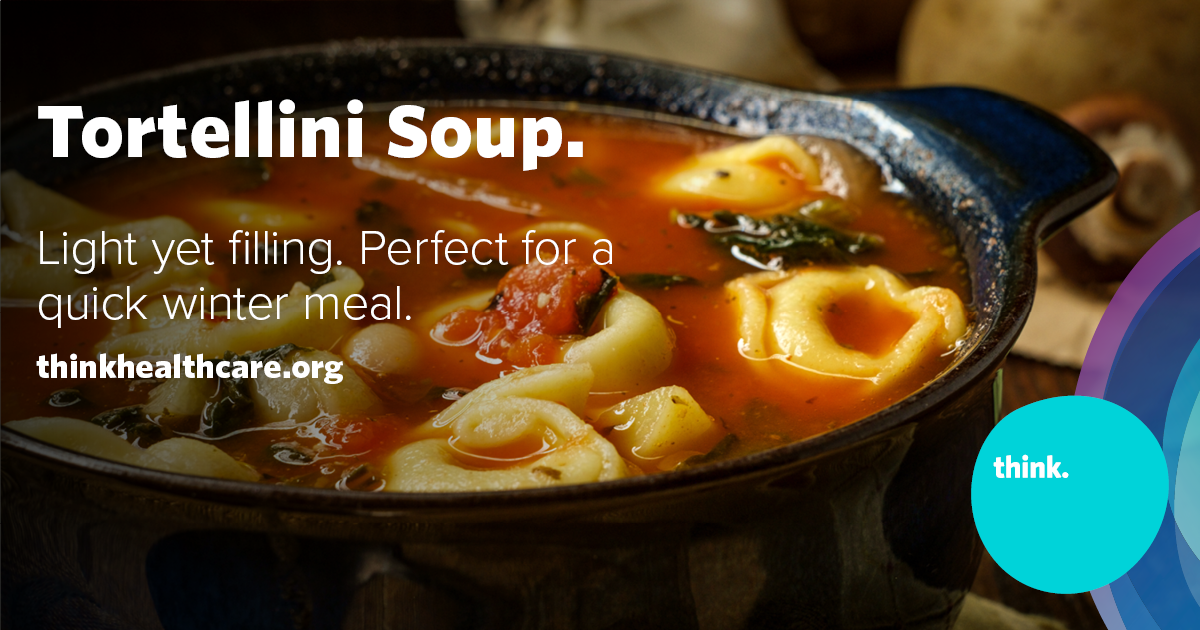
A bowl of Italian Wedding Soup with meatballs, greens, and pasta sits on a wooden tray next to a slice of bread. White text promotes a healthy recipe for autumn evenings.

Warm Up Your Autumn Evenings with This Nutritious and Flavorful Soup. 

As the crisp autumn air settles in, nothing says comfort like a bowl of warm, nourishing soup, and this Italian Wedding Soup is the perfect way to embrace the season. Packed with healthy ingredients, this hearty soup is not just delicious but also a great way to fuel your body with wholesome goodness.

Italian Wedding Soup, despite its name, isn’t tied to weddings but rather to the beautiful “marriage” of flavors and ingredients. This recipe showcases that marriage perfectly, with tender chicken meatballs, vibrant vegetables, and nutrient-rich baby spinach all coming together in a flavorful broth.

What makes this soup a fantastic choice for your fall menu is its emphasis on healthful ingredients. Onions, carrots, and celery provide a solid base of vitamins and minerals, while fresh oregano brings a burst of antioxidant power. Spinach adds a dose of iron and other essential nutrients, and the chicken meatballs offer a lean source of protein, making this soup as nutritious as it is comforting.

Here’s how you can bring this comforting fall classic to your table:

Prep Time
20 mins
Cook Time
20 minutes
Total Time
40 mins

Servings: 6 (9 Cups)

Ingredients

  • 4 tablespoons extra-virgin olive oil, divided
  • 1 ⅓ cups chopped yellow onion
  • ⅔ cup chopped carrot
  • ⅔ cup chopped celery
  • 2 tablespoons minced garlic
  • 6 cups unsalted chicken broth
  • 6 ounces orzo, preferably whole-wheat
  • 1 ½ tablespoons chopped fresh oregano
  • ½ teaspoon kosher salt
  • 24 cooked chicken meatballs (12 ounces), such as Easy Chicken Meatballs
  • 4 cups baby spinach
  • ¼ cup grated Parmesan cheese

Instructions

Sauté your vegetables.

In a large pot or Dutch oven, heat 1 tablespoon of olive oil over medium-high heat. Add the chopped onion, carrot, celery, and garlic. Cook, stirring occasionally, until the onion becomes translucent, about 4 to 5 minutes.

Build a brothy base.

Pour in the chicken broth, cover the pot, and bring it to a boil. Add the orzo, oregano, and salt. Cover and cook, stirring occasionally, until the orzo is just tender, about 9 minutes.

Infuse your soup with flavor. 

Stir in the chicken meatballs and baby spinach. Cook until the meatballs are heated through and the spinach has wilted, about 2 to 4 minutes.

Serve and enjoy.

Ladle the soup into bowls, sprinkle with grated Parmesan cheese, and drizzle with the remaining 3 tablespoons of olive oil for a rich, comforting finish.

Tips

Here are a few tips to enhance your Italian Wedding Soup:

  • Add Extra Depth with Aromatics: Some cooks suggest adding fennel along with the other vegetables to introduce a subtle, aromatic flavor that complements the traditional ingredients. You might also consider adding a pinch of red pepper flakes for a gentle heat that balances the richness of the soup.
  • Customize Your Meatballs: If you’re short on time, store-bought meatballs work well, but if you make them from scratch, consider doubling the batch. This way, you can freeze the extras for a quick addition to future meals.
  • Skip the Extra Oil and Cheese (Optional): If you’re watching your calorie intake or prefer a lighter dish, consider skipping the final drizzle of olive oil and extra Parmesan. 
  • Make It Ahead: This soup can be made a day in advance, which can improve the flavors as they have extra time to meld together. Reheat gently on the stovetop.

This Italian Wedding Soup is a perfect way to warm up on a chilly fall day, filling your kitchen with the comforting aromas of simmering vegetables and herbs. It’s a satisfying, healthy option that will keep you nourished all season long.


3 simple, healthy lunchbox recipes to be a Super-Parent.

A promotional image with the text: 3 Healthy Lunchbox Ideas for Busy Parents and Quick and easy lunchbox ideas that are both healthy and delicious! shows smiling children sitting at a table with lunchboxes.

Quick and easy lunchbox ideas that are both healthy and delicious! Perfect for busy parents who want to nourish their kids with nutritious meals.

As a parent, you want to provide your children with the best possible nutrition. Packing healthy lunches is a great way to ensure your kids are fueled with nutritious meals. These three simple and delicious recipes, along with some healthy drink options, will help you create well-rounded and satisfying lunches for your little learners.

Homemade Lunchables

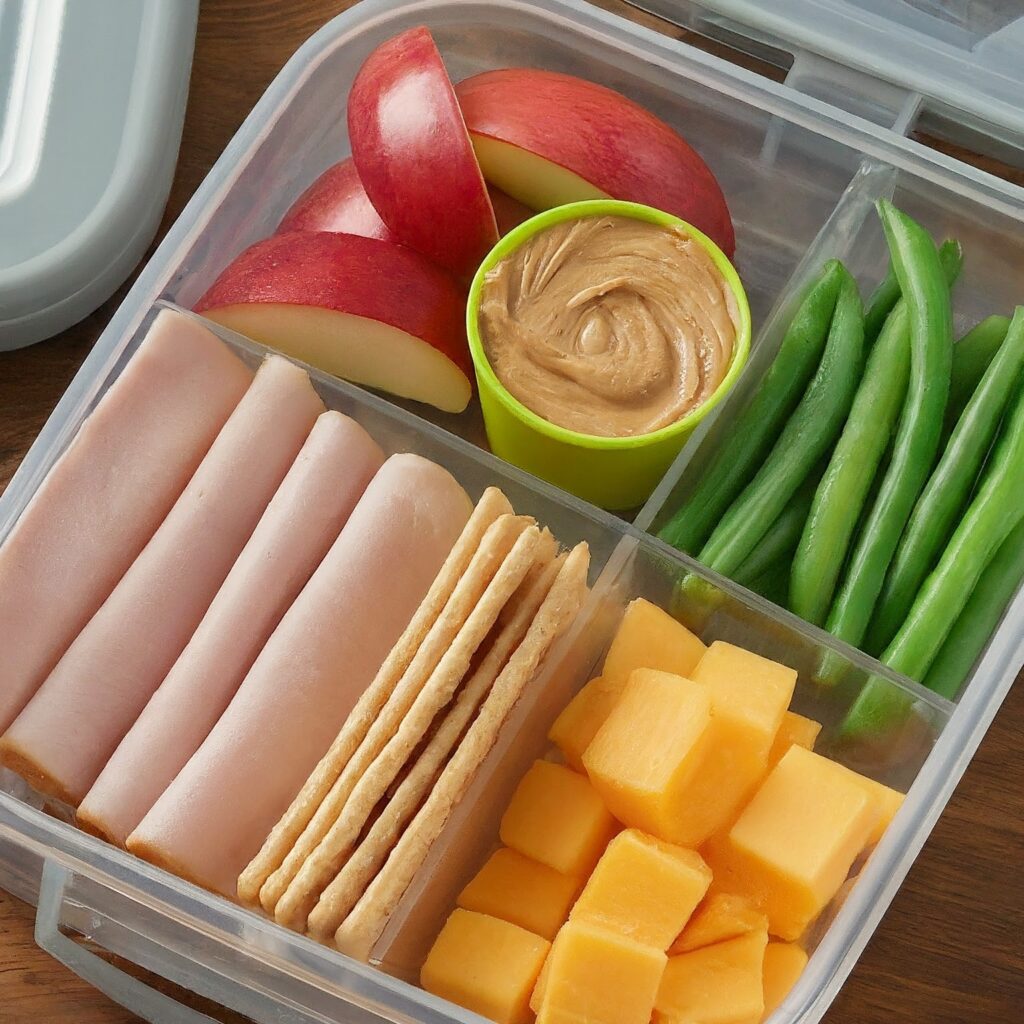
Instead of reaching for a prepackaged lunchbox that’s often loaded with sodium and preservatives, create a healthier, homemade version. Here’s a simple recipe:

Ingredients:

  • Low-sodium turkey or ham
  • Cheese
  • Whole-wheat crackers
  • Cooked green beans (fresh or frozen)
  • Apple slices
  • Nut or seed butter

Instructions:

  • Slice the turkey or ham, cheese, apples, and green beans.
  • Pack the ingredients into a divided tray or separate containers.
  • Let your child assemble their own lunch.

Side Dish Options:

  • Fruit: Apples, grapes, berries, or diced pineapple
  • Vegetables: Carrots, celery sticks, cucumber slices, or cherry tomatoes
  • Chips: Healthier options like Veggie chips
  • Yogurt: Greek yogurt with fruit

Nutritional Benefits: This lunchbox option provides a good balance of protein, carbohydrates, and healthy fats, along with essential vitamins and minerals from the fruits and vegetables.

Deconstructed Tacos

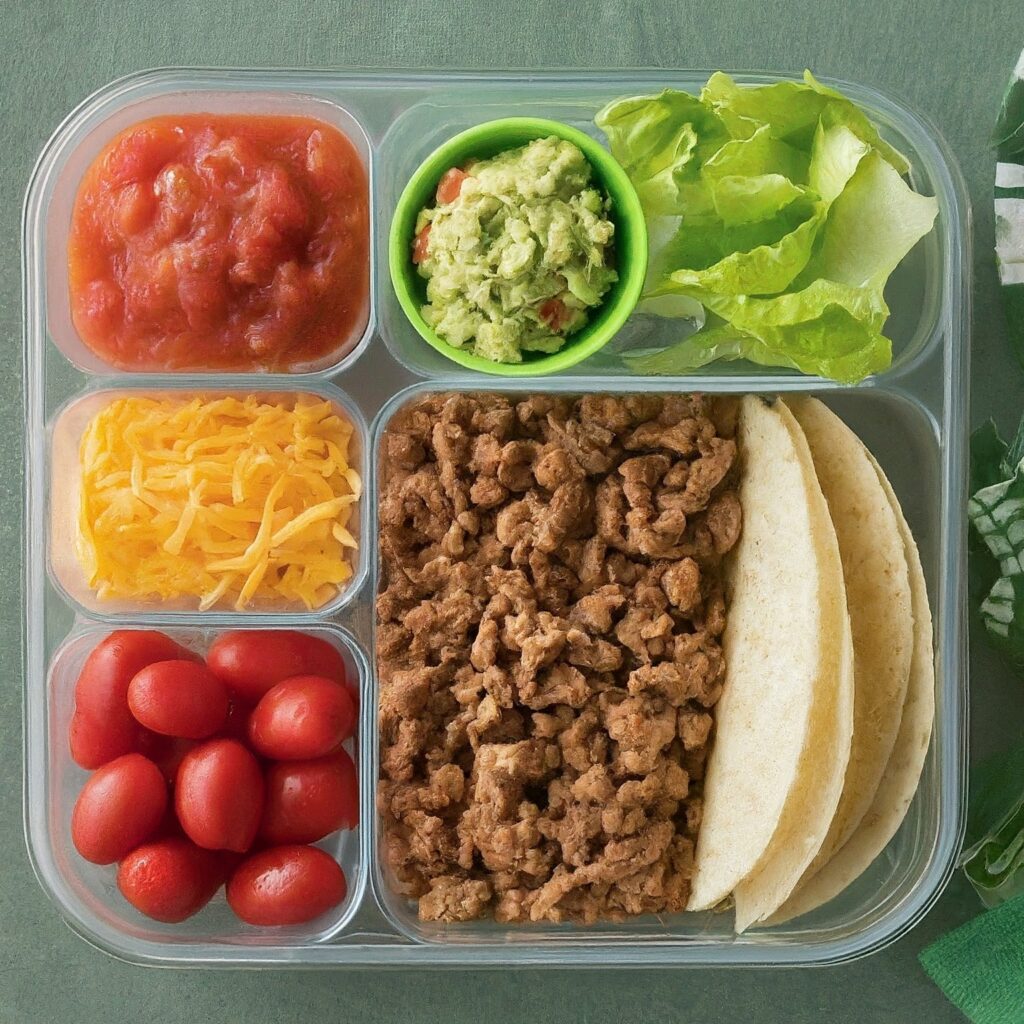
Leftovers from taco night don’t have to go to waste! Deconstruct your tacos and let your child assemble their own meal in the lunchroom.

Ingredients:

  • Ground turkey or beef with taco seasoning
  • Shredded cheese
  • Tomatoes or salsa
  • Lettuce
  • Mini guacamole to-go cup

Instructions:

  • Pack the ingredients into a divided tray or separate containers.
  • Let your child mix and match the ingredients to create their own tacos.

Side Dish Options:

  • Mexican rice: A simple and easy-to-make side dish that adds carbohydrates and nutrients.
  • Black beans: A healthy source of protein and fiber.
  • Watermelon: Fresh and hydrating with a kick of sweet. 
  • Turn it into a salad: Put the ingredients on a bed of lettuce for extra nutrients and fiber.

Nutritional Benefits: This lunchbox option offers a complete meal with protein, carbohydrates, and healthy fats. The side dishes provide additional nutrients and fiber.

Pita Pocket Power Box

A Mediterranean-inspired lunchbox option that’s packed with protein, flavor, and nutrition.

Ingredients:

  • Pita bread
  • Hummus
  • Grilled chicken
  • Spinach
  • Feta cheese
  • Cucumber

Instructions:

  • Cut pita bread in half.
  • Spread hummus on one half of the pita bread.
  • Add grilled chicken or tofu, spinach, feta cheese, and cucumber.
  • Top with the other half of the pita bread.
  • Cut into wedges.

Side Dish Options:

  • Greek yogurt with berries: A refreshing and nutritious snack.
  • Cucumber slices with Tzatziki sauce: A light and flavorful side dish.
  • Olives: A salty and tangy snack that enhances the Mediterranean vibe.

Nutritional Benefits: This lunchbox option provides a good source of protein, carbohydrates, and healthy fats, along with essential vitamins and minerals from the spinach, feta cheese, and cucumber.

Don’t Forget the Drinks!

A healthy drink can complement your child’s lunch and help them stay hydrated throughout the day. Here are three easy and healthy drink options:

  1. Cold Water: Plain old water is the best and most refreshing drink. It’s essential for hydration and has no added sugars or calories.
  2. Milk: A glass of milk is a great way to add protein and calcium to your child’s diet. Choose low-fat or skim milk for a healthier option.
  3. Homemade Lemonade: Make a healthier version of lemonade by using fresh lemon juice, filtered water, and a natural sweetener like honey or maple syrup.

By packing healthy lunches and giving your kids nutritious drinks, you can ensure your child is fueled throughout the day. These simple and delicious recipes will make lunch time a fun and enjoyable experience for your family.

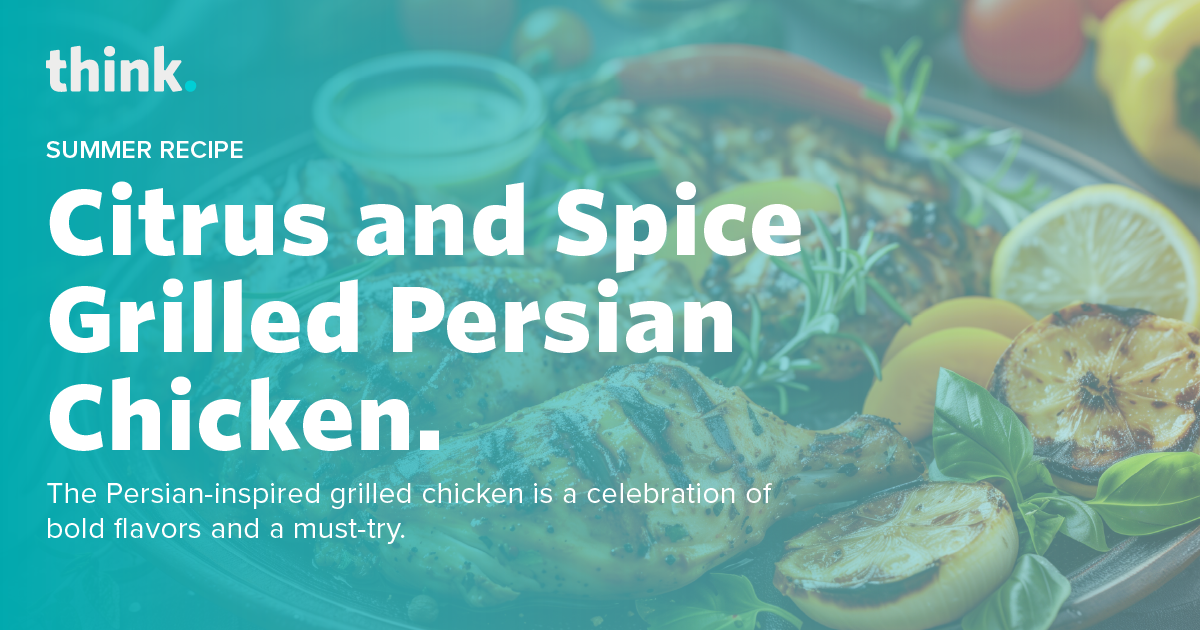
Citrus and Spice Grilled Persian Chicken.

A plate of grilled Persian chicken garnished with fresh herbs and lemon slices. Bold white text reads: Citrus and Spice Grilled Persian Chicken with a recipe description overlay on the left side.

The Persian-inspired grilled chicken is a celebration of bold flavors and a must-try.

There’s a reason yogurt-based marinades are a culinary classic. They work magic on meat, tenderizing without toughening and creating a caramelized crust that’s pure delight. The vibrant flavors and incredible textures in the Persian-inspired grilled chicken make this a dish that promises to impress.

The Magic Marinade

The marinade is a symphony of spices. Creamy whole-milk yogurt forms the base, while warm spices like turmeric, cinnamon, cumin, coriander, cloves, and a hint of cayenne add depth. A burst of citrus comes from fresh lime zest, a worthy stand-in for the traditional dried lime. Season liberally with salt and pepper to bring out the full flavor profile.

Chicken Choice

We prefer bone-in, skin-on chicken pieces for the ultimate juicy, crispy experience. But boneless works, too. You will need to adjust the cooking time accordingly. Are you feeling adventurous? You can swap out the chicken for beef or lamb.

Perfect Pairings

Grilled grape tomatoes and lemon wedges offer a bright counterpoint to the rich chicken. A mound of fluffy jasmine rice completes the meal. Fresh herbs like parsley, mint, and cilantro are the finishing touch.

Give this recipe a try, and let us know how it tastes!

YIELDS:
4 – 6 serving(s)
PREP TIME:
10 mins
TOTAL TIME:
5 hrs
CAL/SERV:
788

Ingredients

  • 1 1/2 oz. plain whole-milk yogurt
  • 2 tsp. kosher salt, plus more
  • 1 1/2 tsp. ground turmeric 
  • 1 tsp. finely grated lime zest or ground sumac
  • 1 tsp. ground cinnamon
  • 1 tsp. ground cumin
  • 1/4 tsp. freshly ground black pepper, plus more
  • 1/4 tsp. ground cloves
  • 1/4 tsp. ground coriander
  • 1/8 tsp. cayenne pepper
  • 4 bone-in, skin-on chicken thighs (about 1 1/2 lb.)
  • 4 whole chicken drumsticks (about 1 1/2 lb.)
  • 2 bone-in, skin-on chicken breasts (about 2 lb.), halved crosswise
  • 1 pint grape tomatoes
  • 1 lemon, quartered
  • Neutral oil, for brushing and grill
  • Steamed jasmine rice (optional) and fresh cilantro, parsley, and mint leaves, for serving

Equipment needed

  • 2 to 3 metal or soaked wooden bamboo skewers

Directions 

Step 1: Prepare the Chicken Marinade

In a large bowl, combine yogurt, salt, turmeric, lime zest, cinnamon, cumin, black pepper, cloves, coriander, and cayenne. Add chicken pieces and toss to coat evenly. Transfer the marinated chicken to a resealable plastic bag and refrigerate for at least 4 hours or up to 24 hours.

Step 2: Prepare the Skewers

Allow the marinated chicken to come to room temperature for about 30 minutes before grilling. While waiting, thread tomatoes and lemon wedges onto skewers. Drizzle skewers with olive oil and season with salt and pepper.

Step 3: Preheat the Grill

Prepare your grill for medium-high heat and preheat for approximately 5 minutes. Clean the grill grates and lightly oil them. Remove any excess marinade from the chicken and discard.

Step 4: Grill the Chicken

Place the chicken skin-side down on the preheated grill and cook until the skin is golden brown, about 15 minutes. Flip the chicken and continue grilling until the skin is charred and the internal temperature reaches 160°F (71°C) as measured by an instant-read thermometer inserted into the thickest part of the thighs. This should take about 10 minutes. Transfer the cooked chicken to a plate, tent with foil, and let rest for 10 minutes.

Step 5: Grill the Skewers

Grill the tomato and lemon skewers, turning occasionally, until lightly charred, about 5-6 minutes. Remove the tomatoes and lemon wedges from the skewers using a fork.

Step 6: Assemble and Serve

Serve the grilled chicken and tomatoes with rice, if desired. Squeeze fresh juice from the grilled lemon wedges over the dish. Garnish with cilantro, parsley, and mint.

This Citrus and Spice Grilled Persian Chicken is a true flavor sensation. The combination of yogurt, warm spices, and citrus creates a symphony of taste that will tantalize your taste buds. Serve it with grilled grape tomatoes and a squeeze of fresh lemon for a bright and refreshing finish. Whether enjoyed with a side of jasmine rice or on its own, this dish is a must-try for any grill enthusiast.

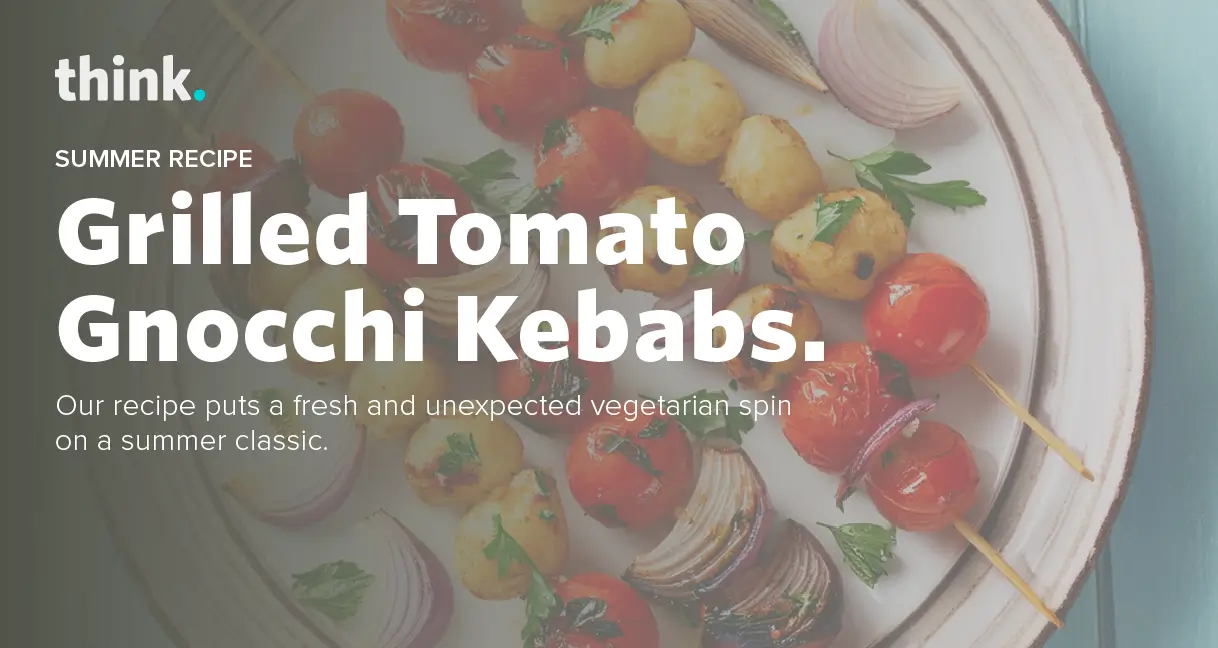
Grilled Tomato Gnocchi Kebabs

A plate of grilled kebabs with cherry tomatoes, gnocchi, red onions, and herbs. Overlaid text reads: Grilled Tomato Gnocchi Kebabs. Our recipe puts a fresh and unexpected vegetarian spin on a summer classic.

Our recipe puts a fresh and unexpected vegetarian spin on a summer classic. 

Summer grilling gets a fresh twist with our veggie-packed kebabs. Ditch the heavy burgers and indulge in a lighter option that’s bursting with flavor and nutrition. These skewers are a great combination of textures and tastes, featuring juicy tomatoes, tender gnocchi, and caramelized onions.

Packed with Flavor and Nutrition

Let’s talk ingredients! Gnocchi, often made from pillowy potato dough, offers a satisfying base packed with carbohydrates for energy. They’re also a good source of potassium, a mineral that helps regulate blood pressure.  Cherry tomatoes are a nutritional powerhouse, loaded with vitamins A and C, which are important for immune function and healthy vision. They’re also a source of lycopene, an antioxidant that may help protect your cells from damage. Rounding out the nutritional profile, red onions add a touch of sweetness and a source of fiber, which keeps you feeling fuller for longer.

Perfect for vegetarians or anyone craving a lighter option, these kebabs are a breeze to prep and disappear in minutes off the grill. So fire up the grill and get ready for a delicious and healthy twist on summer entertaining!

Prep Time
15 mins
Cook Time
15 minutes
Total Time 
30 mins

Servings: 4 

Ingredients

  • 1 (12-ounce) package fresh gnocchi
  • 2 pints cherry tomatoes
  • 2 small red onions, cut into wedges (about 1-inch)
  • ¼ cup extra virgin olive oil
  • Salt and freshly ground black pepper
  • Fresh basil leaves (optional, for garnish)

Salsa Verde

  • 1/4 cup fresh parsley leaves
  • 1/4 cup fresh basil leaves
  • 2 tablespoons capers, drained
  • 1 tablespoon fresh lemon juice
  • 1 garlic clove, peeled
  • 1/4 cup extra virgin olive oil

Instructions

Partially Cook the Gnocchi:

Bring a big pot of salted water to a boil. Add the gnocchi and cook for 2-3 minutes, until they just start to float. Drain them, then rinse with cold water to stop the cooking. Set them aside.

Prep the Veggies

In a bowl, toss your cherry tomatoes and red onion wedges with olive oil. Don’t forget to season them with a sprinkle of salt and pepper!

Skewer Time

Thread the cooked gnocchi, cherry tomatoes, and red onion wedges onto skewers, alternating them for a colorful presentation. Leave a little space between each piece for even grilling.

Grill On!

Preheat your grill to medium-high heat and lightly brush or oil the grates to prevent sticking. Place the kebabs on the grill and cook for 5-7 minutes per side, until the gnocchi are golden brown and the veggies are slightly blistered.

Remove from the Grill and Enjoy

Take the kebabs off the grill and transfer them to a platter. Garnish with fresh basil leaves (if you’re feeling fancy) and serve immediately..

Tips

  • These are vegetarian-friendly, but feel free to add some grilled chicken or shrimp for a heartier option.
  • Soak your wooden skewers in water for 30 minutes before grilling to prevent burning.
  • Pair these kebabs with grilled veggies, crusty bread, or a side salad for a complete summer meal.

These fun and flavorful skewers are guaranteed to be a hit at your next barbecue. Serve them alongside grilled vegetables, crusty bread, or a side salad for a complete and satisfying summer meal. And with minimal prep time and a cook time that won’t leave you hovering over the grill, you’ll have more time to relax and soak up the sunshine with your loved ones.

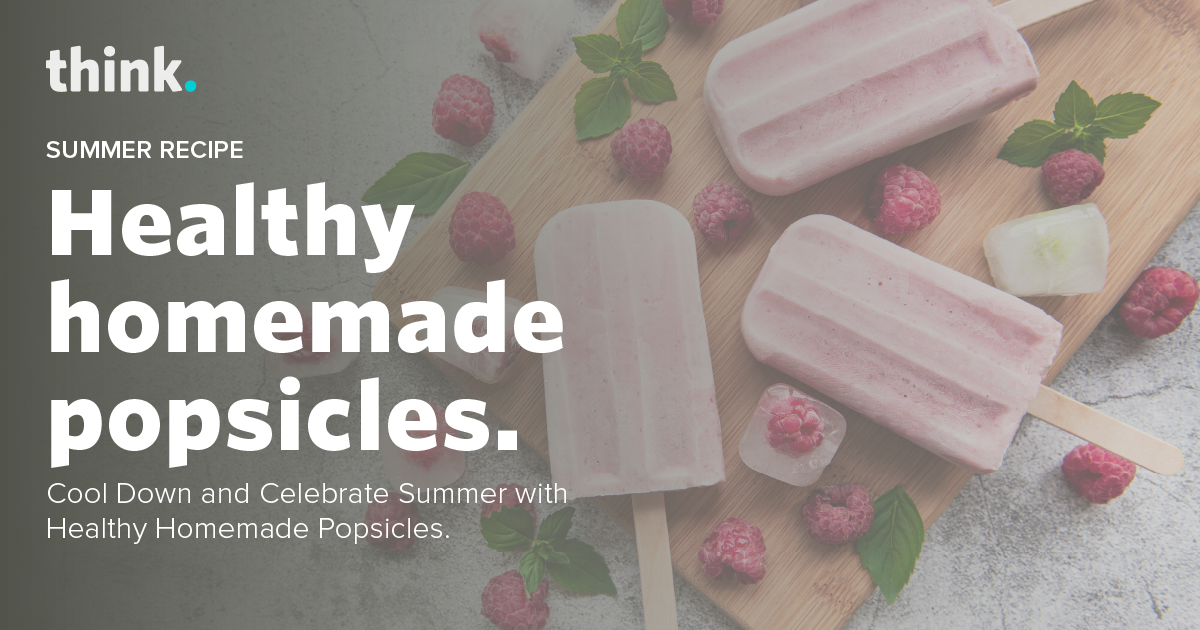
Healthy Homemade Fruit Popsicles.

Three pink popsicles on a light surface are surrounded by fresh raspberries and mint leaves. Text reads: “Healthy homemade popsicles. Cool Down and Celebrate Summer with Healthy Homemade Popsicles.”.

Cool Down and Celebrate Summer with Healthy Homemade Popsicles

Beat the heat and satisfy your sweet tooth with refreshing homemade popsicles bursting with fresh flavor and nutrients. By skipping sugary store-bought options, you’re choosing a healthier alternative packed with the goodness of fresh fruits like hydrating watermelon, fiber-rich berries, and vitamin-packed mango. Enhance these treats with creamy coconut water or yogurt for a boost of electrolytes and probiotics. Sweetened naturally with honey or maple syrup, each popsicle offers a delicious way to stay cool and nourished this summer. Consider including these healthy components in your popsicles:

Fresh Fruit 

Popsicles made with fresh fruit are packed with vitamins, minerals, and antioxidants essential for overall health. Watermelon provides hydration and is rich in lycopene, which may help protect against sun damage. Berries are loaded with fiber and vitamin C, supporting immune function and digestion. Mango offers a boost of vitamin A, promoting eye health and immune function.

Coconut Water and Yogurt

Adding coconut water or yogurt not only enhances creaminess but also boosts electrolytes and probiotics. Coconut water is naturally hydrating and contains potassium, while yogurt provides calcium and gut-friendly probiotics for digestive health.

Honey and Maple Syrup

These natural sweeteners add a touch of sweetness without the refined sugars found in store-bought popsicles. Honey offers antibacterial properties and antioxidants, while maple syrup is rich in minerals like manganese and zinc.

Prep Time
10 mins
Freeze Time
4 hours
Total Time
4 hours 10 mins

Servings: 8 popsicles

Ingredients

  • 2 cups fresh fruit (such as watermelon, berries, mango, or a combination)
  • 1/2 cup coconut water, milk, or yogurt (optional)
  • 1-2 tablespoons honey or maple syrup (optional, to taste)
  • Lime juice (optional, to taste)
  • Fresh mint leaves or chopped fruit (optional, for garnish)

Equipment

  • Popsicle molds
  • Popsicle sticks
  • Blender or food processor

Instructions

Prep the Fruit

Wash and chop your chosen fruit. If using berries, you may want to remove the stems. For fruits with tough skin or seeds, like watermelon or mango, remove the rind or pit before chopping.

Blend the Mixture

Add the chopped fruit to your blender or food processor. Pour in your chosen liquid (coconut water, milk, or yogurt) if using. If desired, add a touch of honey, maple syrup, or lime juice for additional sweetness or tartness. Blend until smooth, adjusting the consistency to your preference. You can leave it a little chunky for a more textured popsicle, or blend it completely smooth.

Fill the Molds

Pour the blended fruit mixture evenly into popsicle molds. Leave a little space at the top, about 1/4 inch, to allow for expansion during freezing.

Add the Sticks

Carefully insert a popsicle stick into each mold. If desired, push a few mint leaves or chopped fruit pieces against the sides of the molds for a decorative touch.

Freeze and Enjoy

Place the filled popsicle molds in the freezer and freeze for at least 4-6 hours, or until completely solid.

Tips

  • Get creative with flavors! Experiment with different fruits or mix and match for unique combinations.
  • You can add a dollop of yogurt or nut butter to the bottom of the mold before filling it with the fruit mixture for an extra layer of flavor and texture.
  • For a creamier popsicle, use full-fat yogurt or coconut milk. For a vegan option, use plant-based milk or yogurt.
  • Leftover fruit puree can be frozen in an airtight container for future popsicle-making or used in smoothies.

Whether you’re lounging by the pool or hosting a backyard barbecue, our budget-friendly homemade popsicles are sure to be a hit. Customize them with your favorite fruits and enjoy knowing you’re treating yourself to a refreshing snack that supports your well-being. Share these treats with family and friends as you savor the flavors of summer guilt-free. Stay cool, stay healthy, and enjoy every bite of these homemade popsicles—it’s a taste of summer you’ll love.

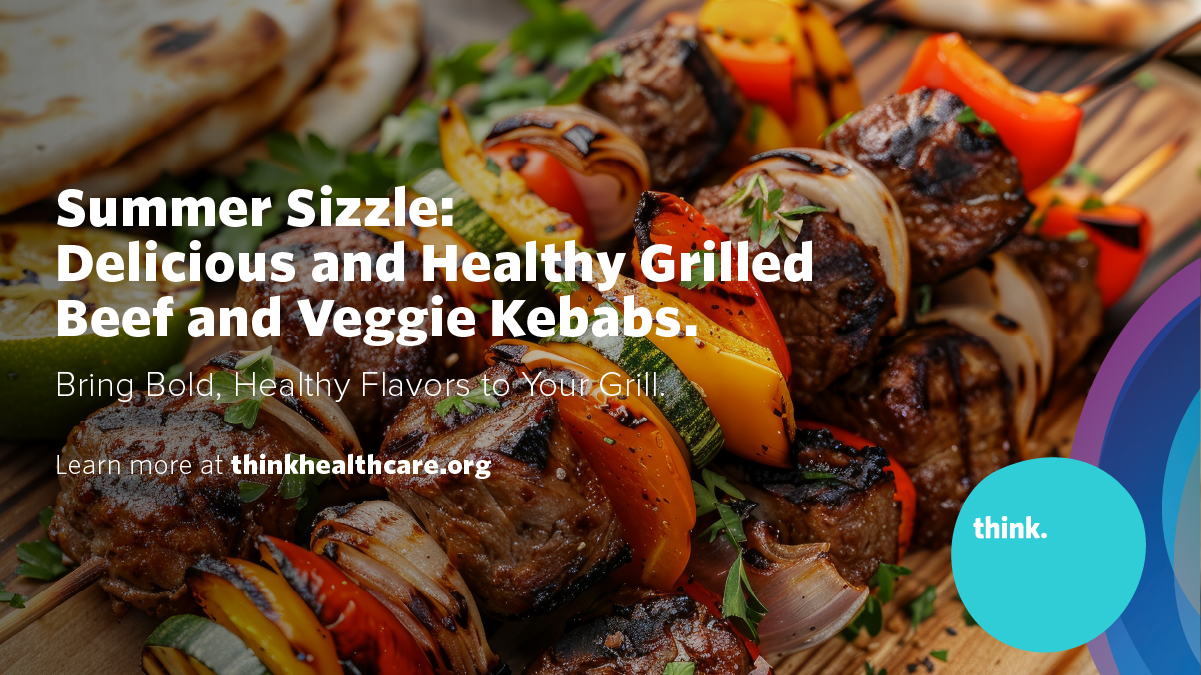
Summer Sizzle: Delicious and Healthy Grilled Beef & Veggie Kebabs

Grilled beef and veggie kebabs with bell peppers and zucchini on skewers, served with flatbread. Text overlays promote healthy grilling and direct viewers to thinkhealthcare.org.

by thinkPress

Bring Bold, Healthy Flavors to Your Grill with Beef & Vegetable Kebabs

During the hot summer months, eating well can be both nutritious and delicious. Our Grilled Beef and Vegetable Kebabs recipe perfectly blends health benefits with mouthwatering flavors. It’s easy to prepare and budget-friendly, making it an excellent choice for your summer gatherings. With lean beef and vibrant vegetables marinated to perfection, these kebabs provide a well-rounded meal sure to please everyone’s palate.

Grilled Beef and Vegetable Kebabs are a nutritional powerhouse. The main ingredient, tri-tip steak, is a lean cut of beef that offers a rich source of protein essential for muscle repair and growth. Protein also helps keep you satisfied, reducing the temptation to snack on less healthy options. Additionally, tri-tip is lower in fat compared to other cuts, making it a healthier choice for grilling.

The colorful vegetables used in this recipe, such as mushrooms, cherry tomatoes, bell peppers, and red onions, are packed with vitamins, minerals, and fiber. Mushrooms provide important nutrients like vitamin D, which supports bone health, while cherry tomatoes are rich in antioxidants such as lycopene that help protect against chronic diseases. Bell peppers are an excellent source of vitamin C, vital for boosting immunity, and red onions contain quercetin, a powerful antioxidant with anti-inflammatory properties.

Prep Time25 minsMarinating Time8 hoursCook Time10 minsTotal Time8 hours 35 mins

Servings: 4 (8 kebabs)

Ingredients

For the Marinade:

  • ¾ cup balsamic vinegar
  • ¾ cup extra-virgin olive oil
  • 2 tablespoons whole-grain mustard
  • 1 tablespoon dried oregano
  • 1 tablespoon dried rosemary
  • 2 cloves garlic, sliced
  • ½ teaspoon salt
  • ½ teaspoon ground pepper

For the Kebabs:

  • For the Kebabs:
    • 1 pound tri-tip sirloin steak, trimmed and cut into 32 chunks
    • 16 button mushrooms
    • 16 cherry tomatoes
    • 1 small bell pepper (any color), cut into 16 pieces
    • 16 (1 inch) chunks red onion

Instructions

Prepare the Marinade

In a small bowl, whisk together the balsamic vinegar, extra-virgin olive oil, whole-grain mustard, dried oregano, dried rosemary, sliced garlic, salt, and ground pepper until well combined.

Assemble the Kebabs

Thread the beef, mushrooms, cherry tomatoes, bell pepper pieces, and red onion chunks onto 8 metal or wooden skewers, alternating evenly. Place the kebabs in a 9-by-13-inch baking dish and pour the marinade over them, ensuring all ingredients are coated evenly. Cover and refrigerate (or store in a cooler packed with ice) for at least 2 hours and up to 8 hours to allow the flavors to meld.

Preheat the Grill

Preheat your grill to medium-high heat. If you’re cooking over a campfire, ensure the flames are controlled and suitable for cooking.

Grill the Kebabs

Remove the kebabs from the baking dish, discarding the marinade. Grill the kebabs on the preheated grill, turning once, until they reach your desired level of doneness, about 6 to 8 minutes total for medium-rare. If grilling over a campfire, hold the skewers over the flames, turning regularly, and cook for about 15 minutes for medium.

Serve and Enjoy

Arrange the grilled kebabs on a serving platter and enjoy this healthy, flavorful meal. Pair the kebabs with a side of whole grain rice or a refreshing salad to complete your summer feast.

Good nutrition is a cornerstone of overall health and well-being and these Grilled Beef & Vegetable Kebabs are a perfect example of how you can enjoy delicious food while nourishing your body with essential nutrients. By incorporating a variety of lean proteins and fresh vegetables, this dish supports a balanced diet and promotes optimal health. We hope this recipe inspires you to explore new culinary adventures and embrace the joy of healthy eating. Remember, eating well is not just about what you consume but also about enjoying the process and sharing it with loved ones.

Nutrition Information (per serving)

  • Calories: 237 kcal
  • Fat: 10g
  • Carbohydrates: 12g
  • Protein: 25g

CategoriesGeneral Health & Wellness, Recipes

Boost Your Wellness with Shrimp Spring Rolls

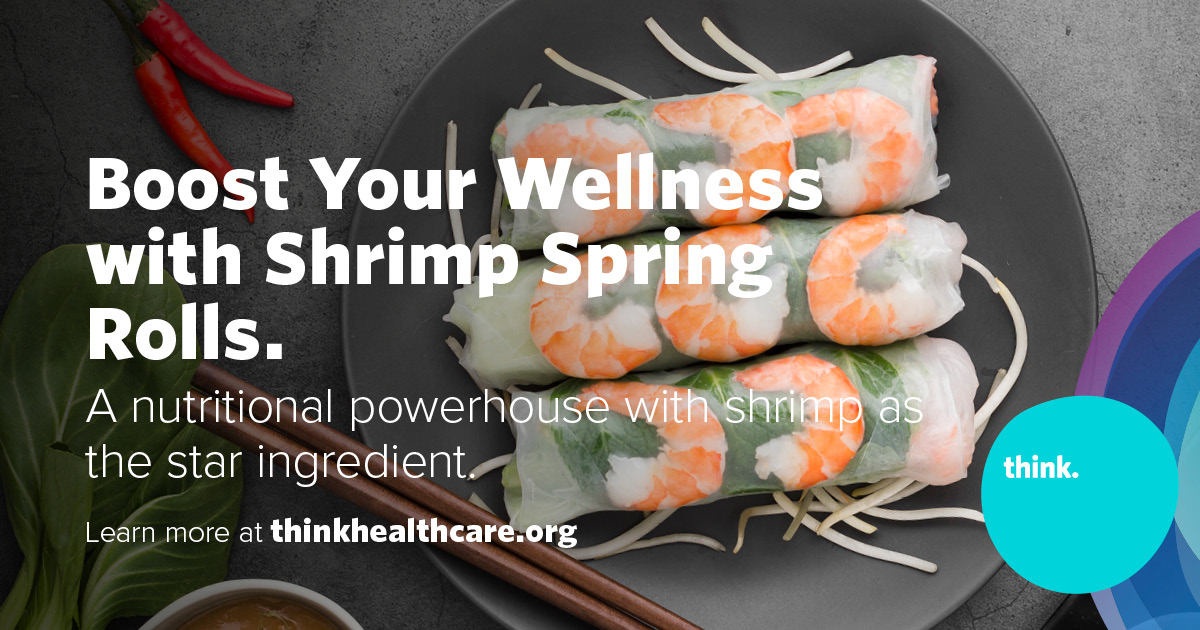
A plate of shrimp spring rolls on shredded vegetables, with a dipping sauce nearby. Text reads: Boost Your Wellness with Shrimp Spring Rolls. A nutritional powerhouse with shrimp as the star ingredient..

At Think Whole Person Healthcare, we believe that eating well can be both delicious and nutritious. Today, we’re excited to share a recipe that perfectly embodies this philosophy: Vietnamese Shrimp Spring Rolls with Peanut Sauce. This versatile dish is not only packed with flavor but also brimming with health benefits, thanks to its fresh ingredients and balanced nutritional profile. Whether you’re enjoying a fun family night or hosting a dinner party, these spring rolls are sure to impress while supporting your overall well-being.

These Vietnamese Shrimp Spring Rolls are a nutritional powerhouse. Shrimp, the star ingredient, is an excellent source of lean protein, essential for muscle repair and growth. Protein also helps keep you feeling full and satisfied, reducing the temptation to snack on less healthy options. Additionally, shrimp is low in calories and rich in nutrients like selenium, which has antioxidant properties that support immune health.

The fresh vegetables used in this recipe, such as lettuce, bok choy, carrots, jicama, and cucumber, are packed with vitamins, minerals, and fiber. Lettuce and bok choy provide essential vitamins A and K, which are crucial for maintaining healthy vision and bone health. Carrots are well-known for their high beta-carotene content, a potent antioxidant that supports skin health and boosts immunity. Jicama, a root vegetable, is a great source of dietary fiber that aids digestion and helps maintain stable blood sugar levels. Cucumber adds a refreshing crunch and is hydrating, thanks to its high water content.

The homemade peanut sauce accompanying these spring rolls is not only delicious but also nutritious. Peanut butter is a good source of healthy fats, protein, and essential vitamins and minerals such as vitamin E and magnesium. These nutrients are vital for maintaining heart health and reducing inflammation. The sauce also includes gluten-free soy sauce, which provides a savory umami flavor, and honey, which adds natural sweetness while offering antioxidants that support overall health.

Prep Time
25 mins
Cook Time
10 mins
Total Time
35 mins

Servings: 2

Ingredients

For the Spring Rolls:

  • 16 oz. large shrimp, raw, peeled, tail off
  • 4 oz. rice noodles
  • 1 tablespoon extra virgin olive oil
  • ½ teaspoon garlic powder
  • ½ teaspoon salt
  • ½ teaspoon ground black pepper
  • 12 sheets rice paper
  • 1 bunch green leaf lettuce
  • 1 bunch bok choy
  • 1 cup shredded carrots
  • ½ medium jicama, julienned
  • 1 medium cucumber, julienned
  • ¼ cup cilantro, chopped
  • ¼ cup chives, chopped

For the Peanut Dipping Sauce:

  • ½ cup smooth peanut butter
  • ⅓ cup gluten-free soy sauce
  • ⅓ cup water
  • 3 tablespoons honey

Instructions

1. Cook the Shrimp 

In a frying pan over medium-low heat, add a tablespoon of extra virgin olive oil. In a small mixing bowl, combine the shrimp with olive oil, garlic powder, salt, and pepper, ensuring the shrimp is well-coated. Sauté the shrimp for 1-2 minutes on each side until fully cooked, then set aside.

2. Cook the Noodles

Bring a pot of salted water to a boil and cook the rice noodles according to the package instructions. Once cooked, drain and rinse the noodles under cold water, then cut them into thirds to make them easier to manage when assembling the spring rolls.

3. Prep the Veggies

Julienne the cucumber and jicama, rinse the bok choy and lettuce, and pat them dry. Shred the carrots and chop the cilantro and chives. Having all the vegetables prepped and ready makes the assembly process smoother and more enjoyable.

4. Make the Peanut Sauce

In a small bowl, whisk together the peanut butter, gluten-free soy sauce, water, and honey until the mixture is smooth and well-combined. This sauce adds a rich, savory flavor that complements the fresh ingredients in the spring rolls.

5. Assemble the Rolls

Dip a sheet of rice paper in lukewarm water for 2-3 seconds and place it on a plate. The rice paper will initially be stiff but will become stretchy and sticky in a minute or two, perfect for rolling. Add a few pieces of shrimp and your desired fillings to the center of the rice paper. Fold the sides in, then roll it up tightly from the bottom, ensuring all the ingredients are securely wrapped.

6. Serve and Enjoy

Arrange the assembled spring rolls on a serving platter and serve them with the peanut dipping sauce. Enjoy the fresh, vibrant flavors and the myriad health benefits these spring rolls offer.

At Think Whole Person Healthcare, we understand that good nutrition is a cornerstone of overall health and well-being. These Vietnamese Shrimp Spring Rolls with Peanut Sauce are a perfect example of how you can enjoy delicious food while nourishing your body with essential nutrients. By incorporating a variety of fresh vegetables, lean proteins, and healthy fats, this dish supports a balanced diet and promotes optimal health. We hope this recipe inspires you to explore new culinary adventures and embrace the joy of healthy eating. Remember, eating well is not just about what you eat but also about enjoying the process and sharing it with loved ones.

Nutrition Information (per serving, without dipping sauce)

  • Calories: 208 kcal
  • Carbohydrates: 21.5g
  • Protein: 21g
  • Fat: 4.5g
  • Fiber: 3g
  • Sugar: 2.5g

Boost Your Wellness with Shrimp Spring Rolls

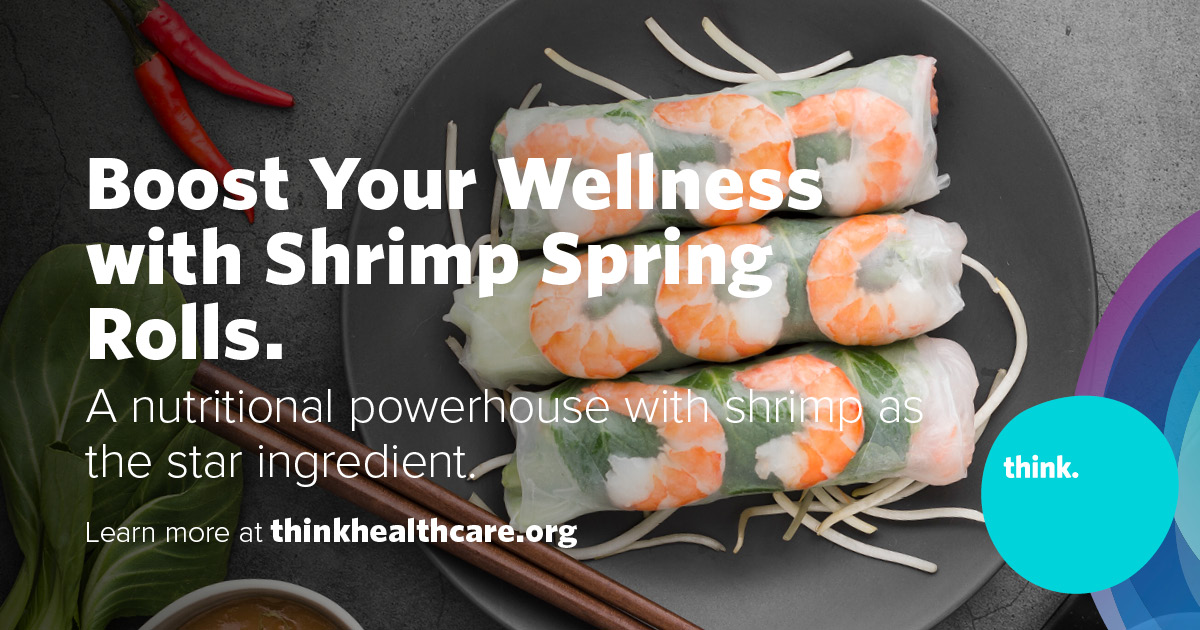
A plate of shrimp spring rolls sits on bean sprouts, with lime and red chilies on the side. Text promotes shrimp spring rolls for wellness. The thinkhealthcare.org logo appears in the corner.

At Think Whole Person Healthcare, we believe that eating well can be both delicious and nutritious. Today, we’re excited to share a recipe that perfectly embodies this philosophy: Vietnamese Shrimp Spring Rolls with Peanut Sauce. This versatile dish is not only packed with flavor but also brimming with health benefits, thanks to its fresh ingredients and balanced nutritional profile. Whether you’re enjoying a fun family night or hosting a dinner party, these spring rolls are sure to impress while supporting your overall well-being.

These Vietnamese Shrimp Spring Rolls are a nutritional powerhouse. Shrimp, the star ingredient, is an excellent source of lean protein, essential for muscle repair and growth. Protein also helps keep you feeling full and satisfied, reducing the temptation to snack on less healthy options. Additionally, shrimp is low in calories and rich in nutrients like selenium, which has antioxidant properties that support immune health.

The fresh vegetables used in this recipe, such as lettuce, bok choy, carrots, jicama, and cucumber, are packed with vitamins, minerals, and fiber. Lettuce and bok choy provide essential vitamins A and K, which are crucial for maintaining healthy vision and bone health. Carrots are well-known for their high beta-carotene content, a potent antioxidant that supports skin health and boosts immunity. Jicama, a root vegetable, is a great source of dietary fiber that aids digestion and helps maintain stable blood sugar levels. Cucumber adds a refreshing crunch and is hydrating, thanks to its high water content.

The homemade peanut sauce accompanying these spring rolls is not only delicious but also nutritious. Peanut butter is a good source of healthy fats, protein, and essential vitamins and minerals such as vitamin E and magnesium. These nutrients are vital for maintaining heart health and reducing inflammation. The sauce also includes gluten-free soy sauce, which provides a savory umami flavor, and honey, which adds natural sweetness while offering antioxidants that support overall health.

Prep Time
25 mins
Cook Time
10 mins
Total Time
35 mins

Servings: 2

Ingredients

For the Spring Rolls:

  • 16 oz. large shrimp, raw, peeled, tail off
  • 4 oz. rice noodles
  • 1 tablespoon extra virgin olive oil
  • ½ teaspoon garlic powder
  • ½ teaspoon salt
  • ½ teaspoon ground black pepper
  • 12 sheets rice paper
  • 1 bunch green leaf lettuce
  • 1 bunch bok choy
  • 1 cup shredded carrots
  • ½ medium jicama, julienned
  • 1 medium cucumber, julienned
  • ¼ cup cilantro, chopped
  • ¼ cup chives, chopped

For the Peanut Dipping Sauce:

  • ½ cup smooth peanut butter
  • ⅓ cup gluten-free soy sauce
  • ⅓ cup water
  • 3 tablespoons honey

Instructions

1. Cook the Shrimp 

In a frying pan over medium-low heat, add a tablespoon of extra virgin olive oil. In a small mixing bowl, combine the shrimp with olive oil, garlic powder, salt, and pepper, ensuring the shrimp is well-coated. Sauté the shrimp for 1-2 minutes on each side until fully cooked, then set aside.

2. Cook the Noodles

Bring a pot of salted water to a boil and cook the rice noodles according to the package instructions. Once cooked, drain and rinse the noodles under cold water, then cut them into thirds to make them easier to manage when assembling the spring rolls.

3. Prep the Veggies

Julienne the cucumber and jicama, rinse the bok choy and lettuce, and pat them dry. Shred the carrots and chop the cilantro and chives. Having all the vegetables prepped and ready makes the assembly process smoother and more enjoyable.

4. Make the Peanut Sauce

In a small bowl, whisk together the peanut butter, gluten-free soy sauce, water, and honey until the mixture is smooth and well-combined. This sauce adds a rich, savory flavor that complements the fresh ingredients in the spring rolls.

5. Assemble the Rolls

Dip a sheet of rice paper in lukewarm water for 2-3 seconds and place it on a plate. The rice paper will initially be stiff but will become stretchy and sticky in a minute or two, perfect for rolling. Add a few pieces of shrimp and your desired fillings to the center of the rice paper. Fold the sides in, then roll it up tightly from the bottom, ensuring all the ingredients are securely wrapped.

6. Serve and Enjoy

Arrange the assembled spring rolls on a serving platter and serve them with the peanut dipping sauce. Enjoy the fresh, vibrant flavors and the myriad health benefits these spring rolls offer.

At Think Whole Person Healthcare, we understand that good nutrition is a cornerstone of overall health and well-being. These Vietnamese Shrimp Spring Rolls with Peanut Sauce are a perfect example of how you can enjoy delicious food while nourishing your body with essential nutrients. By incorporating a variety of fresh vegetables, lean proteins, and healthy fats, this dish supports a balanced diet and promotes optimal health. We hope this recipe inspires you to explore new culinary adventures and embrace the joy of healthy eating. Remember, eating well is not just about what you eat but also about enjoying the process and sharing it with loved ones.

Nutrition Information (per serving, without dipping sauce)

  • Calories: 208 kcal
  • Carbohydrates: 21.5g
  • Protein: 21g
  • Fat: 4.5g
  • Fiber: 3g
  • Sugar: 2.5g

Heart Healthy Avocado Toast

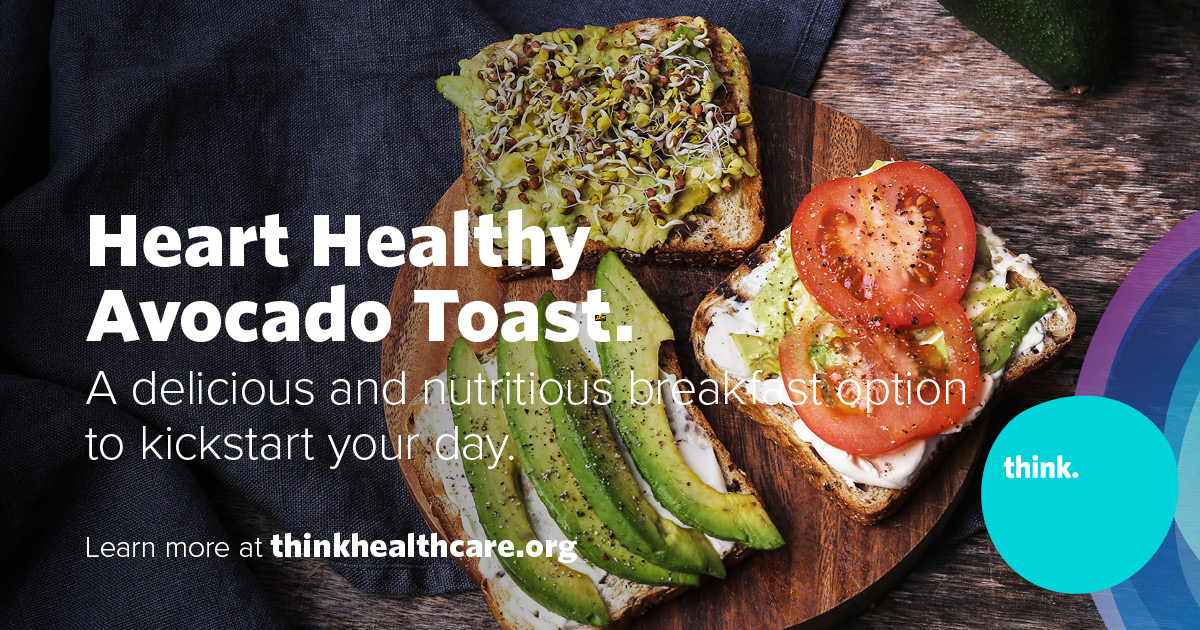
Three slices of avocado toast on a wooden plate, topped with sliced avocado, tomato, and seeds. Text promotes heart healthy avocado toast as a nutritious breakfast. Blue logo with think. and a website link are visible.

Heart Healthy Avocado Toast

A delicious and nutritious breakfast option to kickstart your day.

Avocado toast has become a breakfast staple for good reason—it’s simple, delicious, and packed with heart-healthy fats and fiber. This avocado toast recipe, made with creamy avocado, whole grain bread, and a variety of nutritious toppings, is satisfying and provides numerous health benefits.

Avocados are a nutrient-dense fruit known for their high content of monounsaturated fats. These fats are heart-healthy and can help lower bad cholesterol levels and reduce the risk of heart disease. Additionally, avocados are a good source of fiber, which aids in digestion, helps regulate blood sugar levels, and promotes feelings of fullness to prevent overeating.

Whole grain bread adds complex carbohydrates and additional fiber to this recipe, providing a steady source of energy and helping to keep you feeling full and satisfied throughout the morning. Top the avocado toast with fresh vegetables like tomatoes and spinach for the toast to become rich in vitamins, minerals, and antioxidants that support overall health and well-being.

This recipe is fresh, easy, and fast—perfect for busy mornings when you need a nutritious breakfast in a hurry. With just a few simple ingredients and minimal prep time, you can have this delicious avocado toast on your table in just 10 minutes, making it a convenient option for anyone looking to start their day on a healthy note.

Prep Time
5 mins
Cook Time
5 mins
Total Time
10 mins

Servings: 2

Ingredients

  • 1 ripe avocado
  • 2 slices of whole-grain bread
  • 1 small tomato, sliced
  • Handful of fresh spinach leaves
  • 1 tablespoon of lemon juice or lime juice
  • Salt and pepper to taste
  • Optional toppings: thinly sliced red onion, red pepper flakes, sliced radishes, hemp seeds

Instructions

  1. Prepare the Avocado: Cut the avocado in half, remove the pit, and scoop the flesh into a bowl. Mash the avocado with a fork until smooth but still slightly chunky.
  2. Toast the Bread: Toast the slices of whole grain bread until golden brown and crispy.
  3. Assemble the Toast: Spread the mashed avocado evenly onto each slice of toast.
  4. Add Toppings: Top the avocado with sliced tomato and fresh spinach leaves. If desired, add thinly sliced red onion for extra flavor.
  5. Drizzle with Citrus Juice: Drizzle lemon or lime juice over the toppings to add a bright, citrusy flavor.
  6. Season and Customize: Season the avocado toast with salt and pepper to taste. For an extra kick, sprinkle with red repper flakes, sliced radishes, or hemp seeds.
  7. Serve and Enjoy: Serve the avocado toast immediately while the bread is still warm and crispy. Enjoy as a satisfying breakfast or snack!

This heart-healthy avocado toast is not only delicious but also provides a good source of fiber, vitamins, and minerals to start your day off right. Experiment with different toppings and seasonings to customize your avocado toast to your taste preferences.

Nutrition Information (Per Serving)

  • Calories: 443 cal
  • Protein: 8 g
  • Fat: 26 g
  • Carbohydrates: 44 g
  • Calories from Fat: 370 cal
  • Saturated Fat: 2 g
  • Trans Fat: 0 g
  • Cholesterol: 425 mg
  • Sodium: 1128 mg
  • Fiber: 15 g
  • Sugars: 7 g
  • Added Sugars: 5 g

Greek Chickpea Salad

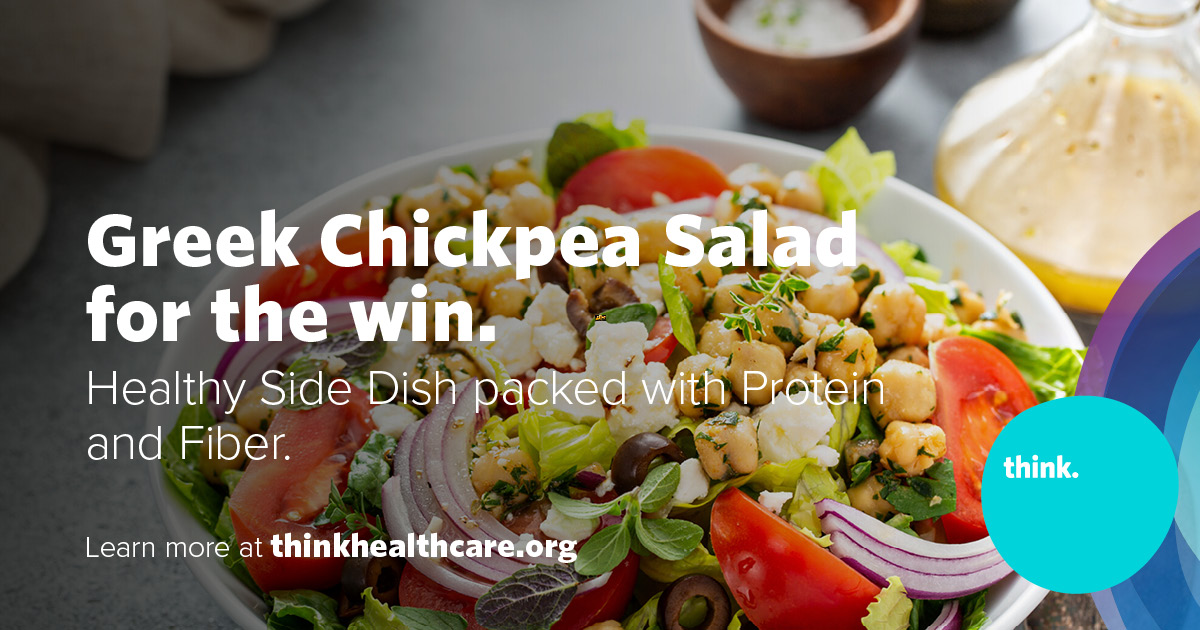
A bowl of Greek chickpea salad with tomatoes, cucumbers, red onions, olives, and feta, next to a jar of dressing. Text promotes this healthy, protein- and fiber-rich side dish from thinkhealthcare.org.

Healthy Side Dish packed with Protein and Fiber.

Prep Time: 15 minutes, Total Time: 15 minutes

This salad is full of protein and fiber from the chickpeas, and it’s also light and refreshing, combining chickpeas, chopped cucumber, tomatoes, red onion, crumbled feta cheese, and a lemon vinaigrette dressing.

A Greek chickpea salad packs a bunch of nutritional goodness. It offers a variety of health benefits, is high in protein and fiber, and is packed with nutrients. 

The main ingredient, chickpeas, is an excellent source of plant-based protein and fiber. Protein helps you feel full and satisfied, while fiber keeps your digestive system running smoothly and can aid in weight management. This salad is also a great way to sneak in essential vitamins and minerals. Chickpeas themselves contain folate, iron, phosphorus, and more. The vegetables typically included, like tomatoes and cucumbers, add vitamins A and C, and the crumbled feta cheese provides calcium. Overall, this salad’s combination of protein, fiber, healthy fats, vitamins, and minerals contributes to overall well-being by promoting feelings of fullness and gut health and providing essential nutrients for the body.

What’s In this Simple Chickpea Salad?

Offering classic Greek and Mediterranean flavors is this easy, refreshing healthy side dish salad. Here’s what you’ll need:

  • Canned chickpeas
  • Cherry tomatoes
  • English cucumber
  • Kalamata olives
  • Red onion
  • Feta cheese
  • Fresh dill
  • Dried oregano
  • Extra virgin olive oil
  • Red wine vinegar
  • Sugar (optional)
  • Kosher salt and freshly ground black pepper

Ingredients

  • 1 15-ounce can garbanzo beans , rinsed and drained
  • 1 English cucumber, halved and sliced into coins
  • 2 cups halved cherry tomatoes
  • ¾ cup pitted kalamata olives , drained and halved
  • ⅓ cup slivered red onion
  • 6 ounces feta cheese , crumbled
  • ¼ cup chopped fresh dill
  • ⅓ cup extra virgin olive oil
  • 2 tablespoons red wine vinegar
  • 1 teaspoon dried oregano
  • 1 teaspoon kosher salt
  • 1 teaspoon freshly ground black pepper
  • ½ teaspoon sugar , optional

Instructions

In large bowl, combine the drained chickpeas, chopped cucumber, halved tomatoes, kalamata olives, red onion, and half of the crumbled feta cheese with fresh dill in a large bowl. Drizzle with olive oil and vinegar, then season with kosher salt, freshly ground black pepper, and a touch of sugar (optional). 

Toss gently to coat, then add the remaining feta cheese. Taste and adjust seasonings as needed. Serve immediately or chill in the refrigerator for at least an hour or overnight to allow the flavors to meld.

Nutrition

Approx 6 Servings. Calories: 229kcal | Carbohydrates: 7g | Protein: 5g | Fat: 21g | Saturated Fat: 6g | Cholesterol: 25mg | Sodium: 976mg | Potassium: 231mg | Fiber: 1g | Sugar: 4g | Vitamin A: 632IU | Vitamin C: 15mg | Calcium: 171mg | Iron: 1mg

Recipe modified from FoodCrush.com