



Crispy Parmesan Caesar Chicken.

Crispy Parmesan Caesar Chicken.

Crispy, golden chicken meets delicious creamy Caesar dressing.

The Crispy Parmesan Caesar Chicken isn’t your average chicken dinner. It brings bold flavor and crunchy texture together in the most delicious way. Tender chicken is covered with a creamy Caesar-sour cream blend, coated in cheesy panko breadcrumbs, and oven-roasted to perfection. Served alongside a colorful medley of roasted carrots and zucchini, this dish is quick to make, bursting with flavor, and destined to be a weeknight favorite. Whether cooking for two or treating yourself, it’s comfort food with a vibrant, gourmet twist. 

Prep Time
10 mins
Cook Time
20 mins
Total Time
30 mins

Servings: 2

Ingredients

  • 2 medium carrots
  • 1 Zucchini
  • 10 oz Chicken Breasts
  • ¼ cup panko breadcrumbs
  • ¼ cup Parmesan cheese
  • 1 tbsp butter 
  • 2 tbsp Caesar dressing
  • 2 tbsp Sour Cream
  • Cooking Oil
  • Kosher Salt
  • Black Pepper
  • Optional: Lemon zest (for added brightness
  • Optional: Green beans or broccoli (about ½ cup, trimmed and chopped

Instructions

Step One: Prep the Ingredients and Preheat the Oven

Preheat your oven to 425°F and adjust the rack to the top position. Wash and dry the carrots and zucchini (and any optional green veggies). Peel the carrots and slice them on a diagonal into ½-inch pieces. Halve the zucchini lengthwise, then slice into ½-inch half-moons. If using green beans or broccoli, trim and cut into bite-sized pieces. Pat the chicken dry with paper towels and season both sides with salt and pepper.

Step Two: Build the Topping

Place the butter in a small microwave-safe bowl and microwave for about 30 seconds until melted. In the same bowl, mix in the panko breadcrumbs and Parmesan cheese. Season the mixture with a pinch of salt and pepper. If you have a lemon on hand, zest a bit into the mixture for a fresh, citrusy note.

Step Three: Make the Creamy Caesar Sauce

In another small bowl, combine the Caesar dressing and sour cream. Stir until smooth. This sauce will be used both for flavoring the chicken and for serving.

Step Four: Start Roasting the Vegetables

On one side of a large baking sheet, toss the sliced carrots and zucchini with a drizzle of cooking oil, salt, and pepper. Spread them out in a single layer.

Place the sheet in the oven and roast for 5 minutes to get them started.

Step Four: Start Roasting the Vegetables

On one side of a large baking sheet, toss the sliced carrots and zucchini with a drizzle of cooking oil, salt, and pepper. Spread them out in a single layer.

Place the sheet in the oven and roast for 5 minutes to get them started.

Step Five: Prepare the Chicken

While the vegetables begin roasting, take the seasoned chicken and spread about 1 teaspoon of the creamy Caesar sauce on the top of each piece (save the rest for serving). Press the panko-Parmesan mixture onto the sauced side of the chicken, gently pressing so it sticks.

Step Six: Roast the Chicken and Finish the Veggies

After the vegetables have roasted for 5 minutes, remove the baking sheet from the oven. Carefully place the prepared chicken cutlets on the empty side of the sheet.

If you’re using green beans or broccoli, add them now to the veggie side and toss with a little oil, salt, and pepper.

Return the sheet to the oven and continue roasting everything for another 12 to 15 minutes, or until the chicken is cooked through (internal temperature reaches 165°F) and the vegetables are golden and tender.

Step Seven: Serve the Dish

Transfer the crispy Caesar chicken and roasted vegetables to plates. Spoon some of the remaining Caesar-sour cream sauce over the chicken or serve it on the side for dipping.

Enjoy your crispy, creamy, and veggie-packed meal!

Tips

  • You can substitute the sour cream for Greek Yogurt for a low-fat and low-calorie version.

Tomato Linguine with Kale & Lemon Garlic Sauce

Tomato Linguine with Kale & Lemon Garlic Sauce

A creamy, lemon-kissed pasta tossed with kale, juicy tomatoes, and your choice of shrimp or chicken.

There’s something undeniably satisfying about a big bowl of creamy pasta, but this one goes beyond your everyday comfort food. This linguine dish is rich and refreshing, bursting with juicy grape tomatoes and tender kale, and layered with bold garlic flavor. Cream cheese and Parmesan create a silky sauce that hugs every strand of pasta, while a splash of lemon adds just the right amount of brightness to balance the richness.

Whether you are craving a cozy dinner after a long day or looking to elevate your weekly meal rotation, this recipe is the perfect go-to. It’s easy to make it your own with flexible protein options like sautéed shrimp or chicken. And thanks to simple prep and a quick cooking time, you can get a restaurant-worthy meal on the table without the fuss.

Prep Time
10 mins
Cook Time
20 mins
Total Time
30 mins

Servings: 2

Ingredients

  • 1 small bunch of Kale (2-3 cups chopped)
  • 2 Garlic Cloves
  • 1 Cup Grape Tomato
  • 1 Lemon
  • 17.6 oz Linguine Pasta (1 Package)
  • 1 tsp Italian Seasoning
  • 2 oz Cream Cheese (¼ of an 8oz block)
  • Shredded Parmesan
  • Koshers Salt
  • Black Pepper
  • 1 tsp Cooking Oil
  • 2 tbsp butter
  • Optional: Shrimp or Chicken Breast Strips

Instructions

Step One: Prepare Ingredients & Start Water

First, wash the tomatoes, kale, and lemon and pat them dry. Fill a large pot with salted water and boil it on the stove. While the water heats up, prepare the other ingredients: halve the tomatoes, peel and finely chop the garlic, remove large stems from the kale and roughly chop the leaves, and finally, zest the lemon and cut it into quarters.

Step Two: Cook the Linguine

Once the pot of water reaches a boil, add the linguine. Let it cook for 9 to 11 minutes, stirring it occasionally, until it’s al dente (tender but still a bit firm). Before you drain the pasta, carefully scoop out and save ⅔ cup of the cooking water (use 1 cup if you’re making 4 servings). After saving the water, drain the pasta well.

Step Three: Cook the Vegetables

As the pasta cooks, heat a drizzle of oil in a large pan over medium heat. Add the halved tomatoes and cook them for about a minute, stirring now and then, until they start to look blistered. Next, add the chopped garlic, kale, half of the Italian seasoning, salt, and pepper to the pan. Continue cooking and stirring for another 2 to 3 minutes until the garlic smells fragrant and the kale has softened a bit.

Step Four: Simmer the Sauce Base

Pour ½ cup of the saved pasta water into the pan with the vegetables (use ⅔ cup if making 4 servings). Bring this mixture to a simmer and let it cook for 2 to 3 minutes. The vegetables should become tender, and the liquid should reduce by about half during this time.

Step Five: Finish the Sauce and Combine

Now, stir the cream cheese into the pan with the vegetables. Keep stirring until the cream cheese melts completely and mixes in smoothly. Turn the heat down to low. Add the drained linguine, a pinch of lemon zest, half of the Parmesan cheese, and 2 TBSP butter (use 4 TBSP for 4 servings) to the pan. Season it with salt and pepper to your liking.

Step Six: Toss and Adjust

Gently toss everything together in the pan until the pasta is evenly coated in the creamy sauce. If the sauce seems too thick, add a small splash of the saved pasta water and toss again. Repeat this step with small amounts of water until the sauce has the consistency you prefer. Finally, stir in fresh lemon juice from the wedges, adding as much as you’d like for taste.

Step seven: Serve the Dish

Divide the finished tomato linguine among your serving bowls. Sprinkle the remaining Parmesan cheese over the top of each portion. Serve the pasta immediately, with any leftover lemon wedges placed on the side for anyone who wants extra lemon juice.

Comfort, Speed, and Peace of Mind.

Comfort, Speed, and Peace of Mind.

Modern Mammograms provide a gentler, more comfortable experience.

Breast cancer screening helps maintain women’s health, but some women delay or avoid mammograms due to fear, discomfort, or misconceptions. Fortunately, advancements in mammography technology have transformed the experience, making it faster, gentler, and more approachable. In a recent video, patient Elizabeth Lowndes and mammographer Chellie Molgard share how new technology is reshaping perceptions of mammograms, turning a once-dreaded appointment into a manageable and even pleasant experience. Watch the video here.

A Gentler, More Comfortable Experience

Elizabeth, who schedules a yearly mammogram due to her family history, described her latest screening as “like getting a gentle hug.” Unlike older machines that could feel harsh or uncomfortable, the new technology made the process seamless, quick, and noticeably less painful. Chellie, the mammographer, credits features like the comfort pedal, which adjusts the pressure applied during imaging to reduce tightness on the breast. With two types of pedals tailored to different comfort needs, patients now enjoy a more personalized experience that feels less clinical and more caring. “It’s more comfortable for the patient,” Chellie says, adding that the sharper, high-quality images also help clinicians provide accurate diagnoses.

This shift in technology is a game-changer for those who’ve avoided screenings due to past discomfort. As Elizabeth noted, walking into the imaging room felt “peaceful” and almost spa-like, a far cry from the sterile, intimidating settings of the past. The combination of a soothing environment and gentler equipment helps ease nerves and makes the process feel less daunting.

Why Annual Mammograms Make a Difference

Chellie emphasizes the value of regular screenings for early detection of breast cancer. “The faster we can get in front of that stuff, the better we can serve our patients,” she explains. Waiting too long—sometimes months or even years—can mean missing the chance to catch issues when they’re most treatable. Annual mammograms offer a proactive way to stay ahead, improving health outcomes and providing peace of mind. For Elizabeth, knowing she’s taking care of her health, especially with her family history, brings reassurance that’s hard to overstate.

Regular screenings are especially meaningful for those at higher risk, but they benefit everyone. As Chellie points out, the goal is to keep patients healthy and maintain their quality of life. By making mammograms less intimidating, new technology encourages more women to stick to a yearly schedule, turning a health habit into a positive routine.

Answers to Common Mammogram Questions

Our Breast Cancer Awareness article sheds light on common concerns about mammograms. Here, we address frequently asked questions with insights from Elizabeth and Chellie’s experiences:

Does a mammogram hurt?

Older machines sometimes cause discomfort, but today’s technology has changed that. Elizabeth called her recent mammogram “painless” and “gentle,” thanks to innovations like the comfort pedal that adjusts pressure for a softer touch.

How long does a mammogram take?

Modern mammograms are designed for efficiency. Elizabeth described the process as “fast” and “seamless,” typically taking 10-15 minutes from start to finish, making it easy to fit into a busy day.

When should I start getting mammograms?

The American Cancer Society advises women at average risk to begin annual mammograms at age 40. If you have a family history, like Elizabeth, or other risk factors, your doctor may recommend starting earlier or screening more frequently. Chatting with your healthcare provider can clarify what’s best for you.

What if I’m nervous about the process?

It’s normal to feel anxious, but today’s mammography settings are designed to put you at ease. Elizabeth compared her experience to “going to a spa,” with a calm, welcoming atmosphere that feels far less medical. Friendly staff and streamlined technology further reduce stress.

Are mammograms safe?

Mammograms use low-dose X-rays, and the risk is minimal compared to the benefits of early detection. Chellie highlighted the “really sharp” images produced by new machines, which help radiologists spot even small changes with greater accuracy.

What should I expect during the appointment?

You’ll be guided by a professional like Chellie, who ensures you’re comfortable throughout the exam. The machine gently compresses the breast for a few seconds to capture clear images, and the process repeats for both sides. Elizabeth found it “easy” and appreciated the supportive, non-rushed approach.

How often should I get screened?

For most women, yearly mammograms are the standard, as Chellie advocates, to catch any changes early. Your doctor can help determine the proper schedule based on your health history and risk factors.

Empowerment Through Proactive Health

Elizabeth’s story shows how far mammography has come. “It’s nothing to be afraid of with the technology that they have today,” she says, describing a process that’s not only tolerable but empowering. A mammogram is more than a medical test—it’s a step toward taking control of your health and gaining peace of mind. Modern mammography makes it easier for women to prioritize their well-being without hesitation by addressing common fears and focusing on comfort.

Ready to take charge of your health?

Schedule your mammogram today by speaking with your Primary Care Provider and discover how quick and comfortable it can be. Give us a call at 402.506.9000.
Think is a primary healthcare organization dedicated to keep you healthy through preventative care and treatment for a wide range of medical conditions. To learn more about the complete list of our healthcare services, visit our Services page online and meet your think Provider by visiting our Meet Your Doctor page.

Turkey Bacon Egg Muffins

Turkey Bacon Egg Muffins

A Breakfast Helper for Busy Mornings.

School mornings can feel like a rush. Getting everyone ready and out the door on time is challenging enough, let alone making sure they eat a decent breakfast. That’s where Turkey Bacon Egg Muffins can be a superhero. Think of them like mini omelets or crustless quiches conveniently baked in a muffin tin.

What makes them useful for busy families? You can bake a whole batch over the weekend or whenever you have a bit more time. Keep them in the fridge, and then on those chaotic weekday mornings, you have a ready-to-go breakfast. Just warm one up quickly in the microwave, and it’s ready to eat – perfect for grabbing on the way out the door if needed!

Kids often enjoy these because you can mix in things they enjoy. For example, cheese is usually a winner, and maybe some ham or bacon bits are also a winner. It’s also a simple way to add small amounts of vegetables like spinach or finely chopped peppers. The eggs provide protein to help keep them feeling full until lunch. Plus, since they’re already in single servings, they’re easy for kids to handle and eat without much mess.

Prep Time
15 mins
Cook Time
20 mins
Total Time
35 mins

Servings: 12

Ingredients

What to buy at the store?

  • Cooking spray
  • 3 slices turkey bacon
  • 1 small yellow onion, chopped
  • 1 red bell pepper, chopped
  • 1/2 cup chopped baby spinach
  • 6 large eggs
  • 2 tablespoons milk
  • 1/2 cup shredded mozzarella cheese
  • 1/2 teaspoon garlic powder
  • 1/4 teaspoon paprika
  • Kosher salt, to taste
  • Freshly ground black pepper, to taste

Instructions

Step One: Get it started.

Preheat your oven to 375°F (190°C). Spray a 12-cup muffin tin well with cooking spray.

Step Two: Cook the bacon.

Cook the turkey bacon in a skillet over medium heat until crisp. Remove bacon from the skillet, let it cool slightly, and then crumble or chop it. If desired, you can quickly sauté the chopped onion and red bell pepper in the same skillet for a few minutes until slightly softened.

Step Three: Combine the Ingredients.

In a large bowl, whisk together the eggs, milk, garlic powder, paprika, salt, and pepper until well combined. Stir the cooked bacon, sautéed onion and pepper (if using, otherwise add raw), chopped spinach, and shredded mozzarella into the egg mixture.

Step Four: Set the stage.

Pour the egg mixture evenly into the prepared muffin cups, filling each about three-quarters full.

Step Four: Bake until golden.

Bake for 15-20 minutes, or until the eggs are set and lightly golden around the edges. A toothpick inserted into the center should come out clean.

Step Four: Let it all cool.

Let the muffins cool in the tin for a few minutes before removing them. You can run a thin knife or spatula around the edges to help loosen them if needed.

Serve warm or let cool completely before storing.

Tips

  • Changing the Ingredients: You can adjust the ingredients in these muffins. For example, you can use other types of cheese like cheddar or Monterey Jack instead of mozzarella. Different vegetables, such as scallions, kale, or tomatoes, can be used. You could also add cooked bacon, ham, or mushrooms. Feel free to change the seasonings based on your preference.
  • Cooling the Muffins: To prevent the muffins from becoming too moist from trapped steam, do not let them cool completely in the muffin tin. Instead, let them rest in the tin for about five minutes after baking. This helps them firm up slightly so they are easier to remove. Then, take the muffins out of the tin and place them on a wire rack to finish cooling.

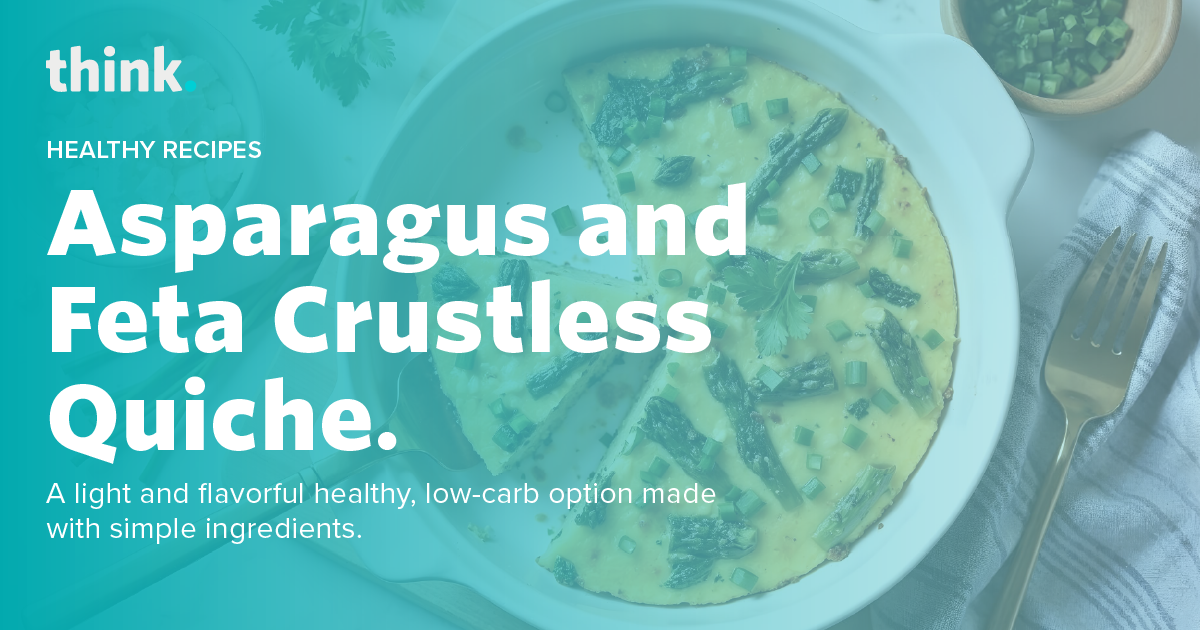
Asparagus and Feta Crustless Quiche

Asparagus and Feta Crustless Quiche

Asparagus and Feta Crustless Quiche

Enjoy a light and flavorful meal with this easy Asparagus and Feta Crustless Quiche. It’s a healthy, low-carb option made with simple ingredients, perfect for any time of day.

Imagine a brunch table decorated with vibrant spring greens and the delicate aroma of baked eggs. Our Asparagus and Feta Crustless Quiche is the centerpiece you’ve been searching for. Picture tender asparagus spears, their earthy sweetness mingling with the tangy, crumbly feta, all suspended in a light, airy egg base. This dish isn’t just visually appealing; it’s a symphony of flavors and textures. Low-carb, high-protein, and naturally gluten-free, it caters to diverse dietary needs while offering endless customization. Add sun-dried tomatoes for a touch of sweetness, or perhaps some sautéed mushrooms for added depth. And the best part? It requires minimal prep time, leaving you more moments to savor the holiday with loved ones. It’s reminiscent of a frittata, but with a streamlined approach, ensuring a delicious and stress-free breakfast or brunch.

Prep Time
5 mins
Cook Time
35 mins
Total Time
40 mins

Servings: 4

Ingredients

What to buy at the store?

  • 8 thin asparagus spears, ends removed and cut into 1-inch pieces  
  • 4 green onions, chopped  
  • 6 large eggs  
  • 2/3 cup milk, of choice  
  • 1/4 cup half and half, (or substitute more milk)  
  • 1/2 tsp oregano  
  • 1/2 tsp salt  
  • 1/4 tsp black pepper  
  • 1/3 cup feta cheese, crumbled  
  • 2 Tbsp chives, finely chopped  

Instructions

Step One: Preheat and prep

Preheat the oven to 350 degrees F and lightly coat a 9-inch pie dish with nonstick spray .  

Step Two: Snap Asparagus

Snap off the ends of the asparagus spears and cut into 1-inch pieces and chop the green onions. (No need to cook the asparagus beforehand as long as you use thin asparagus spears!)  

Step Three: Whisk Together

In a large bowl, whisk together the eggs, milk, half and half, oregano, salt and pepper .  

Step Four: Add Everything Together

Arrange the asparagus pieces and green onions in the bottom of a prepared 9-inch baking dish and pour the egg mixture over top. Sprinkle on the feta cheese and chives .  

Step Five: Bake and Enjoy

Bake the quiche in the oven for 35 minutes, or until the egg is set in the center and the edges are golden. Serve warm .  

It’s more than just medication management. 

It’s more than just medication management. 

The Role of Clinical Pharmacists in Your Healthcare Journey and how they improve your care.

When it comes to your health, having a dedicated team of professionals by your side is essential. Among these professionals is the Clinical Pharmacist, an integral part of your care team at Think Whole Person Healthcare. While many people associate pharmacists with the person behind the counter at the drugstore, their role extends far beyond simply dispensing medications. So what are Clinical Pharmacists and the history of this profession? Let’s explore the fascinating history of pharmacy, the diverse specializations within the field, and how Think’s Clinical Pharmacists work to optimize your medication management and overall well-being

The Evolution of Pharmacy.

The roots of pharmacy can be traced back to ancient civilizations, with evidence of pharmaceutical practices dating as far back as 1,500 BC in Egypt. Paleopharmacologists have uncovered over 1,000 sheets of papyrus detailing hundreds of plant-derived medication recipes, showcasing the early expertise of apothecaries and chemists who worked alongside healers and priests to treat the sick.

Fast forward to the late 19th and early 20th centuries, and the Industrial Revolution brought about significant advancements in pharmaceutical science. Increased technical sophistication allowed for the purification of natural materials and the synthesis of organic chemicals, leading to groundbreaking discoveries like insulin and penicillin. Today, pharmacists play vital roles in drug manufacturing, research, and direct patient care, with the opportunity to specialize in 13 board-certified fields, including ambulatory care, cardiology, oncology, and more.

Clinical Pharmacy at Think.

The Clinical Pharmacists at think hold doctorate degrees in pharmacology and often specialize in medical areas that align with their passions. They collaborate closely with our physicians, specialists, and advanced practice providers to ensure that your medications are tailored to yield the best possible outcomes for your unique situation. 

What services do our Clinical Pharmacists provide?

Comprehensive Medication Reviews 

Our Clinical Pharmacists work hand-in-hand with your Primary Care physician, specialists, and other providers to conduct thorough medication reviews. As experts on each medication’s active ingredients and appropriate treatment approaches, they ensure that your prescriptions are the most suitable options for your specific circumstances, optimizing your therapy and minimizing potential risks.

Optimizing Medication Timing 

Did you know that the timing of your medication can significantly impact its effectiveness? For example, atorvastatin, a common cholesterol medication, works best when taken in the evening when your body’s cholesterol-making enzymes are most active. Think’s Clinical Pharmacists collaborate with you and your doctors to develop a medication schedule that maximizes the benefits of your prescription drugs, ensuring you get the most out of your treatment plan.

Exploring Alternative Medications

One of the key advantages of working with our Clinical Pharmacists is their commitment to finding the best medication options for your individual case. They stay up-to-date on the latest drugs and their interactions, allowing them to recommend alternative treatment paths if you’re not achieving the desired results. This personalized approach ensures that you and your doctor have access to the most current and effective solutions available.

Preventing Adverse Interactions 

For patients managing multiple health conditions, taking several medications simultaneously can pose risks if those medications don’t interact well with one another. Our Clinical Pharmacists possess a deep understanding of medication interactions and work to help you avoid adverse effects. In some cases, they may consolidate your medication regimen by identifying drugs that can treat multiple conditions, simplifying your treatment plan and reducing potential complications.

Ensuring Cost Savings 

At think, we recognize that medications can be a significant expense, even with insurance coverage. Our Clinical Pharmacists go the extra mile to help you save money on your prescriptions. They collaborate with your doctor, insurance company, and retail pharmacy to secure the lowest possible prices, whether that means prescribing a different brand of medication or adjusting dosages (e.g., three 100mg pills instead of one 300mg pill) to optimize cost-effectiveness without compromising quality of care.

Personalized Patient Consultations 

Some patients, such as those with uncontrolled diabetes or multiple health conditions, require more frequent support from their healthcare team. Our Clinical Pharmacists work directly with your physician to provide continuity of care and offer recommendations on medication adjustments tailored to your needs. In the case of uncontrolled diabetes, for example, you may benefit from a collaborative team that includes Physicians, Clinical Pharmacists, Pharmacy Technicians, Care Coordinators, Diabetic Educators, Dietitians, and Social Workers—all working together to design a treatment plan that gets your blood sugar levels back on track as efficiently as possible.

The Think Whole Person Healthcare Difference

At think, our commitment to your well-being goes beyond simply treating symptoms. Our Clinical Pharmacists incorporate this philosophy by taking a holistic approach to your medication management, considering factors like efficacy, safety, cost, and your individual circumstances. They ensure that your care is coordinated, comprehensive, and centered around you by partnering with our physicians and specialists.

Our Clinical Pharmacists are the unsung heroes of your healthcare journey, working behind the scenes to optimize your medication therapy and support your overall health. At Think Whole Person Healthcare, our highly trained Clinical Pharmacists bring their expertise, compassion, and dedication to every patient interaction. From conducting medication reviews and preventing adverse interactions to exploring cost-saving alternatives and providing personalized consultations, they play an indispensable role in helping you achieve your best possible outcomes.

To learn more about how our Clinical Pharmacy services can benefit you, visit our service page at https://thinkhealthcare.org/services/clinical-pharmacy/ or speak with your Primary Care physician at Think Whole Person Healthcare. Experience the difference of having a world-class Clinical Pharmacist as part of your care team and unlock the full potential of your healthcare journey today.

Think is a primary healthcare organization dedicated to keep you healthy through preventative care and treatment for a wide range of medical conditions.

To learn more about the complete list of our healthcare services, visit our Services page online and meet your think provider by visiting our Meet Your Doctor page. Visit our self-scheduling page or give us a call at 402.506.9000.

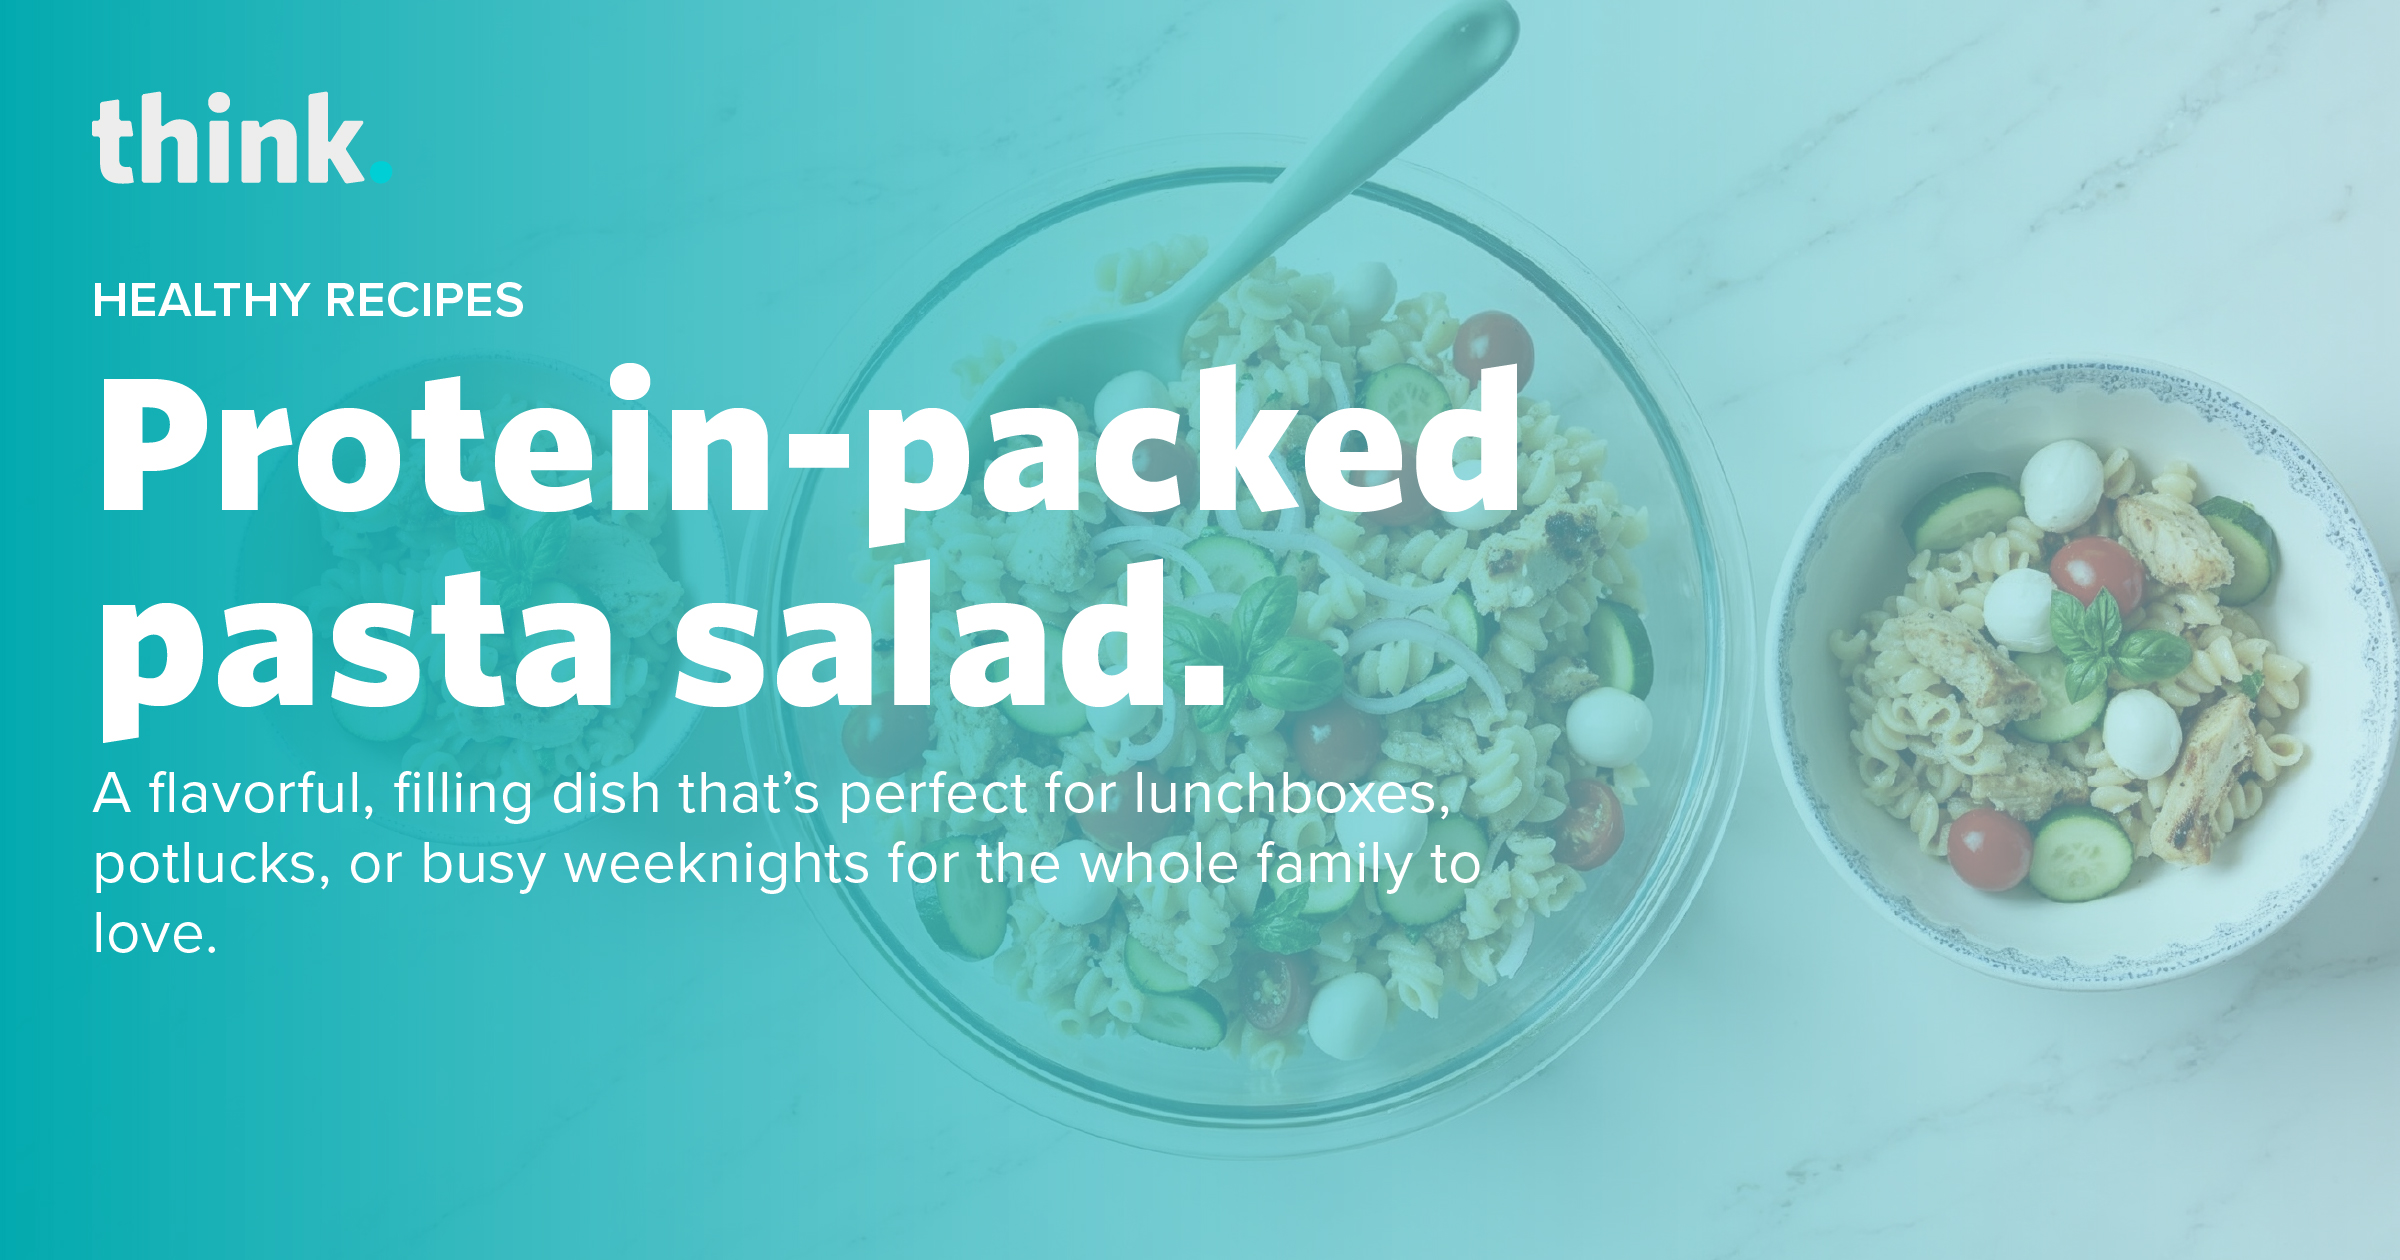
Protein-packed pasta salad.

Protein-packed pasta salad.

A flavorful, filling dish that’s perfect for lunchboxes, potlucks, or busy weeknights for the whole family to love.

There’s something comforting about a big bowl of pasta salad—especially when it’s packed with bold flavor, vibrant veggies, and protein to keep everyone feeling full and satisfied. The high-protein pasta salad delivers fresh ingredients, balanced nutrition, and a great flavor that keeps you coming back for another bite.

This pasta salad checks all the boxes from prepping lunches for the week to throwing together a quick dinner, or looking for something that will actually get eaten at your next family gathering. It’s easy to customize, tastes great cold or at room temp, and offers several protein options including vegetarian-friendly white beans and feta. Plus you can easily swap ingredients like adding salmon, turkey, or tofu instead of chicken.

Get ready for a new go-to in your meal rotation.

Prep Time
15 mins
Cook Time
10 mins
Total Time
25 mins

Servings: 6-8

Ingredients

For the Salad:

  • 10 oz pasta (elbows, farfalle, or rotini work well)
  • 1 can (15 oz) cannellini or great northern beans, drained and rinsed
  • 1 ½ cups cherry tomatoes, halved
  • 1 cup diced cooked chicken, salmon, or turkey or 1 cup cubed extra-firm tofu (pressed and baked)
  • ½ cup crumbled feta, goat cheese or cubed mozzarella
  • ¼ cup fresh basil, thinly sliced

For the Dressing:

  • ⅓ cup extra-virgin olive oil
  • 1 tablespoon white wine vinegar or lemon juice
  • 2 cloves garlic, smashed
  • ½ teaspoon salt
  • Fresh ground black pepper, to taste

Instructions

Step One: Marinate the Flavor Base

In a large bowl, combine cherry tomatoes, garlic, basil, olive oil, salt, and vinegar or lemon juice. Stir well and set aside for 15–20 minutes so the flavors can meld.

Step Two: Cook the Pasta

After marinating, sprinkle 2 tablespoons of cornstarch over the chicken pieces, ensuring each piece is evenly coated.​ Follow by tossing the coated chicken in the gluten-free breadcrumbs, pressing gently to adhere.

Step Three: Air Fry the Chicken

Cook chicken till internal temperature reaches 165º F. Meanwhile, bring a large pot of salted water to a boil. Cook pasta according to package directions until al dente. Drain and rinse under cool water to stop the cooking process.

Step Four: Remove Garlic, Mix the Salad

Discard the garlic cloves from the tomato mixture. Add in the cooked pasta, white beans, chosen protein, and cheese. Gently toss until everything is evenly coated with the dressing. Add a bit of black pepper to taste.

Step Five: Serve and Enjoy

Serve immediately at room temperature, or refrigerate and let the flavors deepen. This dish holds up well for several days, making it perfect for leftovers and meal prep.

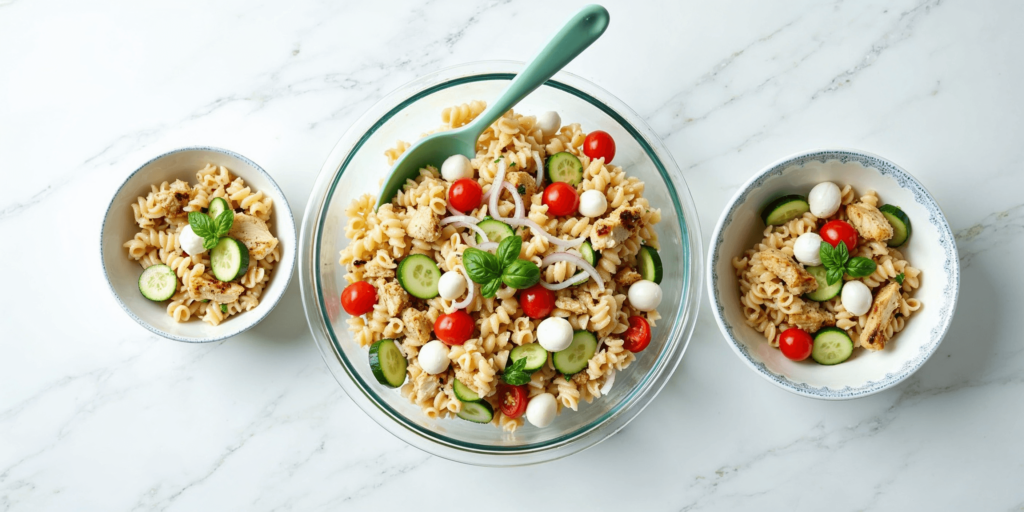
A large bowl and two smaller bowls of pasta salad with cherry tomatoes, mozzarella balls, cucumber slices, and fresh basil, on a white marble surface.

Tips

  • Involve the Kids: To appeal to younger palettes, consider using fun-shaped pasta like wagon wheels or bowties. Involving kids in the preparation by letting them choose and add their favorite veggies or proteins can make them more excited to enjoy the meal.
  • Make it Vegetarian: Skip the meat and double up on white beans, or use tofu or a plant-based meat substitute for extra protein. ​Incorporate vegetables that your children enjoy, such as sliced bell peppers, cucumbers, or peas. It not only boosts the nutritional value but also makes the salad more appealing to kids.
  • Protein Swaps We Love: Rotisserie chicken, smoked salmon, grilled turkey, roasted chickpeas, or baked tofu all work well.
  • Pasta Picks: Go for short pasta shapes like rotini or farfalle—they mix well with the other ingredients and are easy for little hands to manage. Gluten-free and bean-based pastas are great alternatives for added fiber and protein.
  • Dairy-Free Version: Skip the cheese and add roasted sunflower seeds for a little crunch and extra nutrients.

Embrace the ease of a chilled meal that satisfies and energizes. This high-protein pasta salad is proof that simple ingredients, when thoughtfully combined, can be both nourishing and delicious. It’s a recipe the whole family will ask for again and again—no matter the season.

Unlock better sleep tonight.

Unlock better sleep tonight.

Learn about the science of sleep and strategies to enhance your nightly rest.

When it comes to sleep, many of us struggle—whether it’s tossing and turning, difficulty falling asleep, or waking up multiple times during the night. Counting sheep can only do so much. 

March is National Sleep Awareness Month, providing an excellent opportunity to reflect on our sleep habits and explore ways to improve the quality and quantity of our nightly rest.

Quality sleep is essential for our overall health and well-being. It plays a vital role in maintaining cognitive functions, emotional balance, and physical health. Despite its importance, many individuals do not get enough restorative sleep, leading to various health issues.​

In this article, we will delve into the science of sleep, common sleep problems, the effects of sleep deficiency, and practical strategies to enhance your sleep quality. By understanding these aspects, you can take proactive steps toward achieving more restful and rejuvenating sleep.

Understanding Sleep

Sleep is a complex and dynamic biological process that still isn’t fully understood. Multiple parts of the brain are involved in producing hormones and chemicals that regulate rest and wakefulness. There are four main stages of the sleep cycle, categorized into REM (rapid eye movement) and non-REM sleep. The first three stages are non-REM sleep, during which the brain and body slow down, and muscles relax. Stage three, known as deep sleep, is when the body repairs itself, building tissue, muscle, and bone. The fourth stage is REM sleep, which allows the brain to process information, dream, and store memories.​

sleepfoundation.org

Each sleep cycle lasts about 90 minutes, repeating four or five times per night. Traditionally, eight hours of sleep was considered optimal for healthy adults, but experts now recognize a range of six to eight hours as sufficient. As bodies grow and develop, teens, children, and infants require more sleep, with some newborns needing up to 17 hours a day. Observations indicate that older adults may need more sleep due to less efficient sleep patterns and health issues that interrupt rest.

Common Sleep Problems

Physical, emotional, and mental health are deeply intertwined with sleep quality. Common sleep disorders include:​

Insomnia: Difficulty falling or staying asleep, the most prevalent sleep disorder.​

Obstructive Sleep Apnea: A condition where breathing repeatedly stops and starts during sleep.​

Restless Leg Syndrome: An uncontrollable urge to move the legs, typically in the evenings.​

Other health conditions, such as chronic pain, menopause, enlarged prostate, respiratory ailments like asthma, uncontrolled heart failure, diabetes, and other chronic illnesses, can also negatively impact sleep patterns.

Effects of Sleep Deficiency

Sleep deficiency encompasses not sleeping enough, not sleeping well, sleeping at the wrong time of day (such as with narcolepsy), or having a sleep disorder that causes poor-quality sleep. Reports indicate that about one-third of Americans do not get sufficient sleep daily. The National Institutes of Health states that an estimated 50 to 70 million Americans have chronic, or ongoing, sleep disorders.​

Lack of sleep contributes to mood disorders, decreased focus and concentration, loss of productivity, injuries, and even an increased risk of death. Sleep deprivation can also lead to weight gain, as individuals may crave calorie-rich foods and opt for unhealthy comfort foods when overtired. Chronic sleep deficiency is linked to long-term health problems, including depression, high blood pressure, diabetes, kidney disease, heart disease, and stroke. It is a myth that people can cope well with little sleep for extended periods without negative effects.

How to Improve Your Sleep

Modern lifestyles, characterized by busyness and stress, often disrupt sleep. Evening screen time and social media usage can interfere with circadian rhythms—the body’s internal clock—especially when sleep and wake times vary. Many people inadvertently develop poor sleep habits, but improvements can be achieved through lifestyle adjustments:​

Maintain a Consistent Sleep Schedule 

Go to bed and wake up at the same time daily, limiting weekend variations to about an hour.​

Create a Pre-Bedtime Routine

Dedicate the hour before bed to quiet activities. Avoid bright screens, loud music, and intense exercise late in the day.​

Watch Your Nighttime Diet 

Avoid large or heavy meals within a few hours of bedtime. A light snack is acceptable, but avoid overindulgence.​

Limit Alcohol Consumption Before Bed

While alcohol may induce drowsiness, it disrupts overall sleep architecture.​

Be Cautious with Nicotine and Caffeine

Both are stimulants that can impair sleep quality. Individual sensitivity varies, so monitor personal responses, especially later in the day.​

Stay Physically Activity

Regular exercise, preferably outdoors, promotes better sleep and overall health.

When to Seek Medical Help for Sleep Issues

If you consistently experience sleep disruptions, it is advisable to make an appointment with your healthcare provider for a comprehensive assessment to determine the root cause of your sleep problems.​

Insomnia is the most common sleep disorder, often caused by lifestyle factors, particularly stress and anxiety. Improving sleep hygiene (as outlined above) and learning stress-reduction techniques can help. Referral to a behavioral health specialist may be necessary if mental health conditions are interfering with sleep.​

While medications are sometimes prescribed for insomnia, they do not address the underlying structure of sleep and primarily induce drowsiness. Over-the-counter medications like Benadryl® (diphenhydramine) are discouraged due to potential links to dementia. Research indicates that, on average, sleep aids provide only about 20 minutes of extra sleep per night, and potential side effects must be considered. It is essential to inform your medical provider about all prescriptions and medications you are taking to ensure they are not contributing to sleep issues.​

If an underlying health condition such as sleep apnea is identified, a referral to a sleep specialist may be necessary. Weight loss often helps correct obstructive sleep apnea. Most sleep disorders are treatable, and addressing them can lead to improved well-being.

Most sleep disorders are treatable. At think, we aim to help you achieve restful sleep and enhance your quality of life. 

Prioritize Sleep for a Healthier Life

Achieving restful sleep is not just a nightly routine; it’s a cornerstone of a healthy, fulfilling life. By understanding the intricacies of sleep and implementing effective strategies, you can transform your nights and, consequently, your days. Embrace the journey toward better sleep, and remember that seeking professional guidance is a proactive step toward overall well-being. At think, we’re here to support you in achieving the restorative sleep you deserve.

READY FOR BETTER SLEEP? CONSIDER THINK YOUR GO-TO FOR ALL OF YOUR MEDICAL NEEDS.

Think is dedicated to keeping you healthy through preventative care and treatment for a wide range of medical conditions. From sleep issues to persistent back pain, our physicians, advanced practice providers and specialists are committed to you and your family’s lifelong health and well-being.

Our walk-in clinic treats anyone, even those who are not a think patient or do not have a primary care provider currently. To learn more about our comprehensive healthcare services, visit our Services page online and choose your own think medical professionals by visiting our Meet Your Doctor page. We help you stay healthy. Visit our self-scheduling page or give us a call at 402.506.9000.

Brighten your table with air fryer orange chicken.

Brighten your table with air fryer orange chicken.

A zesty, nutritious dish that’s light on calories and big on flavor.

As winter lingers and we eagerly anticipate the warmth of spring and summer, it’s the perfect time to enjoy meals that are both comforting and health-conscious. This Air Fryer Orange Chicken offers a delightful combination of crispiness and tangy sweetness, all while being a healthier alternative to traditional takeout. By utilizing the air fryer, we achieve that coveted crunch with significantly less oil, making it a lighter and healthier indulgence.​

Chicken breast serves as a lean protein foundation, supporting muscle health and keeping you satiated. The fresh orange juice not only imparts a natural sweetness but also provides a boost of vitamin C, essential for immune support. A touch of honey replaces refined sugars, offering antioxidants and a more balanced glycemic response. Cooking in the air fryer reduces the need for excessive oil, cutting down on unnecessary fats and calories.​

Let’s dive into this simple yet flavorful recipe that’s sure to become a household favorite.

Prep Time
15 mins
Cook Time
20 mins
Total Time
35 mins

Servings: 4

Ingredients

For the chicken:

  • 1 pound boneless, skinless chicken breasts, cut into 1-inch cubes​
  • 1 tablespoon low-sodium soy sauce​
  • 2 tablespoons cornstarch​
  • 3 tablespoons plain gluten-free breadcrumbs​

For the orange sauce:

  • 2 cloves garlic, minced​
  • 2 teaspoons fresh ginger, grated (or 1/2 teaspoon ground ginger)​
  • 1 tablespoon olive oil​
  • 1 cup fresh orange juice (about 2-3 oranges)​
  • 1 tablespoon orange zest​
  • 1/4 cup honey​
  • 1/4 cup low-sodium soy sauce​
  • 1 tablespoon rice vinegar​
  • 2-3 teaspoons sriracha, adjust to taste​
  • 1 tablespoon cornstarch​
  • 2 tablespoons water

Serve with:

  • Jasmine rice
  • Steamed vegetables like broccoli​, bell peppers, snap peas, or bok choy
  • Green onions and/or sesame seeds for garnish

Instructions

Marinate the Chicken

In a medium bowl, combine the cubed chicken with 1 tablespoon of soy sauce. Let it marinate for about 15 minutes to absorb the flavors.

Prepare the Coating

After marinating, sprinkle 2 tablespoons of cornstarch over the chicken pieces, ensuring each piece is evenly coated.​

Follow by tossing the coated chicken in the gluten-free breadcrumbs, pressing gently to adhere.

Air Fry the Chicken

Preheat your air fryer to 380°F (193°C) for a few minutes.​

Lightly spray the air fryer basket with cooking spray to prevent sticking.​

Arrange the chicken pieces in a single layer in the basket, ensuring they don’t touch. You may need to cook in batches depending on the size of your air fryer.​

Lightly spray the tops of the chicken with cooking spray.​

Cook for 10-14 minutes, flipping halfway through, until the chicken is golden brown and reaches an internal temperature of 165°F (74°C).

Prepare the Orange Sauce

While the chicken cooks, heat 1 tablespoon of olive oil in a saucepan over medium heat.​

Sauté the minced garlic and grated ginger until fragrant, about 1-2 minutes.​

Pour in the fresh orange juice, orange zest, honey, soy sauce, rice vinegar, and sriracha. Stir to combine and bring to a gentle simmer.​

In a small bowl, mix 1 tablespoon of cornstarch with 2 tablespoons of water to create a slurry.​

Slowly whisk the slurry into the simmering sauce. Continue to cook, stirring frequently, until the sauce thickens, approximately 2-3 minutes. Remove from heat and let it cool slightly; it will thicken further as it cools.

Combine and Serve

Once the chicken is cooked and crispy, transfer it to a large bowl.​

Pour about two-thirds of the orange sauce over the chicken, tossing gently to ensure each piece is coated. Reserve the remaining sauce for drizzling.​

Serve immediately over steamed jasmine rice and a side of steamed broccoli or your preferred vegetables. Drizzle extra sauce on top if desired.

Tips

  • Maintain Crispiness To keep the chicken crispy, combine it with the sauce just before serving. If preparing in advance, store the sauce and chicken separately, combining them when ready to eat.​
  • Fresh Orange Juice Using freshly squeezed orange juice enhances the flavor and ensures no added sugars or preservatives.​
  • Adjusting Sweetness and Spice Tailor the sauce to your taste by modifying the amounts of honey and sriracha. For a sweeter sauce, add more honey; for extra heat, increase the sriracha.

​Embracing healthier cooking methods doesn’t mean sacrificing flavor. This Air Fryer Orange Chicken exemplifies how nutritious ingredients and innovative techniques can come together to create a dish that’s both delicious and mindful of your well-being. By opting for lean protein sources and utilizing the air fryer to achieve that satisfying crunch with minimal oil, you’re making a choice that’s good for your taste buds and your health.​ We encourage you to try this recipe and experience firsthand how delightful healthy eating can be!

Heat up dinner with healthy stuffed poblano peppers.

Heat up dinner with healthy stuffed poblano peppers.

A flavorful, nutrient-packed meal with lean protein and bold southwestern flavors.

Looking for a nutritious, satisfying meal that doesn’t skimp on flavor? These Healthy Stuffed Poblano Peppers check all the boxes. Packed with lean ground turkey, black beans, and a delicious blend of spices, they bring bold southwestern flavors to your table while keeping things light and healthy. Plus, they’re easy to customize and perfect for meal prep!

With February being Heart Health Month, it’s a great time to focus on meals that support your well-being. Poblanos are mild, nutrient-rich peppers loaded with antioxidants, while black beans offer a great source of fiber and plant-based protein to support heart health. Using lean ground turkey instead of beef keeps this dish lighter, and a moderate amount of cheese adds just the right amount of indulgence. Whether you’re making this for a weeknight dinner or prepping ahead for a busy week, this dish is sure to be a hit.

Want to add more veggies or adjust the spice level? This recipe is flexible and easy to make your own. Let’s get started.

Prep Time
20 mins
Cook Time
50 mins
Total Time
1 hour 10 mins

Servings: 6

Ingredients

  • 6 poblano peppers, halved and deseeded (gloves recommended!)
  • 1 lb lean ground turkey
  • 1 small onion, diced
  • 4 cloves garlic, minced
  • 2 tsp chili powder
  • 1 tsp dried oregano
  • ¾ tsp ground cumin
  • ¾ tsp black pepper
  • ½ tsp salt
  • 1 (15-oz) can black beans, drained and rinsed
  • ½ cup corn kernels (fresh, canned, or frozen)
  • 1 (16-oz) jar salsa (mild or spicy, your choice)
  • ¼ cup fresh cilantro, chopped
  • 3 oz cotija cheese, crumbled
  • 4 oz sharp cheddar cheese, shredded

Instructions

Preheat the Oven

Preheat the oven to 350°F. Line a large baking sheet with parchment paper.

Prepare the Poblanos

Slice each poblano pepper in half lengthwise and remove the seeds and pith. Arrange them skin-side down on the baking sheet. (Wearing disposable gloves is recommended when handling poblanos.)

Make the Filling

In a large skillet over medium heat, cook the ground turkey for 5-6 minutes, breaking it apart as it browns.

Add onion and garlic, cooking for another 3-4 minutes until the onion softens.

Stir in the chili powder, oregano, cumin, salt, and pepper, mixing well.

Add the black beans, corn, and salsa and stir to combine. Let simmer for 1-2 minutes.

Remove from heat and fold in the chopped cilantro and crumbled cotija cheese.

Stuff and Bake

Spoon the filling evenly into each poblano half, arranging them snugly on the baking sheet.

Bake uncovered for 35-40 minutes until the peppers are tender.

Remove from the oven, sprinkle cheddar cheese over each pepper, and return to the oven for another 10 minutes, or until the cheese is melted.

Serve and Enjoy

Serve warm and enjoy!

Tips

  • Want a softer pepper? Roast the poblanos beforehand to remove the skin and enhance their smoky flavor.
  • Make it dairy-free by skipping the cheese or using a plant-based alternative.
  • Boost the veggies by adding chopped bell peppers or zucchini to the filling.
  • Spice it up with a dash of cayenne or extra jalapeños!

Serving Suggestions

Pair with:

  • Cilantro-lime rice or cauliflower rice for a low-carb option.
  • A fresh avocado and tomato salad.
  • Greek yogurt or sour cream for a creamy topping.

Eating healthy doesn’t have to be boring! These Stuffed Poblano Peppers bring together wholesome ingredients, bold flavors, and an easy-to-make process that fits perfectly into any healthy eating plan. Whether you’re meal-prepping for the week or making a family dinner, this dish is packed with protein, fiber, and nutrients to keep you feeling full and energized.

With so many ways to customize this recipe, it’s sure to become a favorite in your kitchen. Give it a try and enjoy a satisfying meal that’s good for your heart and great for your taste buds. Enjoy!