



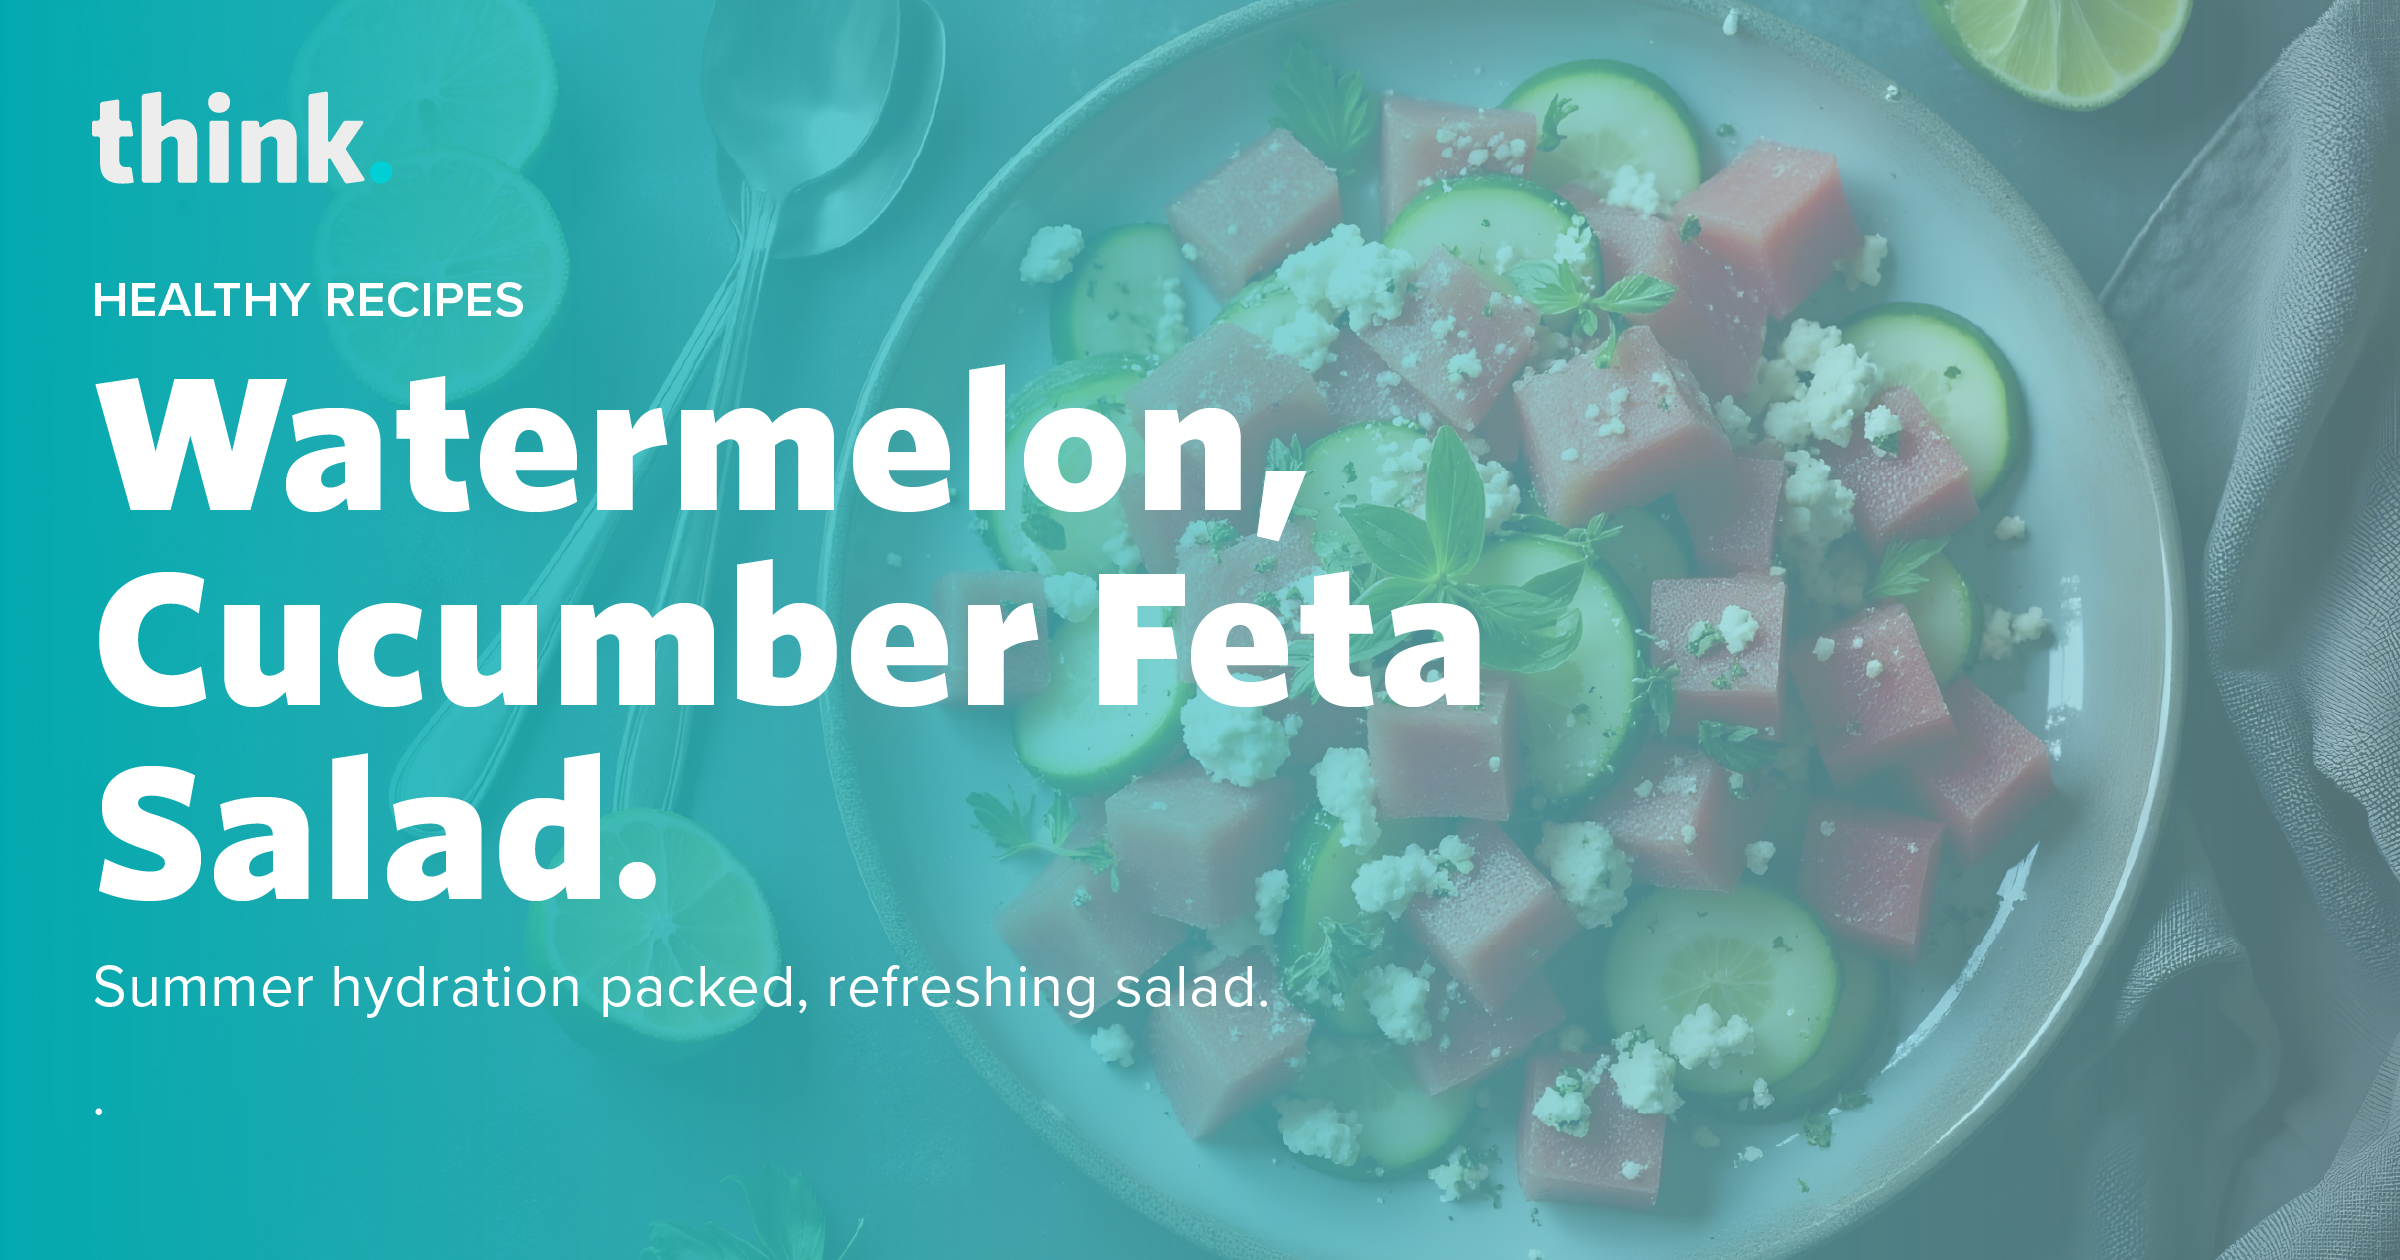
Watermelon, cucumber, feta salad.

A plate of watermelon, cucumber, and feta salad with fresh herbs. Text reads: Watermelon, Cucumber Feta Salad. Summer hydration packed, refreshing salad..

Summer hydration packed, refreshing salad.

The Watermelon, Cucumber, and Feta Salad is a healthy summer choice, primarily due to its hydrating and nutrient-dense ingredients. With both watermelon and cucumber being over 90% water, the salad is a delicious way to support hydration, which is vital for overall health, especially during the warm summer months in Omaha. Beyond its water content, the dish is rich in powerful antioxidants from the watermelon and red onion. It also delivers a strong dose of vitamins, including Vitamin C from the lime juice and Vitamin K from the cucumber, which supports immune function and bone health. Additionally, the feta cheese provides essential protein and calcium, making the salad more filling while also supporting your bone health. What elevates this dish beyond a simple fruit salad is its balanced nutritional profile. 

Prep Time
15 mins
Cook Time
00 mins
Total Time
15 mins

Servings: 4-6

Ingredients

For the Salad:

  • 5 Cups Watermelon
  • 1 Large English Cucumber
  • ¾ cup of crumbled feta cheese
  • ¼ of a medium red onion
  • ½ cup of fresh mint leaves

For the Lime Vinaigrette:

  • 3 tablespoons Olive Oil
  • 2 Limes
  • 1 teaspoon Honey or Agave (Optional)
  • ¼ teaspoon Black Pepper
  • Sea Salt (for taste)

Instructions

Step One: Prepare the Ingredients

Cut Watermelon into 1-inch cubes and chilled, partially peel Cucumbers (in stripes) and cut into bite-sized half-moons, Thinly slice Red Onion, and roughly chop Fresh Mint.

Step Two: Mellow the Onion

Place the thinly sliced red onion in a small bowl of ice water for about 10 minutes while you prepare the other ingredients. This removes some of its harsh bite, leaving a crisp, sweet flavor. Drain well before using.

Step Three: Prepare the dressing

In a small bowl or jar, whisk together the olive oil, fresh lime juice, optional honey, and black pepper until well combined. Set aside.

Step Four: Combine the Salad Ingredients

In a large, shallow serving bowl, gently combine the chilled watermelon cubes, cucumber slices, drained red onion, and most of the fresh mint (save a little for garnish).

Step Five: Dress and Serve Immediately

Just before you are ready to serve, drizzle the lime vinaigrette over the salad. Toss gently until everything is lightly coated. Waiting to dress the salad prevents the watermelon from releasing too much water and keeps the dish crisp.

Step Six: Garnish and Enjoy

Sprinkle the crumbled feta cheese and the remaining fresh mint over the top. Add a pinch of flaky sea salt, if desired. Serve immediately.

Tips

  • Add Some Crunch: For extra texture, consider adding ¼ cup of toasted pistachios or pumpkin seeds.
  • Make it Peppery: Toss the salad with a large handful of fresh arugula for a peppery bite that complements the sweet watermelon.
  • Turn it into a Meal: To make this a more substantial main course, add grilled chicken, shrimp, or a cup of chickpeas.

Herb Variations: While mint is classic, fresh basil or a combination of mint and basil also works beautifully.
A Healthier Buffalo Chicken Dip.

Overhead view of a baked buffalo chicken dip topped with green onions in a white dish, surrounded by dipping sauces and green onion slices. Text overlays promoting a healthier buffalo chicken dip recipe.

A dip with all the classic, tangy taste you love but crafted with lighter, protein-rich ingredients. 

You should never have to choose between a fun, crowd-pleasing appetizer and a healthy option. We crafted a recipe to meet a specific need, a buffalo chicken dip that is both flavorful and health-conscious. Many existing recipes sacrifice nutrition for taste. Our version provides a solution by delivering the classic, satisfying flavor of the original in a more balanced format.

It is a versatile appetizer suitable for any social event or quiet-evenings-in. High in protein, it is a satisfying option that pairs well with crackers, tortilla chips, or fresh vegetables like carrots and celery. This dip allows you to enjoy a favorite snack with confidence.

Prep Time
10 mins
Cook Time
16-20 mins
Total Time
30 mins

Servings: 8

Ingredients

What to buy at the store?

  • 2 12.5 oz cans of chicken or 2.5 cups of finely shredded chicken breasts (or rotisserie chicken)
  • 1 8oz package light cream cheese or Neufchatel, softened.
  • 1/2 cup Franks hot sauce
  • 1/2 cup mozzarella cheese
  • 1/2 cup plain Greek yogurt
  • 1/4 cup chopped green onion
  • 1/2 tsp garlic powder
  • 1/2 tsp onion powder
  • 3/4 cup cheddar cheese for topping
  • optional toppings: green onion, blue cheese

Instructions

Step 1: Prepare Your Oven and Dish

Preheat your oven to 400°F. Grease a baking dish (an 8×8 inch dish works well). If you use a larger dish, you may need to reduce the baking time.

Step 2: Combine the Ingredients

In a large bowl, shred the chicken with a fork. Add the softened cream cheese, hot sauce, mozzarella cheese, and Greek yogurt. Stir these ingredients together until they are well combined.

Step 3: Add Final Ingredients

Mix in the chopped green onion, garlic powder, and onion powder.

Step 4: Bake the Dip

Pour the mixture into your prepared baking dish. Spread it evenly and top with the shredded cheddar cheese. Bake for 16-20 minutes, or until the dip is bubbly and heated through.

Step 5: Serve

You can top the dip with additional green onions or blue cheese if you like. Serve it warm with your choice of accompaniments, such as tortilla chips, celery sticks, or carrot sticks.

Tips

  • For serving, tortilla chips are best, but we also love serving this with celery sticks, bell peppers, and carrots.

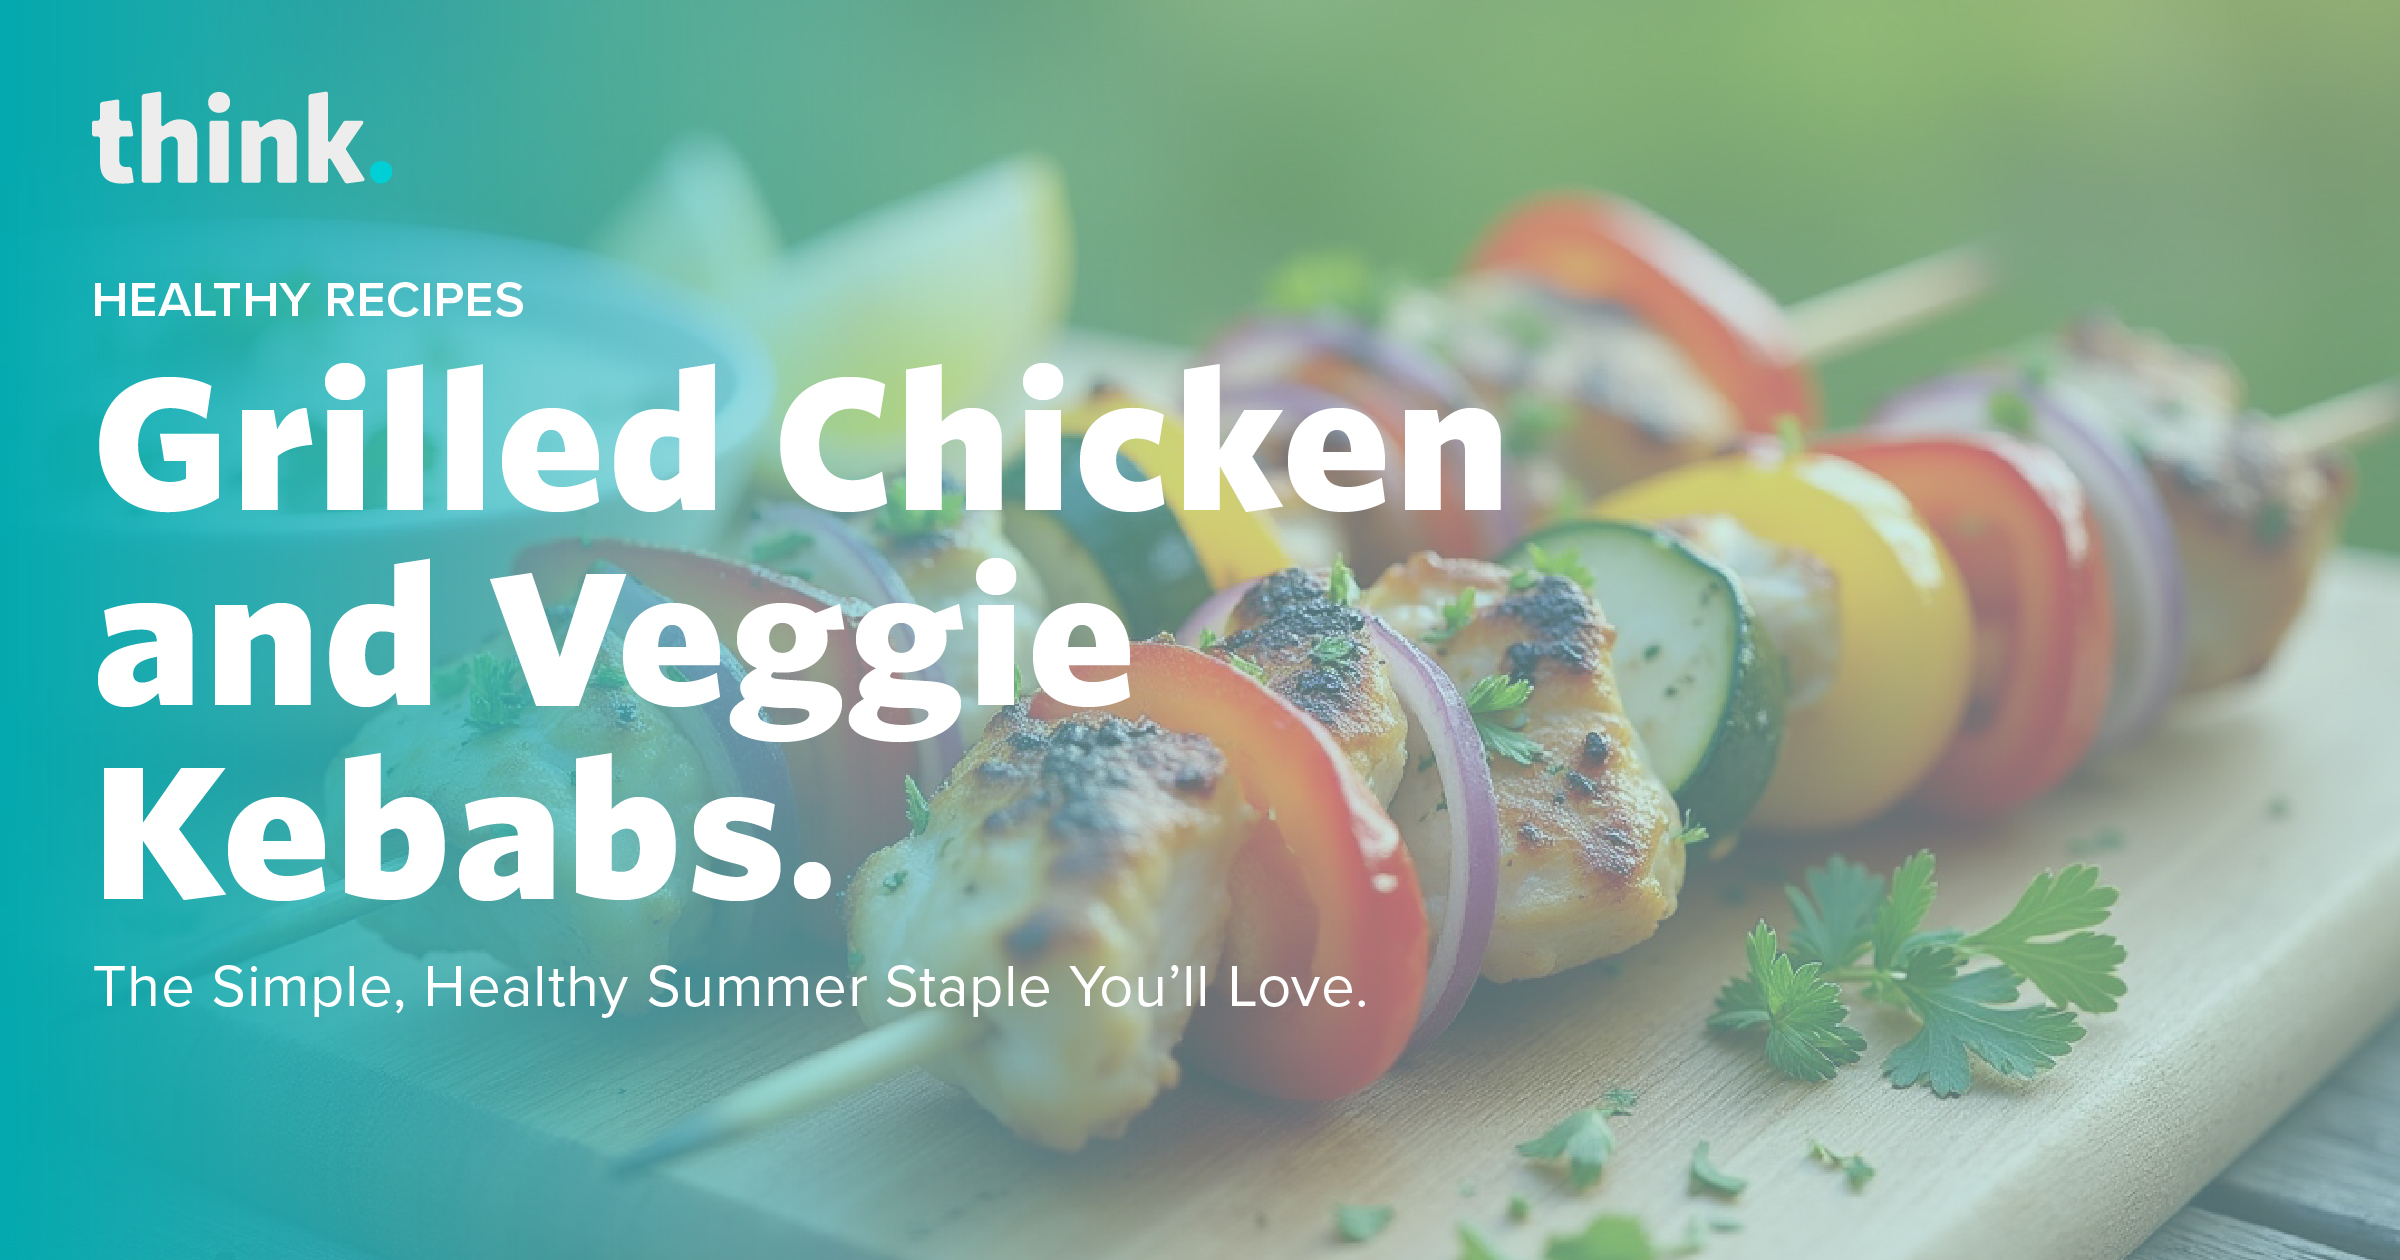
Grilled Chicken and Veggie Kebabs.

Colorful grilled chicken and vegetable kebabs on a wooden board, garnished with fresh herbs. White text reads: Grilled Chicken and Veggie Kebabs. The Simple, Healthy Summer Staple Youll Love..

Kebabs: The Simple, Healthy Summer Staple You’ll Love

As the days get longer and the grill gets hotter, it’s the perfect time to freshen up your meals with something simple, colorful, and full of flavor. These easy-to-make skewers are more than just a backyard barbecue favorite — they’re a balanced, nutrient-packed option that fits seamlessly into a healthy lifestyle. Whether you’re cooking for the family or just yourself, they make healthy eating feel fun, effortless, and delicious.

Prep Time
15 minutes
Cook Time
12–15 minutes 
Total Time
30 mins

Servings: 4

Ingredients

What to buy at the store?

  • 2 boneless, skinless chicken breasts, cut into 1-inch cubes
  • 1 red bell pepper, chopped into chunks
  • 1 yellow bell pepper, chopped into chunks
  • 1 small red onion, cut into wedges
  • 1 zucchini, sliced into thick rounds
  • 1 tablespoon olive oil
  • Juice of 1 lemon
  • 2 cloves garlic, minced
  • 1 teaspoon dried oregano
  • ½ teaspoon smoked paprika
  • Salt and pepper to taste
  • Optional: fresh parsley or tzatziki sauce for serving

Instructions

Step One: Marinate

In a large bowl, mix olive oil, lemon juice, garlic, oregano, paprika, salt, and pepper. Add chicken and toss to coat. Let marinate for at least 30 minutes (or up to 2 hours in the fridge for extra flavor).

Step Two: Assemble

Thread chicken and veggies onto skewers, alternating ingredients for color and balance.

Step Three: Grill

Preheat the grill to medium-high heat. Grill kabobs for 12–15 minutes, turning every few minutes, until the chicken is fully cooked and veggies are slightly charred.

Step Four: Serve

Garnish with fresh parsley or a drizzle of tzatziki sauce. Serve over brown rice or alongside a crisp salad.

Tips

  • Pair your kabobs with a side of brown rice, a light cucumber salad, or hummus for a Mediterranean twist. Add a little lemon and fresh herbs for an extra burst of flavor!

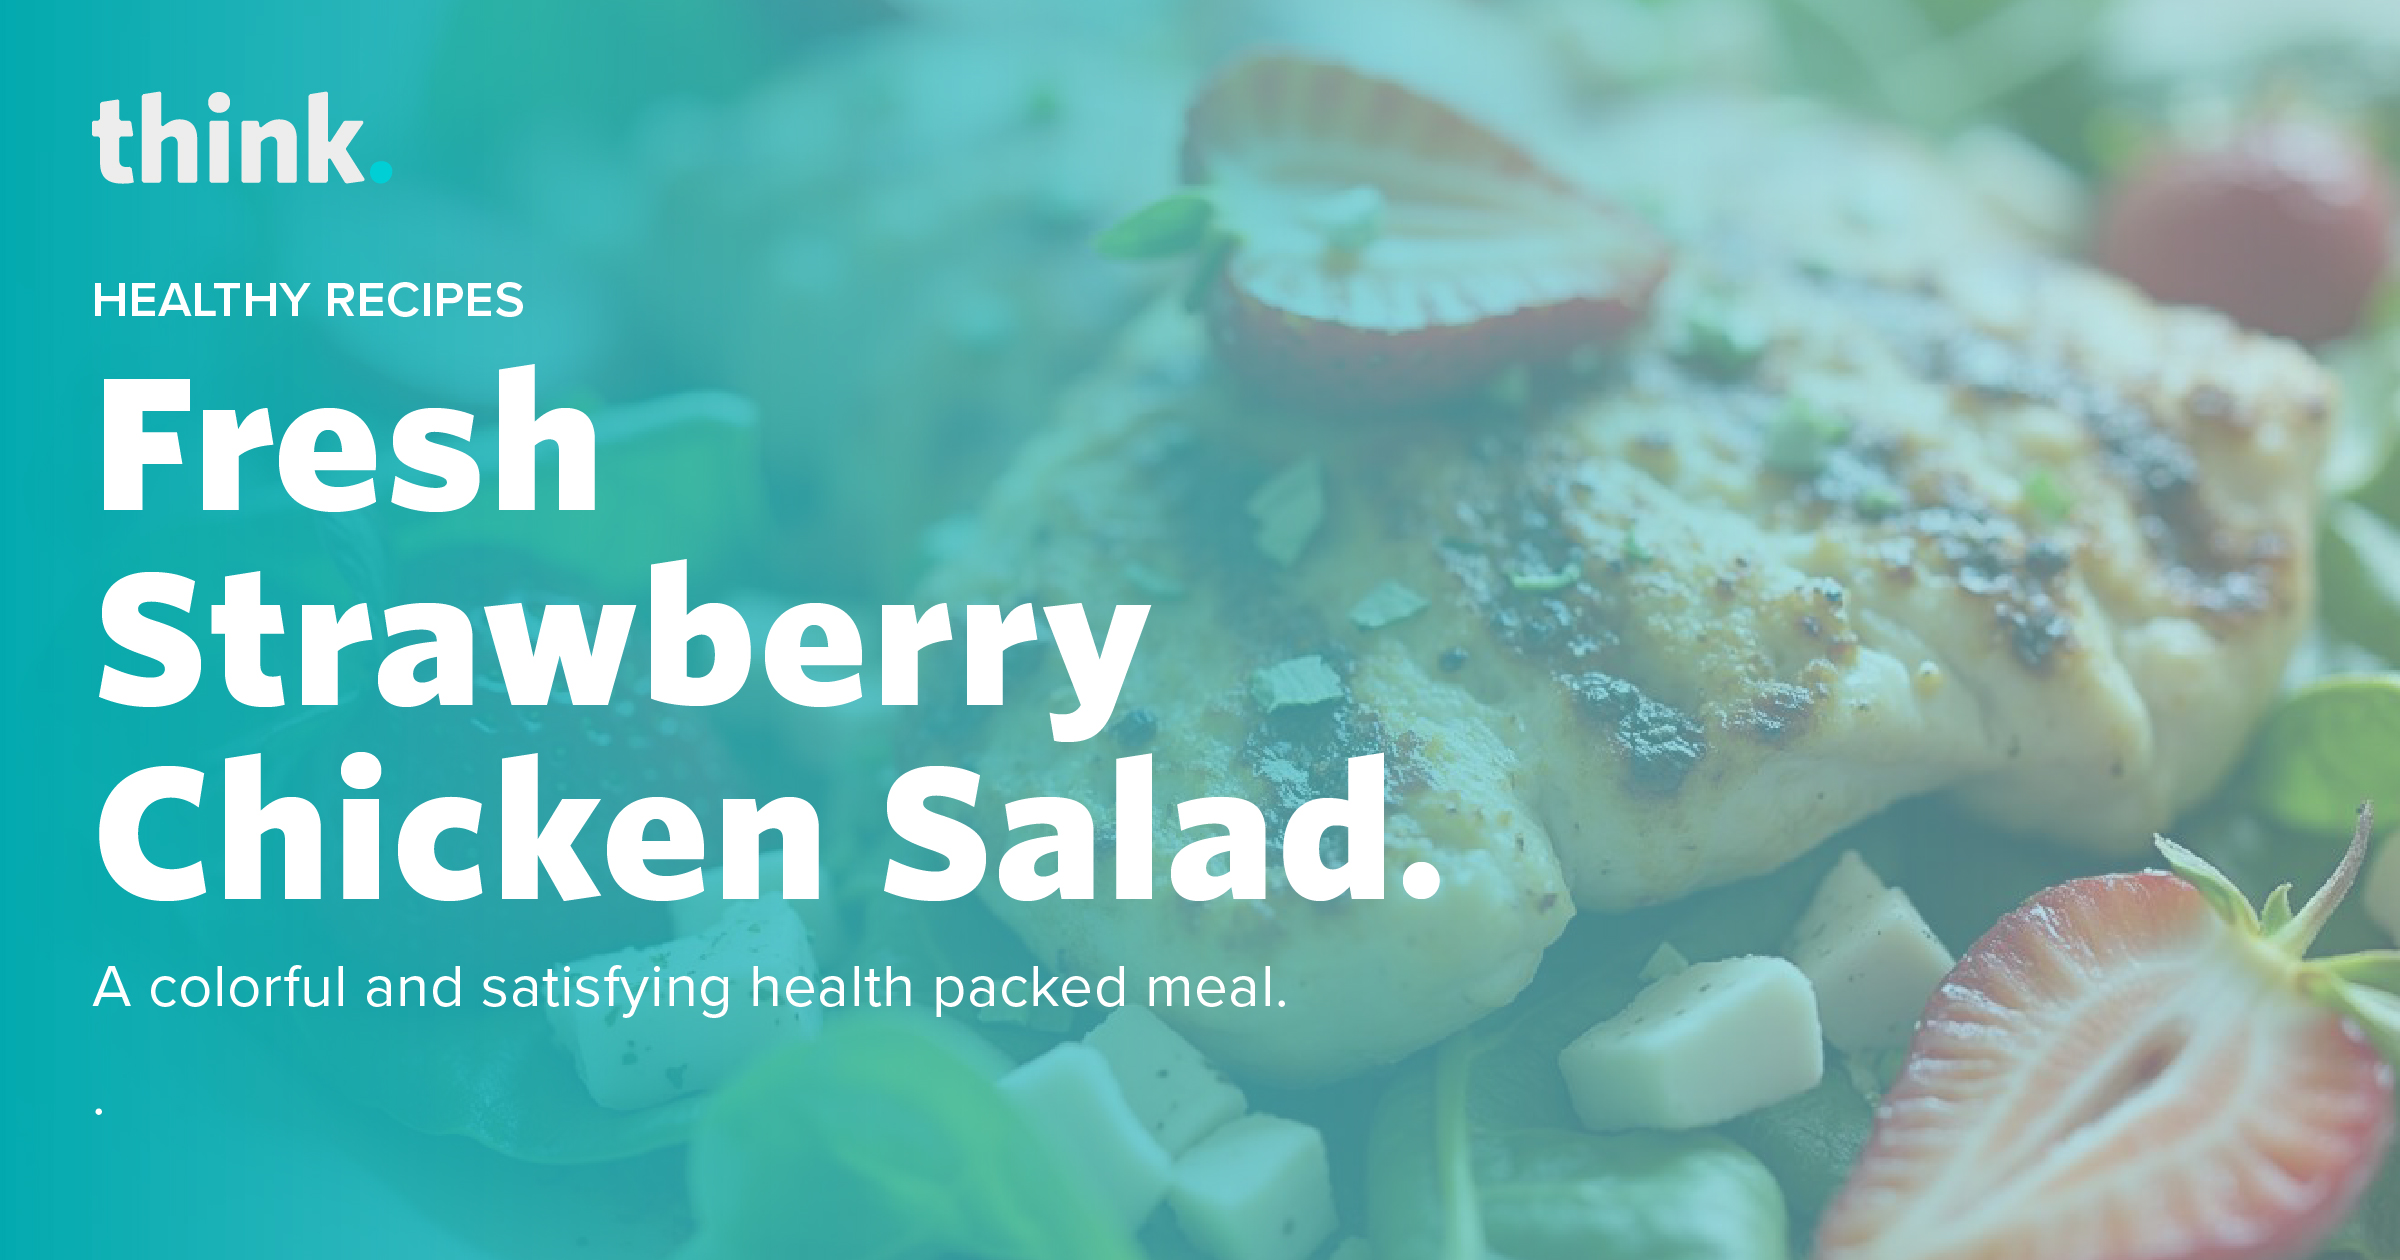
Fresh Strawberry Chicken Salad.

Grilled chicken salad topped with fresh strawberries, spinach, and cheese; overlaid text reads Fresh Strawberry Chicken Salad. A colorful and satisfying health packed meal..

A colorful and satisfying health packed meal.

This colorful and satisfying strawberry chicken salad is a perfect no-cook meal for a warm day. Packed with juicy berries, crunchy almonds, creamy avocado, and lean chicken, all atop a bed of fresh greens, and drizzled with a simple, homemade poppy seed dressing, it’s more than just a tasty meal; it’s a powerhouse of nutrients that support your overall health. The chicken provides high-quality, lean protein for muscle maintenance, helping you feel full and satisfied for longer. You also get a dose of heart-healthy monounsaturated fats from the avocado, olive oil, and almonds, which help support cardiovascular health. The colorful berries and leafy greens are rich in vitamins and antioxidants, including Vitamin C and iron, which help combat inflammation. With plenty of fiber from fruits, greens, and nuts, this salad also supports healthy digestion and helps stabilize blood sugar. Finally, the homemade dressing features a Greek yogurt base, providing protein and probiotics while reducing the calories and unhealthy fats often found in store-bought options.

Prep Time
12 mins
Cook Time
2-3 mins
Total Time
15 mins

Servings: 2-4

Ingredients

For the Salad:

  • 6 cups mixed greens (a combination of spinach and field greens works well)
  • 8 ounces cooked chicken breast, chopped or shredded
  • 1 cup strawberries, sliced
  • ¾ cup blueberries
  • ¾ cup fresh mandarin orange or clementine segments
  • ½ ripe avocado, chopped
  • ¼ cup toasted sliced almonds
  • Optional: ¼ cup crumbled feta, goat cheese, or gorgonzola

For the Homemade Poppy Seed Dressing:

  • ⅓ cup plain Greek yogurt
  • 2 Tbsp extra virgin olive oil
  • 2 Tbsp apple cider vinegar
  • 1 Tbsp honey (or to taste)
  • 1 ½ tsp poppy seeds
  • ¼ tsp salt
  • ¼ tsp ground dry mustard

Instructions

Grilled or Baked Chicken Instructions

Baked Chicken Instructions

Baking is an easy, hands-off method that results in tender, juicy chicken.

  1. Preheat Oven: Set your oven to 400°F (200°C). Line a baking sheet with parchment paper for easy cleanup.
  2. Season: Pat the chicken breasts dry with a paper towel. Drizzle them with a little olive oil and rub it over all sides. Sprinkle generously with salt, pepper, and garlic powder.
  3. Arrange: Place the seasoned chicken on the prepared baking sheet, leaving a little space between each piece.
  4. Bake: Bake for 20-25 minutes. The exact time will depend on the thickness of the chicken.
  5. Check for Doneness: The chicken is done when it is no longer pink inside and the juices run clear. For guaranteed accuracy, use a meat thermometer; the internal temperature should read 165°F (74°C) at the thickest part.
  6. Rest: Transfer the chicken to a cutting board and let it rest for 5-10 minutes before slicing or shredding. This allows the juices to redistribute, keeping the chicken moist.

Grilled Chicken Instructions

Grilling adds a delicious, smoky flavor that compliments the fresh salad ingredients.

  1. Preheat Grill: Heat your grill to medium-high heat, around 400-450°F (200-230°C).
  2. Season: Pat the chicken breasts dry. Lightly coat them with olive oil and season well with salt, pepper, and garlic powder.
  3. Grill: Place the chicken on the clean, oiled grill grates. Cook for 5-7 minutes per side. Avoid pressing down on the chicken, which can squeeze out the juices.
  4. Check for Doneness: The chicken is ready when it has clear grill marks and is firm to the touch. Use a meat thermometer to confirm the internal temperature has reached 165°F (74°C).

Rest: Remove the chicken from the grill and place it on a cutting board. Let it rest for 5-10 minutes before slicing. This resting period is essential for juicy, flavorful grilled chicken.

Salad Instructions

Prepare the dressing.

In a small bowl or jar, whisk together the Greek yogurt, olive oil, apple cider vinegar, honey, poppy seeds, salt, and mustard until smooth. Set aside.

Toast the almonds.

Place sliced almonds in a dry skillet over medium heat. Toast for 2-3 minutes, stirring frequently, until fragrant and lightly golden. This simple step adds a wonderful depth of flavor.

Assemble the salad.

In a large bowl, create a bed of mixed greens. Arrange the chicken, strawberries, blueberries, and mandarin segments over the top.

Serve and enjoy.

Just before serving, add the chopped avocado and toasted almonds to the salad. Drizzle with your desired amount of poppy seed dressing, toss gently, and enjoy immediately.

Tips

  • Add Cheese. Try adding 4 ounces goat cheese, gorgonzola, or feta cheese.
  • Change up the dressing. You could really dress this summer salad with just about anything. Either balsamic or raspberry vinaigrette would be incredible, too.

Creamy Tuscan Flatbread.

A close-up of a cheesy, tomato-topped flatbread garnished with fresh herbs. Overlaid text reads: Creamy Tuscan Flatbread. Savory, cheesy, and satisfyingly crisp will be your new favorite weeknight dinner.

Savory, cheesy, and satisfyingly crisp will be your new favorite weeknight dinner.

These Creamy Tuscan Flatbread are everything you want from a comfort meal, crispy, creamy, savory, and just the right amount of spice. Layers of roasted shallots and bell peppers meet a rich tomato cream sauce, melted mozzarella, and crispy flatbread bases. Perfect for a cozy dinner for two or as a base to customize with chicken strips for extra protein. Quick, flavorful, and satisfying, this recipe might just become your new weeknight go-to.

Prep Time
10 mins
Cook Time
20 mins
Total Time
30 mins

Servings: 2

Ingredients

What to buy at the store?

  • 1 shallot
  • 1 bell pepper
  • 1 clove garlic
  • 2 flatbread
  • 1 tbsp tomato paste
  • 2 tbsp cream cheese
  • 1 tbsp butter
  • ½ tbsp Tuscan Heat Spice (use more if desired)
  • ½ cup shredded mozzarella cheese
  • Olive oil
  • Kosher salt
  • Black pepper

Optional: Chicken breast strips (about 5–6 oz), cooked and sliced for topping

Instructions

Step One: Prep the Ingredients and Preheat the Oven

​​Preheat your oven to 450°F and adjust the racks to the top and middle positions. Wash and dry the produce.

  • Halve, peel, and cut the shallot into wedges.
  • Halve, core, and slice the bell pepper into thin strips.
  • Peel and finely chop the garlic.

Step Two: Roast the Veggies

On a baking sheet, toss the shallot and bell pepper with a large drizzle of olive oil, half the Tuscan Heat Spice, salt, and pepper. Spread them out in a single layer and roast on the top rack for 13–15 minutes, until softened and lightly browned.

Step Three: Toast the Flatbread

Meanwhile, place the flatbread on a second baking sheet and rub the tops with a large drizzle of olive oil. Toast on the middle rack for 5–7 minutes, until golden and crispy at the edges. (If doubling the recipe, use two sheets or toast in batches.)

Step Four: Optional – Cook the Chicken

If you’re adding chicken: Pat the chicken dry with paper towels and season all over with salt and pepper. Heat a drizzle of oil in a large pan over medium-high heat. Add the chicken in a single layer and cook, stirring occasionally, for 4–6 minutes or until browned and cooked through. Transfer to a plate and set aside.

Step Five: Make the Creamy Tomato Sauce

In a medium pan over medium-high heat, melt 1 tbsp butter. Add the chopped garlic and remaining Tuscan Heat Spice. Sauté for about 1 minute until fragrant. Stir in 1 tbsp tomato paste to coat. Add ¼ cup water and 2 tbsp cream cheese, stirring until smooth. Simmer for 2–3 minutes until slightly thickened. Season with salt and pepper to taste. (Use the same pan from the chicken, if making.)

Step Six: Assemble the Flatbread

Once the flatbread are toasted, remove from the oven. Spread each flatbread with a generous layer of creamy tomato sauce. Top with the roasted veggies and shredded mozzarella. Return to the oven for 3–5 minutes, until the cheese is melted and bubbling.

Optional: Add cooked chicken strips on top with the veggies.

Step Seven: Serve and Enjoy

Slice the flatbread into wedges and divide between plates. Enjoy your crispy, cheesy, flavor-packed Tuscan feast!

Tips

  • Want more greens? Try topping with a handful of fresh arugula after baking.
  • No chicken? No problem—this dish is hearty and satisfying as a vegetarian meal.
  • Add a pinch of red pepper flakes for a little kick.

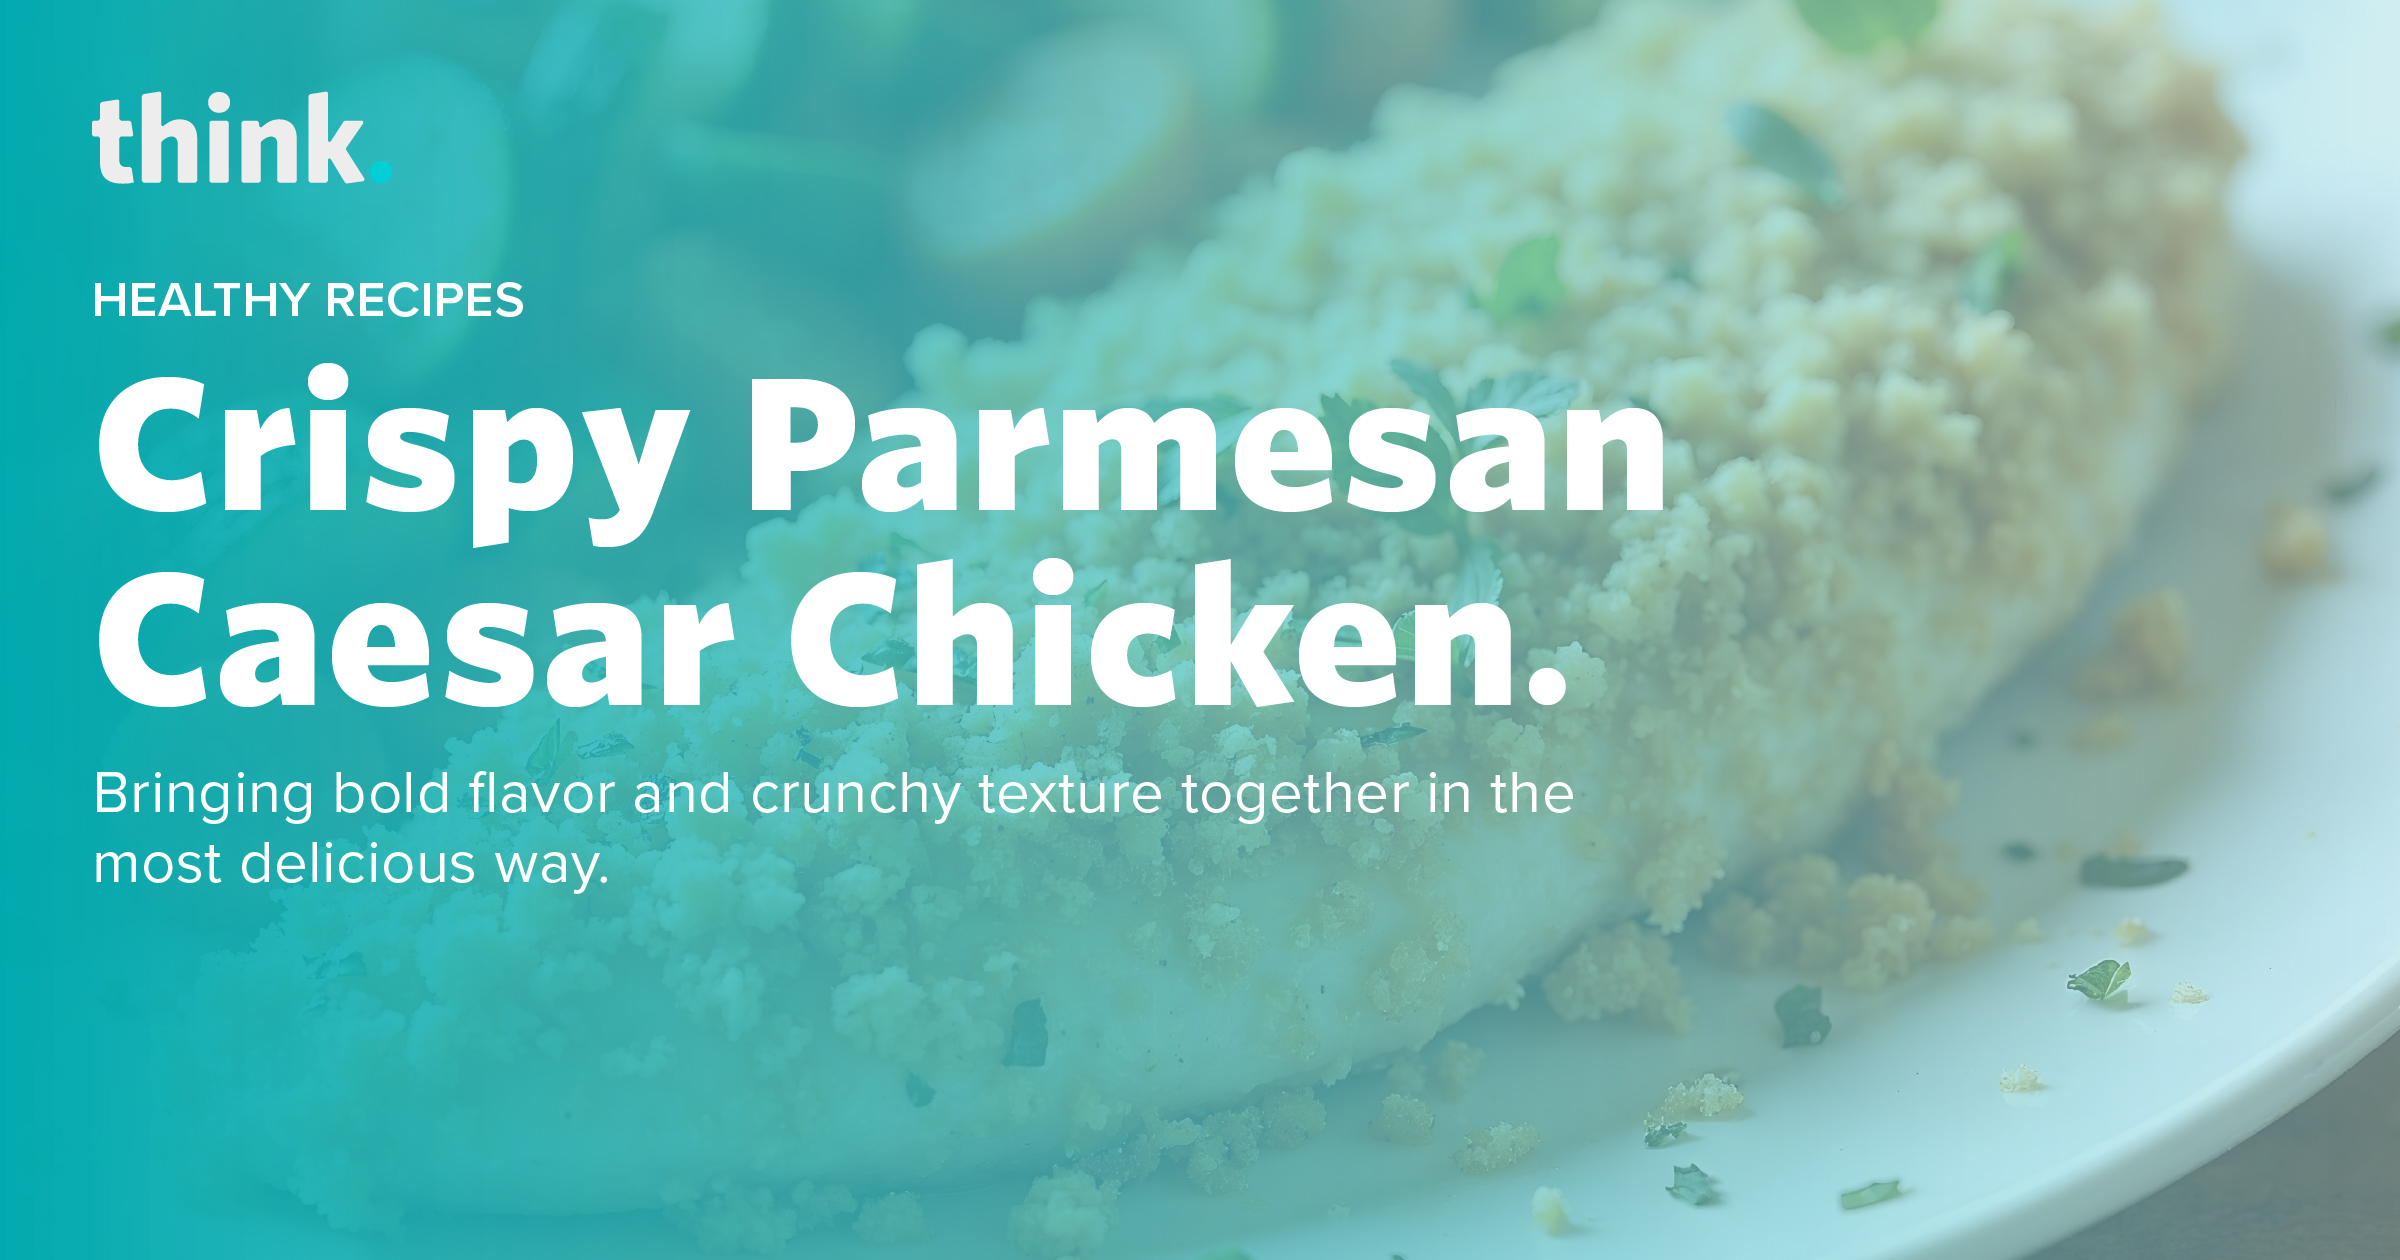
Crispy Parmesan Caesar Chicken.

A close-up of a breaded chicken breast topped with parmesan crumbs on a white plate, with the text: Crispy Parmesan Caesar Chicken. Bringing bold flavor and crunchy texture together in the most delicious way.

Crispy, golden chicken meets delicious creamy Caesar dressing.

The Crispy Parmesan Caesar Chicken isn’t your average chicken dinner. It brings bold flavor and crunchy texture together in the most delicious way. Tender chicken is covered with a creamy Caesar-sour cream blend, coated in cheesy panko breadcrumbs, and oven-roasted to perfection. Served alongside a colorful medley of roasted carrots and zucchini, this dish is quick to make, bursting with flavor, and destined to be a weeknight favorite. Whether cooking for two or treating yourself, it’s comfort food with a vibrant, gourmet twist. 

Prep Time
10 mins
Cook Time
20 mins
Total Time
30 mins

Servings: 2

Ingredients

  • 2 medium carrots
  • 1 Zucchini
  • 10 oz Chicken Breasts
  • ¼ cup panko breadcrumbs
  • ¼ cup Parmesan cheese
  • 1 tbsp butter 
  • 2 tbsp Caesar dressing
  • 2 tbsp Sour Cream
  • Cooking Oil
  • Kosher Salt
  • Black Pepper
  • Optional: Lemon zest (for added brightness
  • Optional: Green beans or broccoli (about ½ cup, trimmed and chopped

Instructions

Step One: Prep the Ingredients and Preheat the Oven

Preheat your oven to 425°F and adjust the rack to the top position. Wash and dry the carrots and zucchini (and any optional green veggies). Peel the carrots and slice them on a diagonal into ½-inch pieces. Halve the zucchini lengthwise, then slice into ½-inch half-moons. If using green beans or broccoli, trim and cut into bite-sized pieces. Pat the chicken dry with paper towels and season both sides with salt and pepper.

Step Two: Build the Topping

Place the butter in a small microwave-safe bowl and microwave for about 30 seconds until melted. In the same bowl, mix in the panko breadcrumbs and Parmesan cheese. Season the mixture with a pinch of salt and pepper. If you have a lemon on hand, zest a bit into the mixture for a fresh, citrusy note.

Step Three: Make the Creamy Caesar Sauce

In another small bowl, combine the Caesar dressing and sour cream. Stir until smooth. This sauce will be used both for flavoring the chicken and for serving.

Step Four: Start Roasting the Vegetables

On one side of a large baking sheet, toss the sliced carrots and zucchini with a drizzle of cooking oil, salt, and pepper. Spread them out in a single layer.

Place the sheet in the oven and roast for 5 minutes to get them started.

Step Four: Start Roasting the Vegetables

On one side of a large baking sheet, toss the sliced carrots and zucchini with a drizzle of cooking oil, salt, and pepper. Spread them out in a single layer.

Place the sheet in the oven and roast for 5 minutes to get them started.

Step Five: Prepare the Chicken

While the vegetables begin roasting, take the seasoned chicken and spread about 1 teaspoon of the creamy Caesar sauce on the top of each piece (save the rest for serving). Press the panko-Parmesan mixture onto the sauced side of the chicken, gently pressing so it sticks.

Step Six: Roast the Chicken and Finish the Veggies

After the vegetables have roasted for 5 minutes, remove the baking sheet from the oven. Carefully place the prepared chicken cutlets on the empty side of the sheet.

If you’re using green beans or broccoli, add them now to the veggie side and toss with a little oil, salt, and pepper.

Return the sheet to the oven and continue roasting everything for another 12 to 15 minutes, or until the chicken is cooked through (internal temperature reaches 165°F) and the vegetables are golden and tender.

Step Seven: Serve the Dish

Transfer the crispy Caesar chicken and roasted vegetables to plates. Spoon some of the remaining Caesar-sour cream sauce over the chicken or serve it on the side for dipping.

Enjoy your crispy, creamy, and veggie-packed meal!

Tips

  • You can substitute the sour cream for Greek Yogurt for a low-fat and low-calorie version.

Tomato Linguine with Kale & Lemon Garlic Sauce

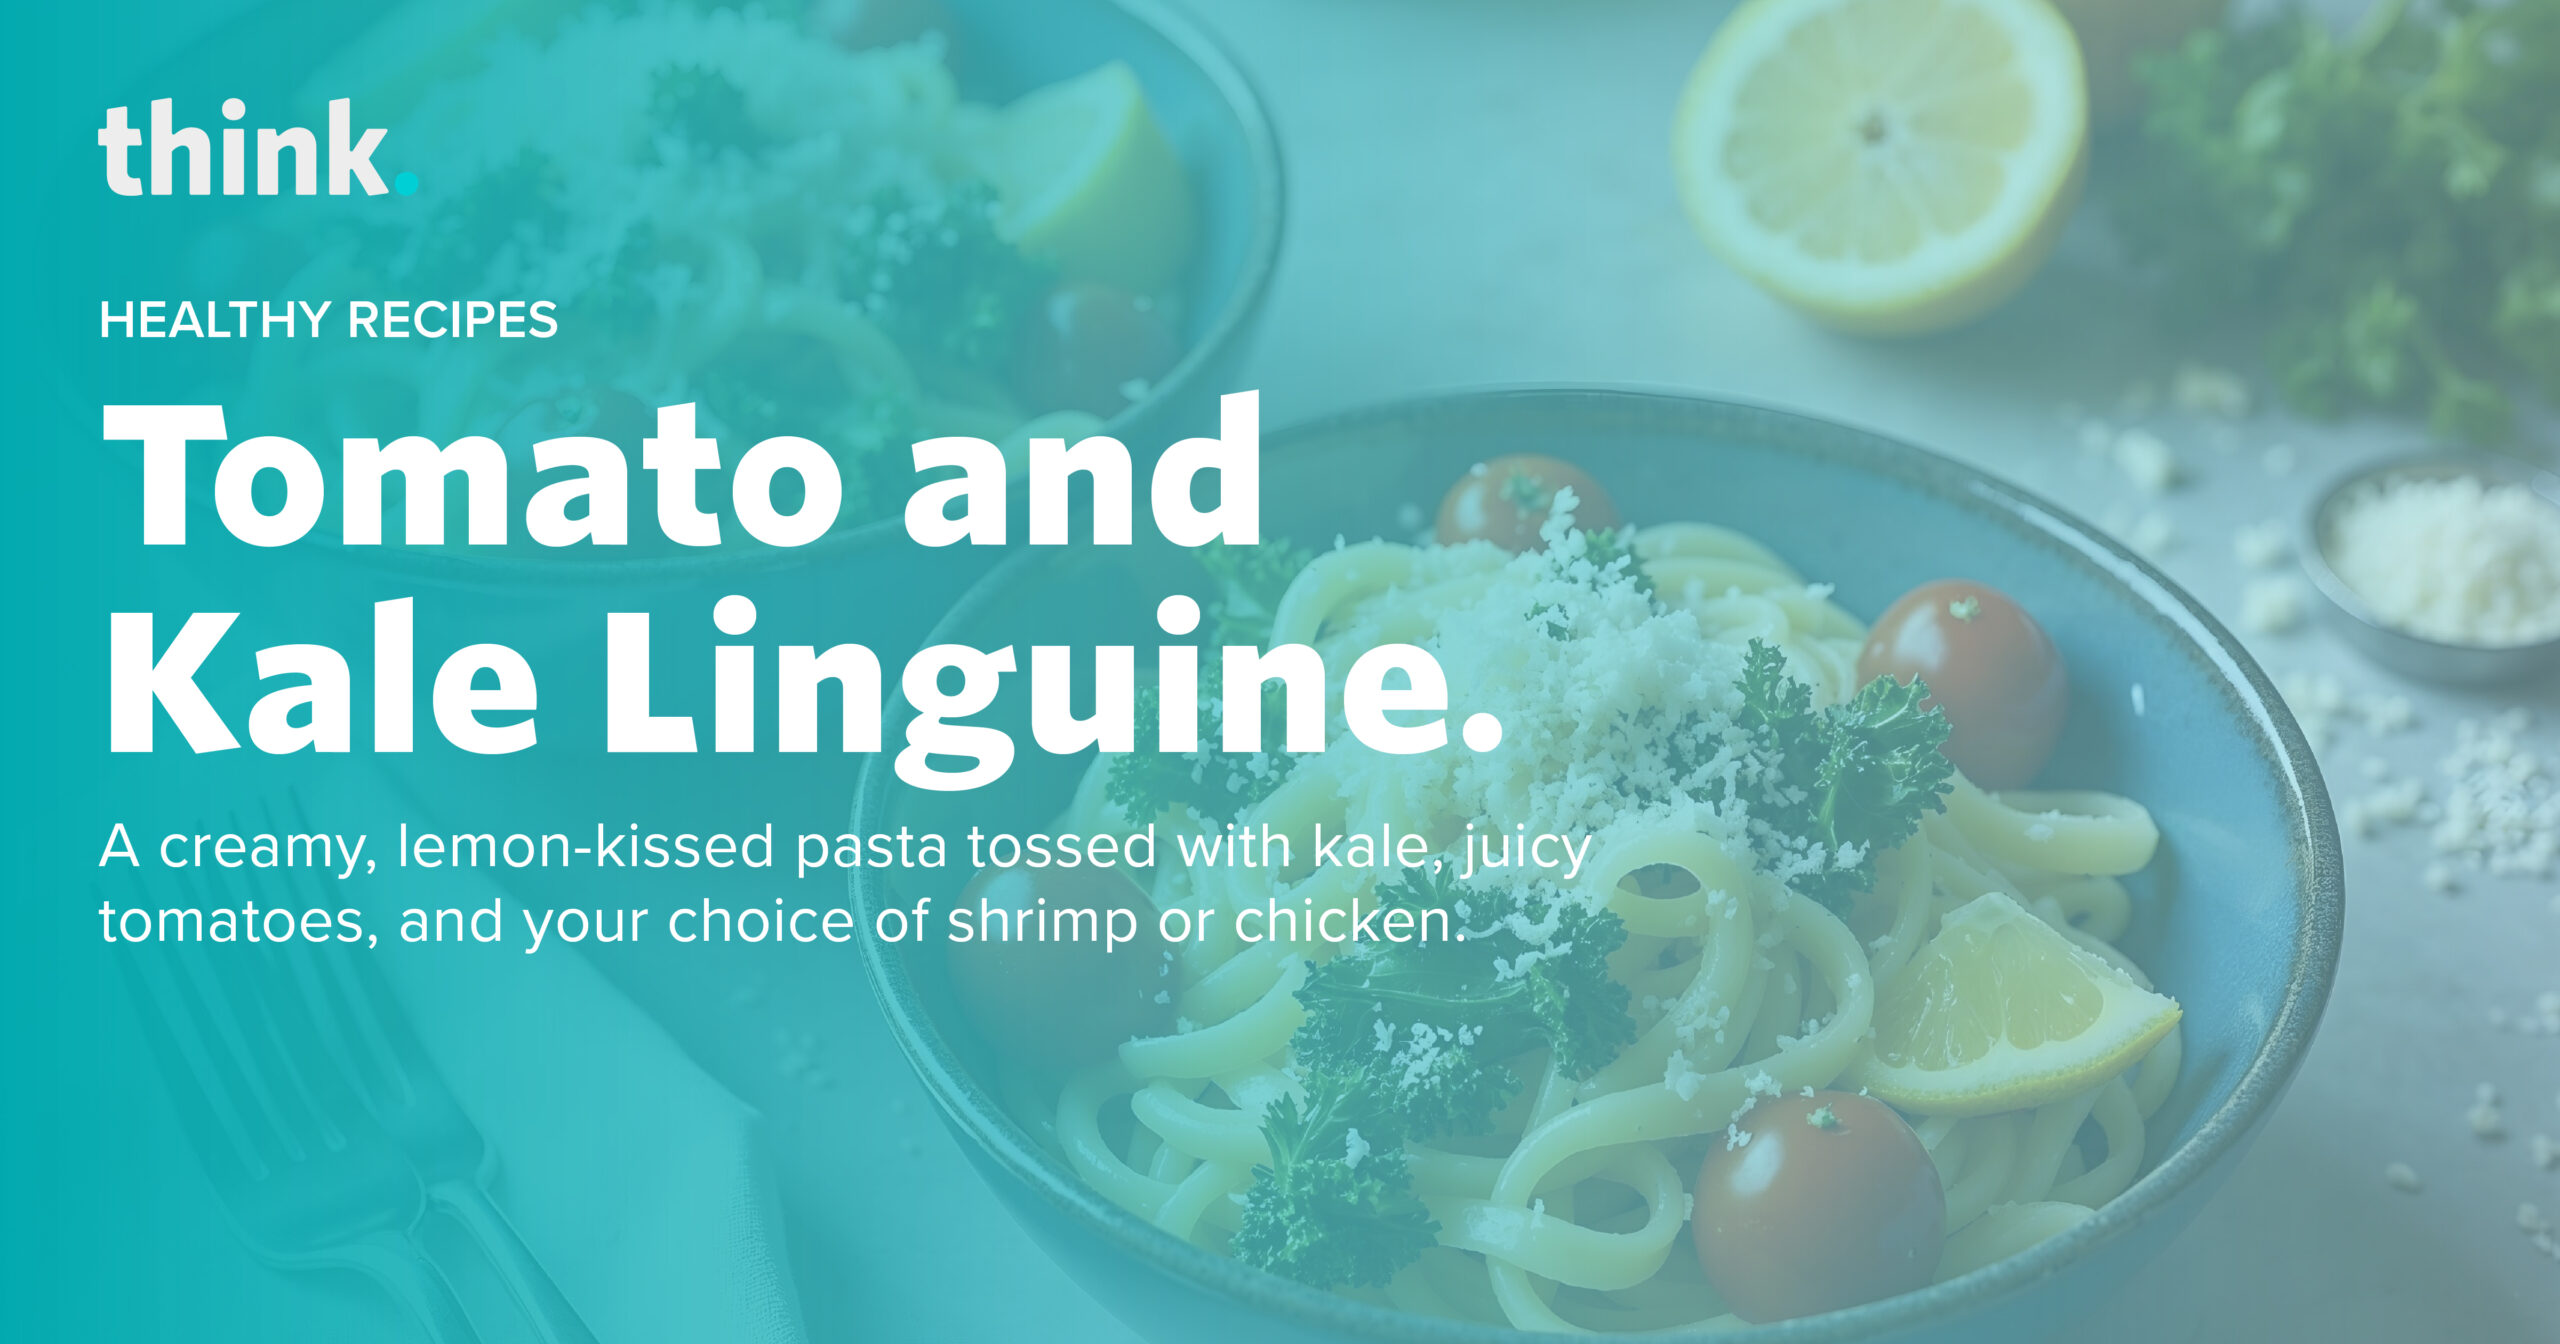
A bowl of linguine pasta with cherry tomatoes, kale, and grated cheese, garnished with parsley. Lemon slices and another bowl of pasta are in the background. Overlaid text reads: Tomato and Kale Linguine..

A creamy, lemon-kissed pasta tossed with kale, juicy tomatoes, and your choice of shrimp or chicken.

There’s something undeniably satisfying about a big bowl of creamy pasta, but this one goes beyond your everyday comfort food. This linguine dish is rich and refreshing, bursting with juicy grape tomatoes and tender kale, and layered with bold garlic flavor. Cream cheese and Parmesan create a silky sauce that hugs every strand of pasta, while a splash of lemon adds just the right amount of brightness to balance the richness.

Whether you are craving a cozy dinner after a long day or looking to elevate your weekly meal rotation, this recipe is the perfect go-to. It’s easy to make it your own with flexible protein options like sautéed shrimp or chicken. And thanks to simple prep and a quick cooking time, you can get a restaurant-worthy meal on the table without the fuss.

Prep Time
10 mins
Cook Time
20 mins
Total Time
30 mins

Servings: 2

Ingredients

  • 1 small bunch of Kale (2-3 cups chopped)
  • 2 Garlic Cloves
  • 1 Cup Grape Tomato
  • 1 Lemon
  • 17.6 oz Linguine Pasta (1 Package)
  • 1 tsp Italian Seasoning
  • 2 oz Cream Cheese (¼ of an 8oz block)
  • Shredded Parmesan
  • Koshers Salt
  • Black Pepper
  • 1 tsp Cooking Oil
  • 2 tbsp butter
  • Optional: Shrimp or Chicken Breast Strips

Instructions

Step One: Prepare Ingredients & Start Water

First, wash the tomatoes, kale, and lemon and pat them dry. Fill a large pot with salted water and boil it on the stove. While the water heats up, prepare the other ingredients: halve the tomatoes, peel and finely chop the garlic, remove large stems from the kale and roughly chop the leaves, and finally, zest the lemon and cut it into quarters.

Step Two: Cook the Linguine

Once the pot of water reaches a boil, add the linguine. Let it cook for 9 to 11 minutes, stirring it occasionally, until it’s al dente (tender but still a bit firm). Before you drain the pasta, carefully scoop out and save ⅔ cup of the cooking water (use 1 cup if you’re making 4 servings). After saving the water, drain the pasta well.

Step Three: Cook the Vegetables

As the pasta cooks, heat a drizzle of oil in a large pan over medium heat. Add the halved tomatoes and cook them for about a minute, stirring now and then, until they start to look blistered. Next, add the chopped garlic, kale, half of the Italian seasoning, salt, and pepper to the pan. Continue cooking and stirring for another 2 to 3 minutes until the garlic smells fragrant and the kale has softened a bit.

Step Four: Simmer the Sauce Base

Pour ½ cup of the saved pasta water into the pan with the vegetables (use ⅔ cup if making 4 servings). Bring this mixture to a simmer and let it cook for 2 to 3 minutes. The vegetables should become tender, and the liquid should reduce by about half during this time.

Step Five: Finish the Sauce and Combine

Now, stir the cream cheese into the pan with the vegetables. Keep stirring until the cream cheese melts completely and mixes in smoothly. Turn the heat down to low. Add the drained linguine, a pinch of lemon zest, half of the Parmesan cheese, and 2 TBSP butter (use 4 TBSP for 4 servings) to the pan. Season it with salt and pepper to your liking.

Step Six: Toss and Adjust

Gently toss everything together in the pan until the pasta is evenly coated in the creamy sauce. If the sauce seems too thick, add a small splash of the saved pasta water and toss again. Repeat this step with small amounts of water until the sauce has the consistency you prefer. Finally, stir in fresh lemon juice from the wedges, adding as much as you’d like for taste.

Step seven: Serve the Dish

Divide the finished tomato linguine among your serving bowls. Sprinkle the remaining Parmesan cheese over the top of each portion. Serve the pasta immediately, with any leftover lemon wedges placed on the side for anyone who wants extra lemon juice.

Turkey Bacon Egg Muffins

A close up of turkey bacon egg muffins on a light board, with text overlay about healthy recipes and breakfast tips for busy mornings.

A Breakfast Helper for Busy Mornings.

School mornings can feel like a rush. Getting everyone ready and out the door on time is challenging enough, let alone making sure they eat a decent breakfast. That’s where Turkey Bacon Egg Muffins can be a superhero. Think of them like mini omelets or crustless quiches conveniently baked in a muffin tin.

What makes them useful for busy families? You can bake a whole batch over the weekend or whenever you have a bit more time. Keep them in the fridge, and then on those chaotic weekday mornings, you have a ready-to-go breakfast. Just warm one up quickly in the microwave, and it’s ready to eat – perfect for grabbing on the way out the door if needed!

Kids often enjoy these because you can mix in things they enjoy. For example, cheese is usually a winner, and maybe some ham or bacon bits are also a winner. It’s also a simple way to add small amounts of vegetables like spinach or finely chopped peppers. The eggs provide protein to help keep them feeling full until lunch. Plus, since they’re already in single servings, they’re easy for kids to handle and eat without much mess.

Prep Time
15 mins
Cook Time
20 mins
Total Time
35 mins

Servings: 12

Ingredients

What to buy at the store?

  • Cooking spray
  • 3 slices turkey bacon
  • 1 small yellow onion, chopped
  • 1 red bell pepper, chopped
  • 1/2 cup chopped baby spinach
  • 6 large eggs
  • 2 tablespoons milk
  • 1/2 cup shredded mozzarella cheese
  • 1/2 teaspoon garlic powder
  • 1/4 teaspoon paprika
  • Kosher salt, to taste
  • Freshly ground black pepper, to taste

Instructions

Step One: Get it started.

Preheat your oven to 375°F (190°C). Spray a 12-cup muffin tin well with cooking spray.

Step Two: Cook the bacon.

Cook the turkey bacon in a skillet over medium heat until crisp. Remove bacon from the skillet, let it cool slightly, and then crumble or chop it. If desired, you can quickly sauté the chopped onion and red bell pepper in the same skillet for a few minutes until slightly softened.

Step Three: Combine the Ingredients.

In a large bowl, whisk together the eggs, milk, garlic powder, paprika, salt, and pepper until well combined. Stir the cooked bacon, sautéed onion and pepper (if using, otherwise add raw), chopped spinach, and shredded mozzarella into the egg mixture.

Step Four: Set the stage.

Pour the egg mixture evenly into the prepared muffin cups, filling each about three-quarters full.

Step Four: Bake until golden.

Bake for 15-20 minutes, or until the eggs are set and lightly golden around the edges. A toothpick inserted into the center should come out clean.

Step Four: Let it all cool.

Let the muffins cool in the tin for a few minutes before removing them. You can run a thin knife or spatula around the edges to help loosen them if needed.

Serve warm or let cool completely before storing.

Tips

  • Changing the Ingredients: You can adjust the ingredients in these muffins. For example, you can use other types of cheese like cheddar or Monterey Jack instead of mozzarella. Different vegetables, such as scallions, kale, or tomatoes, can be used. You could also add cooked bacon, ham, or mushrooms. Feel free to change the seasonings based on your preference.
  • Cooling the Muffins: To prevent the muffins from becoming too moist from trapped steam, do not let them cool completely in the muffin tin. Instead, let them rest in the tin for about five minutes after baking. This helps them firm up slightly so they are easier to remove. Then, take the muffins out of the tin and place them on a wire rack to finish cooling.

Protein-packed pasta salad.

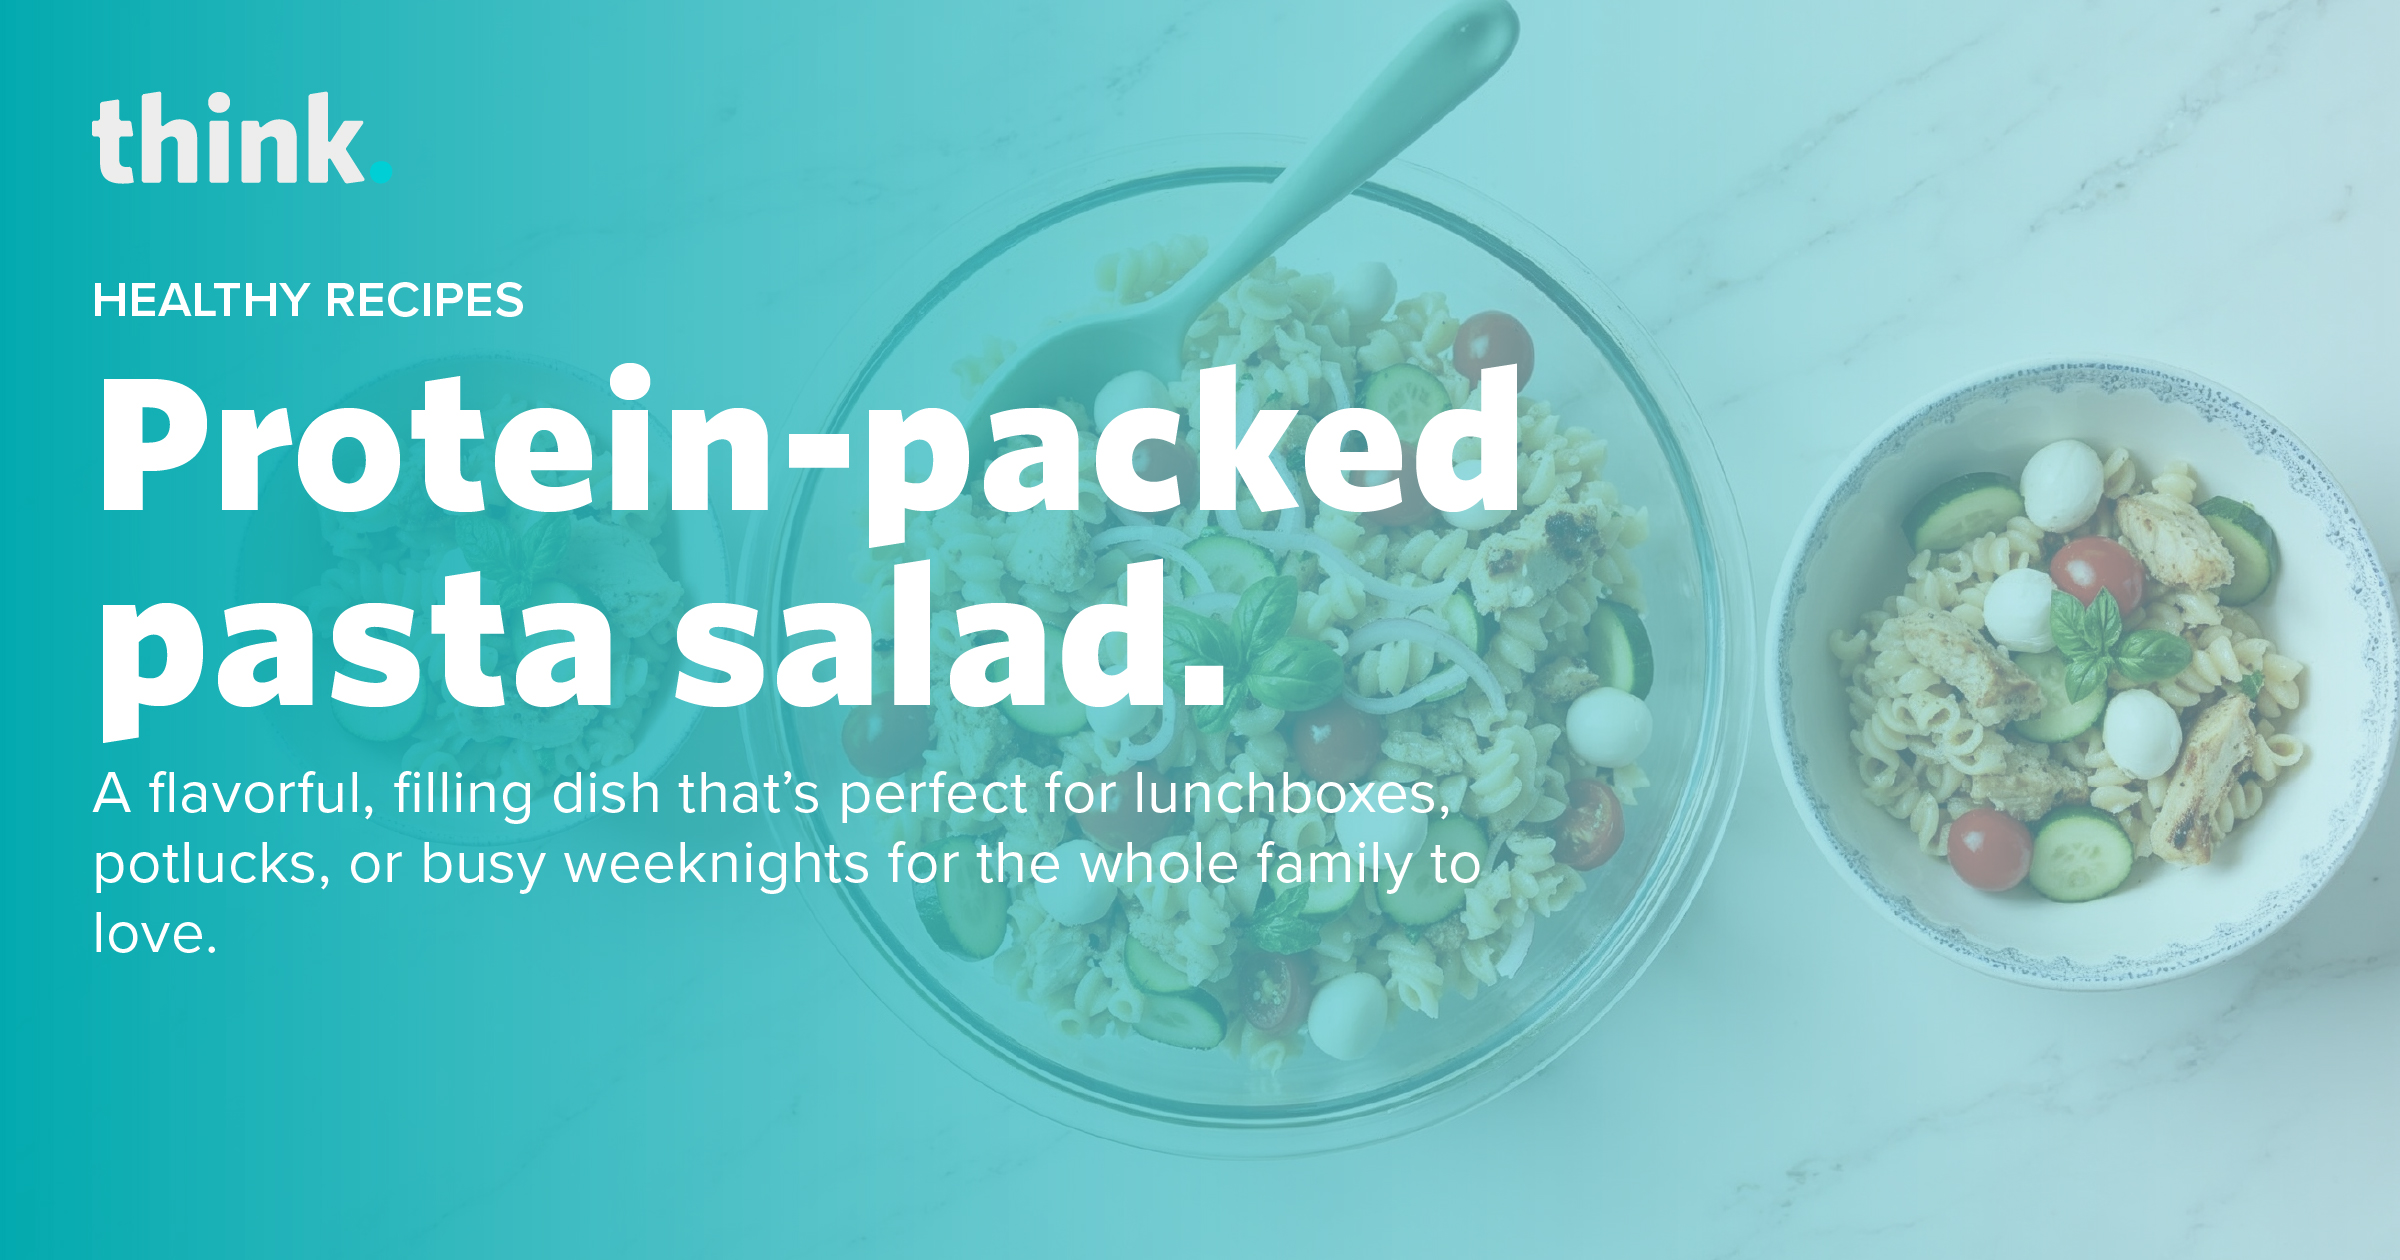
Two bowls of colorful pasta salad with tomatoes, cheese, and greens sit on a table. Overlaid text promotes a healthy, protein-packed pasta salad recipe for lunchboxes, potlucks, or busy weeknights.

A flavorful, filling dish that’s perfect for lunchboxes, potlucks, or busy weeknights for the whole family to love.

There’s something comforting about a big bowl of pasta salad—especially when it’s packed with bold flavor, vibrant veggies, and protein to keep everyone feeling full and satisfied. The high-protein pasta salad delivers fresh ingredients, balanced nutrition, and a great flavor that keeps you coming back for another bite.

This pasta salad checks all the boxes from prepping lunches for the week to throwing together a quick dinner, or looking for something that will actually get eaten at your next family gathering. It’s easy to customize, tastes great cold or at room temp, and offers several protein options including vegetarian-friendly white beans and feta. Plus you can easily swap ingredients like adding salmon, turkey, or tofu instead of chicken.

Get ready for a new go-to in your meal rotation.

Prep Time
15 mins
Cook Time
10 mins
Total Time
25 mins

Servings: 6-8

Ingredients

For the Salad:

  • 10 oz pasta (elbows, farfalle, or rotini work well)
  • 1 can (15 oz) cannellini or great northern beans, drained and rinsed
  • 1 ½ cups cherry tomatoes, halved
  • 1 cup diced cooked chicken, salmon, or turkey or 1 cup cubed extra-firm tofu (pressed and baked)
  • ½ cup crumbled feta, goat cheese or cubed mozzarella
  • ¼ cup fresh basil, thinly sliced

For the Dressing:

  • ⅓ cup extra-virgin olive oil
  • 1 tablespoon white wine vinegar or lemon juice
  • 2 cloves garlic, smashed
  • ½ teaspoon salt
  • Fresh ground black pepper, to taste

Instructions

Step One: Marinate the Flavor Base

In a large bowl, combine cherry tomatoes, garlic, basil, olive oil, salt, and vinegar or lemon juice. Stir well and set aside for 15–20 minutes so the flavors can meld.

Step Two: Cook the Pasta

After marinating, sprinkle 2 tablespoons of cornstarch over the chicken pieces, ensuring each piece is evenly coated.​ Follow by tossing the coated chicken in the gluten-free breadcrumbs, pressing gently to adhere.

Step Three: Air Fry the Chicken

Cook chicken till internal temperature reaches 165º F. Meanwhile, bring a large pot of salted water to a boil. Cook pasta according to package directions until al dente. Drain and rinse under cool water to stop the cooking process.

Step Four: Remove Garlic, Mix the Salad

Discard the garlic cloves from the tomato mixture. Add in the cooked pasta, white beans, chosen protein, and cheese. Gently toss until everything is evenly coated with the dressing. Add a bit of black pepper to taste.

Step Five: Serve and Enjoy

Serve immediately at room temperature, or refrigerate and let the flavors deepen. This dish holds up well for several days, making it perfect for leftovers and meal prep.

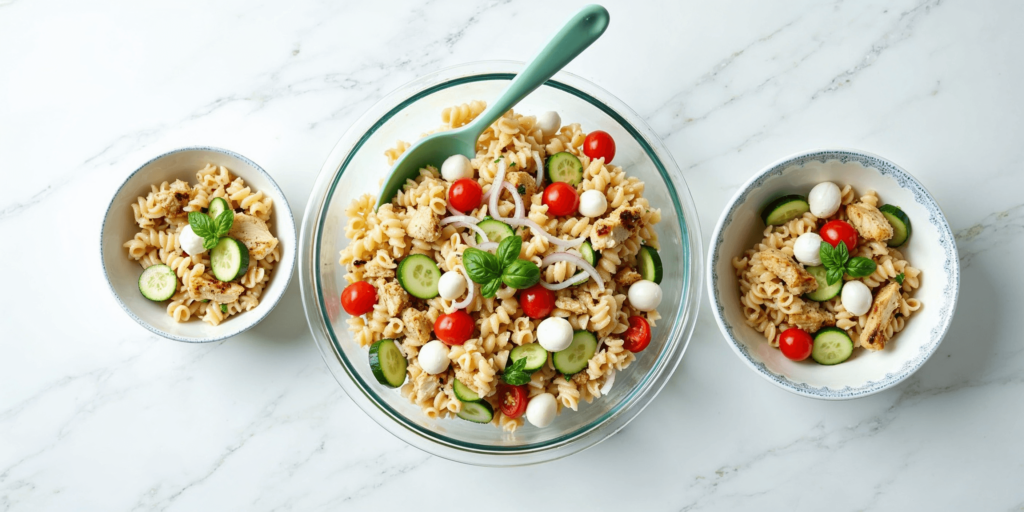
A large bowl and two smaller bowls of pasta salad with cherry tomatoes, mozzarella balls, cucumber slices, and fresh basil, on a white marble surface.

Tips

  • Involve the Kids: To appeal to younger palettes, consider using fun-shaped pasta like wagon wheels or bowties. Involving kids in the preparation by letting them choose and add their favorite veggies or proteins can make them more excited to enjoy the meal.
  • Make it Vegetarian: Skip the meat and double up on white beans, or use tofu or a plant-based meat substitute for extra protein. ​Incorporate vegetables that your children enjoy, such as sliced bell peppers, cucumbers, or peas. It not only boosts the nutritional value but also makes the salad more appealing to kids.
  • Protein Swaps We Love: Rotisserie chicken, smoked salmon, grilled turkey, roasted chickpeas, or baked tofu all work well.
  • Pasta Picks: Go for short pasta shapes like rotini or farfalle—they mix well with the other ingredients and are easy for little hands to manage. Gluten-free and bean-based pastas are great alternatives for added fiber and protein.
  • Dairy-Free Version: Skip the cheese and add roasted sunflower seeds for a little crunch and extra nutrients.

Embrace the ease of a chilled meal that satisfies and energizes. This high-protein pasta salad is proof that simple ingredients, when thoughtfully combined, can be both nourishing and delicious. It’s a recipe the whole family will ask for again and again—no matter the season.

Brighten your table with air fryer orange chicken.

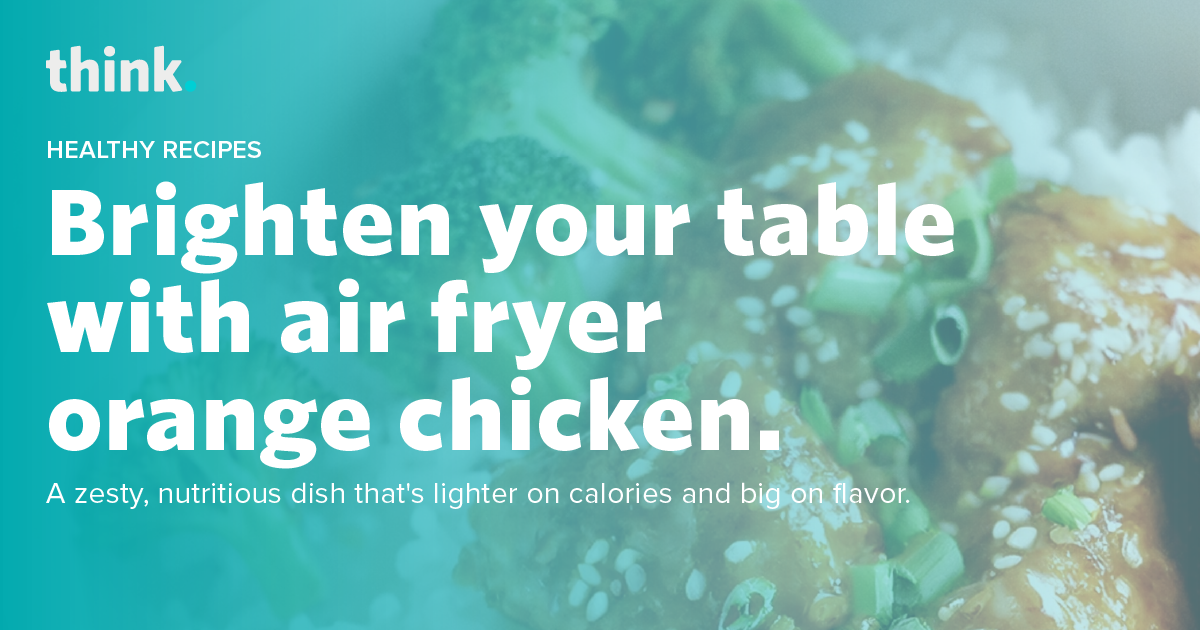
A plate of air fryer orange chicken garnished with green onions, served over white rice. Text reads: Brighten your table with air fryer orange chicken..

A zesty, nutritious dish that’s light on calories and big on flavor.

As winter lingers and we eagerly anticipate the warmth of spring and summer, it’s the perfect time to enjoy meals that are both comforting and health-conscious. This Air Fryer Orange Chicken offers a delightful combination of crispiness and tangy sweetness, all while being a healthier alternative to traditional takeout. By utilizing the air fryer, we achieve that coveted crunch with significantly less oil, making it a lighter and healthier indulgence.​

Chicken breast serves as a lean protein foundation, supporting muscle health and keeping you satiated. The fresh orange juice not only imparts a natural sweetness but also provides a boost of vitamin C, essential for immune support. A touch of honey replaces refined sugars, offering antioxidants and a more balanced glycemic response. Cooking in the air fryer reduces the need for excessive oil, cutting down on unnecessary fats and calories.​

Let’s dive into this simple yet flavorful recipe that’s sure to become a household favorite.

Prep Time
15 mins
Cook Time
20 mins
Total Time
35 mins

Servings: 4

Ingredients

For the chicken:

  • 1 pound boneless, skinless chicken breasts, cut into 1-inch cubes​
  • 1 tablespoon low-sodium soy sauce​
  • 2 tablespoons cornstarch​
  • 3 tablespoons plain gluten-free breadcrumbs​

For the orange sauce:

  • 2 cloves garlic, minced​
  • 2 teaspoons fresh ginger, grated (or 1/2 teaspoon ground ginger)​
  • 1 tablespoon olive oil​
  • 1 cup fresh orange juice (about 2-3 oranges)​
  • 1 tablespoon orange zest​
  • 1/4 cup honey​
  • 1/4 cup low-sodium soy sauce​
  • 1 tablespoon rice vinegar​
  • 2-3 teaspoons sriracha, adjust to taste​
  • 1 tablespoon cornstarch​
  • 2 tablespoons water

Serve with:

  • Jasmine rice
  • Steamed vegetables like broccoli​, bell peppers, snap peas, or bok choy
  • Green onions and/or sesame seeds for garnish

Instructions

Marinate the Chicken

In a medium bowl, combine the cubed chicken with 1 tablespoon of soy sauce. Let it marinate for about 15 minutes to absorb the flavors.

Prepare the Coating

After marinating, sprinkle 2 tablespoons of cornstarch over the chicken pieces, ensuring each piece is evenly coated.​

Follow by tossing the coated chicken in the gluten-free breadcrumbs, pressing gently to adhere.

Air Fry the Chicken

Preheat your air fryer to 380°F (193°C) for a few minutes.​

Lightly spray the air fryer basket with cooking spray to prevent sticking.​

Arrange the chicken pieces in a single layer in the basket, ensuring they don’t touch. You may need to cook in batches depending on the size of your air fryer.​

Lightly spray the tops of the chicken with cooking spray.​

Cook for 10-14 minutes, flipping halfway through, until the chicken is golden brown and reaches an internal temperature of 165°F (74°C).

Prepare the Orange Sauce

While the chicken cooks, heat 1 tablespoon of olive oil in a saucepan over medium heat.​

Sauté the minced garlic and grated ginger until fragrant, about 1-2 minutes.​

Pour in the fresh orange juice, orange zest, honey, soy sauce, rice vinegar, and sriracha. Stir to combine and bring to a gentle simmer.​

In a small bowl, mix 1 tablespoon of cornstarch with 2 tablespoons of water to create a slurry.​

Slowly whisk the slurry into the simmering sauce. Continue to cook, stirring frequently, until the sauce thickens, approximately 2-3 minutes. Remove from heat and let it cool slightly; it will thicken further as it cools.

Combine and Serve

Once the chicken is cooked and crispy, transfer it to a large bowl.​

Pour about two-thirds of the orange sauce over the chicken, tossing gently to ensure each piece is coated. Reserve the remaining sauce for drizzling.​

Serve immediately over steamed jasmine rice and a side of steamed broccoli or your preferred vegetables. Drizzle extra sauce on top if desired.

Tips

  • Maintain Crispiness To keep the chicken crispy, combine it with the sauce just before serving. If preparing in advance, store the sauce and chicken separately, combining them when ready to eat.​
  • Fresh Orange Juice Using freshly squeezed orange juice enhances the flavor and ensures no added sugars or preservatives.​
  • Adjusting Sweetness and Spice Tailor the sauce to your taste by modifying the amounts of honey and sriracha. For a sweeter sauce, add more honey; for extra heat, increase the sriracha.

​Embracing healthier cooking methods doesn’t mean sacrificing flavor. This Air Fryer Orange Chicken exemplifies how nutritious ingredients and innovative techniques can come together to create a dish that’s both delicious and mindful of your well-being. By opting for lean protein sources and utilizing the air fryer to achieve that satisfying crunch with minimal oil, you’re making a choice that’s good for your taste buds and your health.​ We encourage you to try this recipe and experience firsthand how delightful healthy eating can be!