



Cold-pressed Watermelon Lime popsicles

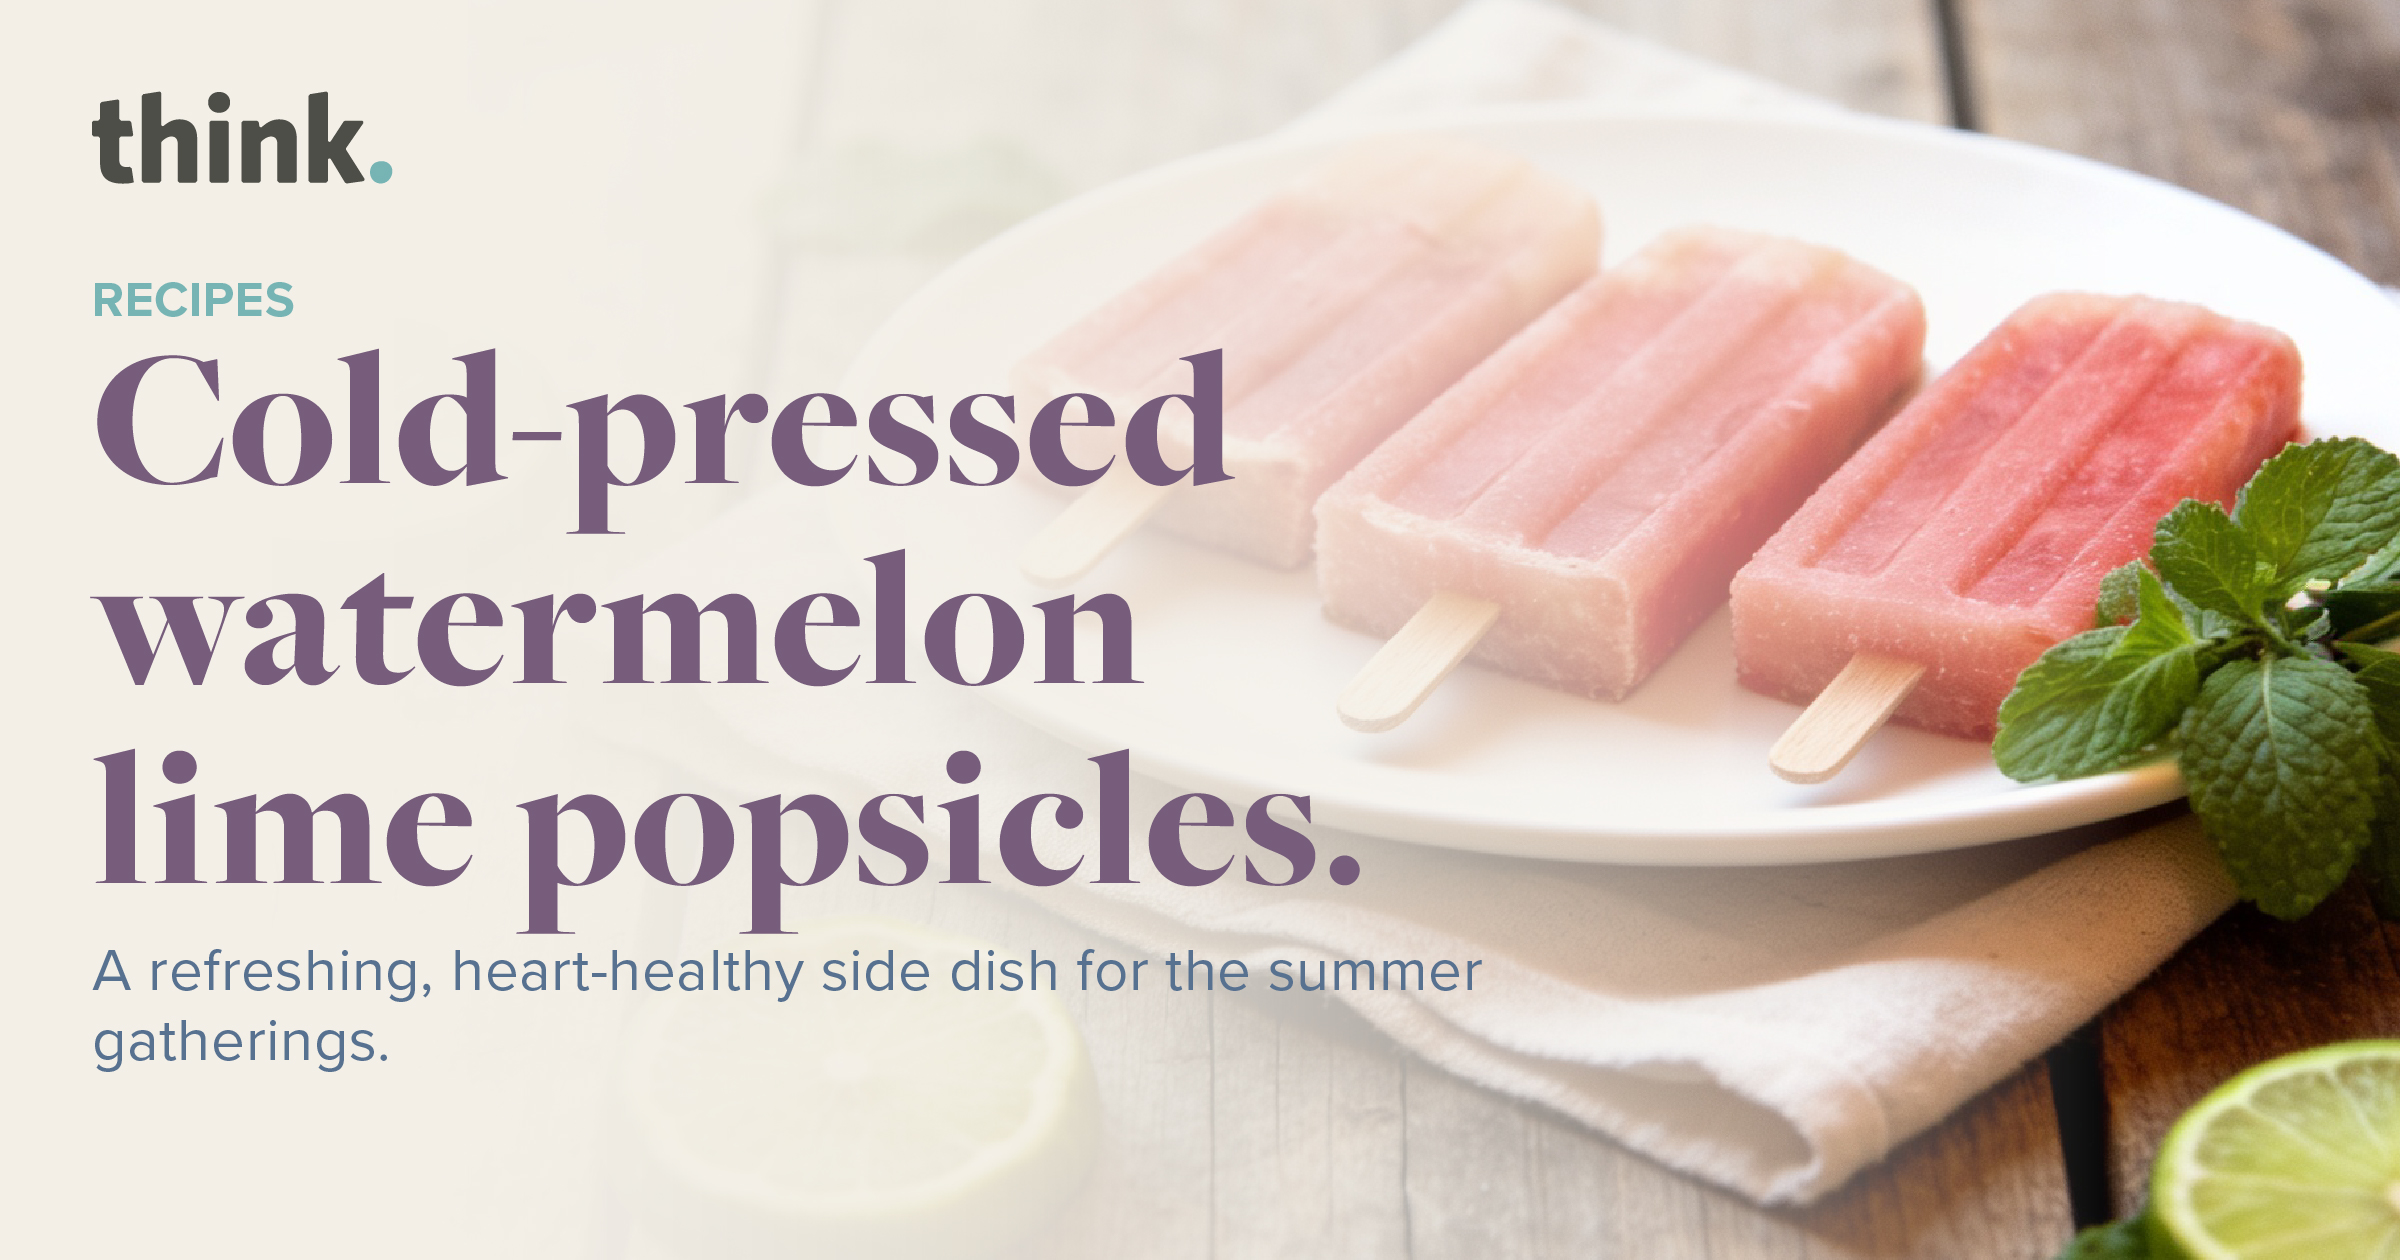
Three pink popsicles rest on a white plate next to fresh mint and lime slices. Text reads: Cold-pressed watermelon lime popsicles, a refreshing, heart-healthy side dish for summer gatherings.

Maintaining proper fluid balance is essential when dealing with heavy summer heat. This refreshing, cold-pressed popsicle recipe serves as an exceptional alternative to store-bought frozen treats, providing clean hydration and electrolyte support without introducing refined sugars or artificial additives.

Prep Time
10 minutes
Cook Time
4 – 6 hours
Total Time
6 Hours

Serving Size: 4–6 Popsicles (depending on mold size)


Ingredients

  • 4 cups Fresh watermelon, cubed and seeded
  • 1 tbsp Fresh lime juice (roughly half a lime)
  • 1 tsp Lime zest, finely grated
  • 1 pinch Sea salt
  • Optional: 4–6 Fresh mint leaves, finely chopped

Cook Steps

Step 1: Blend the Base

Place the fresh watermelon cubes, lime juice, and a small pinch of sea salt into a high-speed blender. Blend on high for 30–45 seconds until the mixture is completely liquefied and smooth.

Step 2: Incorporate Texture and Herbs

Stir in the finely grated lime zest and the optional chopped fresh mint leaves by hand. This ensures the herbs and zest are evenly distributed throughout the liquid without being pulverized.

Step 3: Pour into Molds

Carefully pour the liquid mixture into your preferred popsicle molds, leaving about a quarter-inch of space at the top to allow for natural expansion as the liquid freezes.

Step 4: Insert Sticks and Freeze

Secure the lids on your molds and insert the wooden popsicle sticks. Place the molds in the flattest section of your freezer for 4 to 6 hours, or until the popsicles are completely solid.

Step 5: Unmold and Serve

To remove the popsicles easily, run the outside of the plastic molds under warm water for 10–15 seconds. Gently slide the popsicle out of the mold and serve immediately.


Tips for Success

If you are looking to add a clean source of protein or healthy fats to this treat, you can fill the popsicle molds halfway with the watermelon mixture, freeze for two hours, and then layer the remaining half with plain, unsweetened Greek yogurt or coconut milk before finishing the freeze.
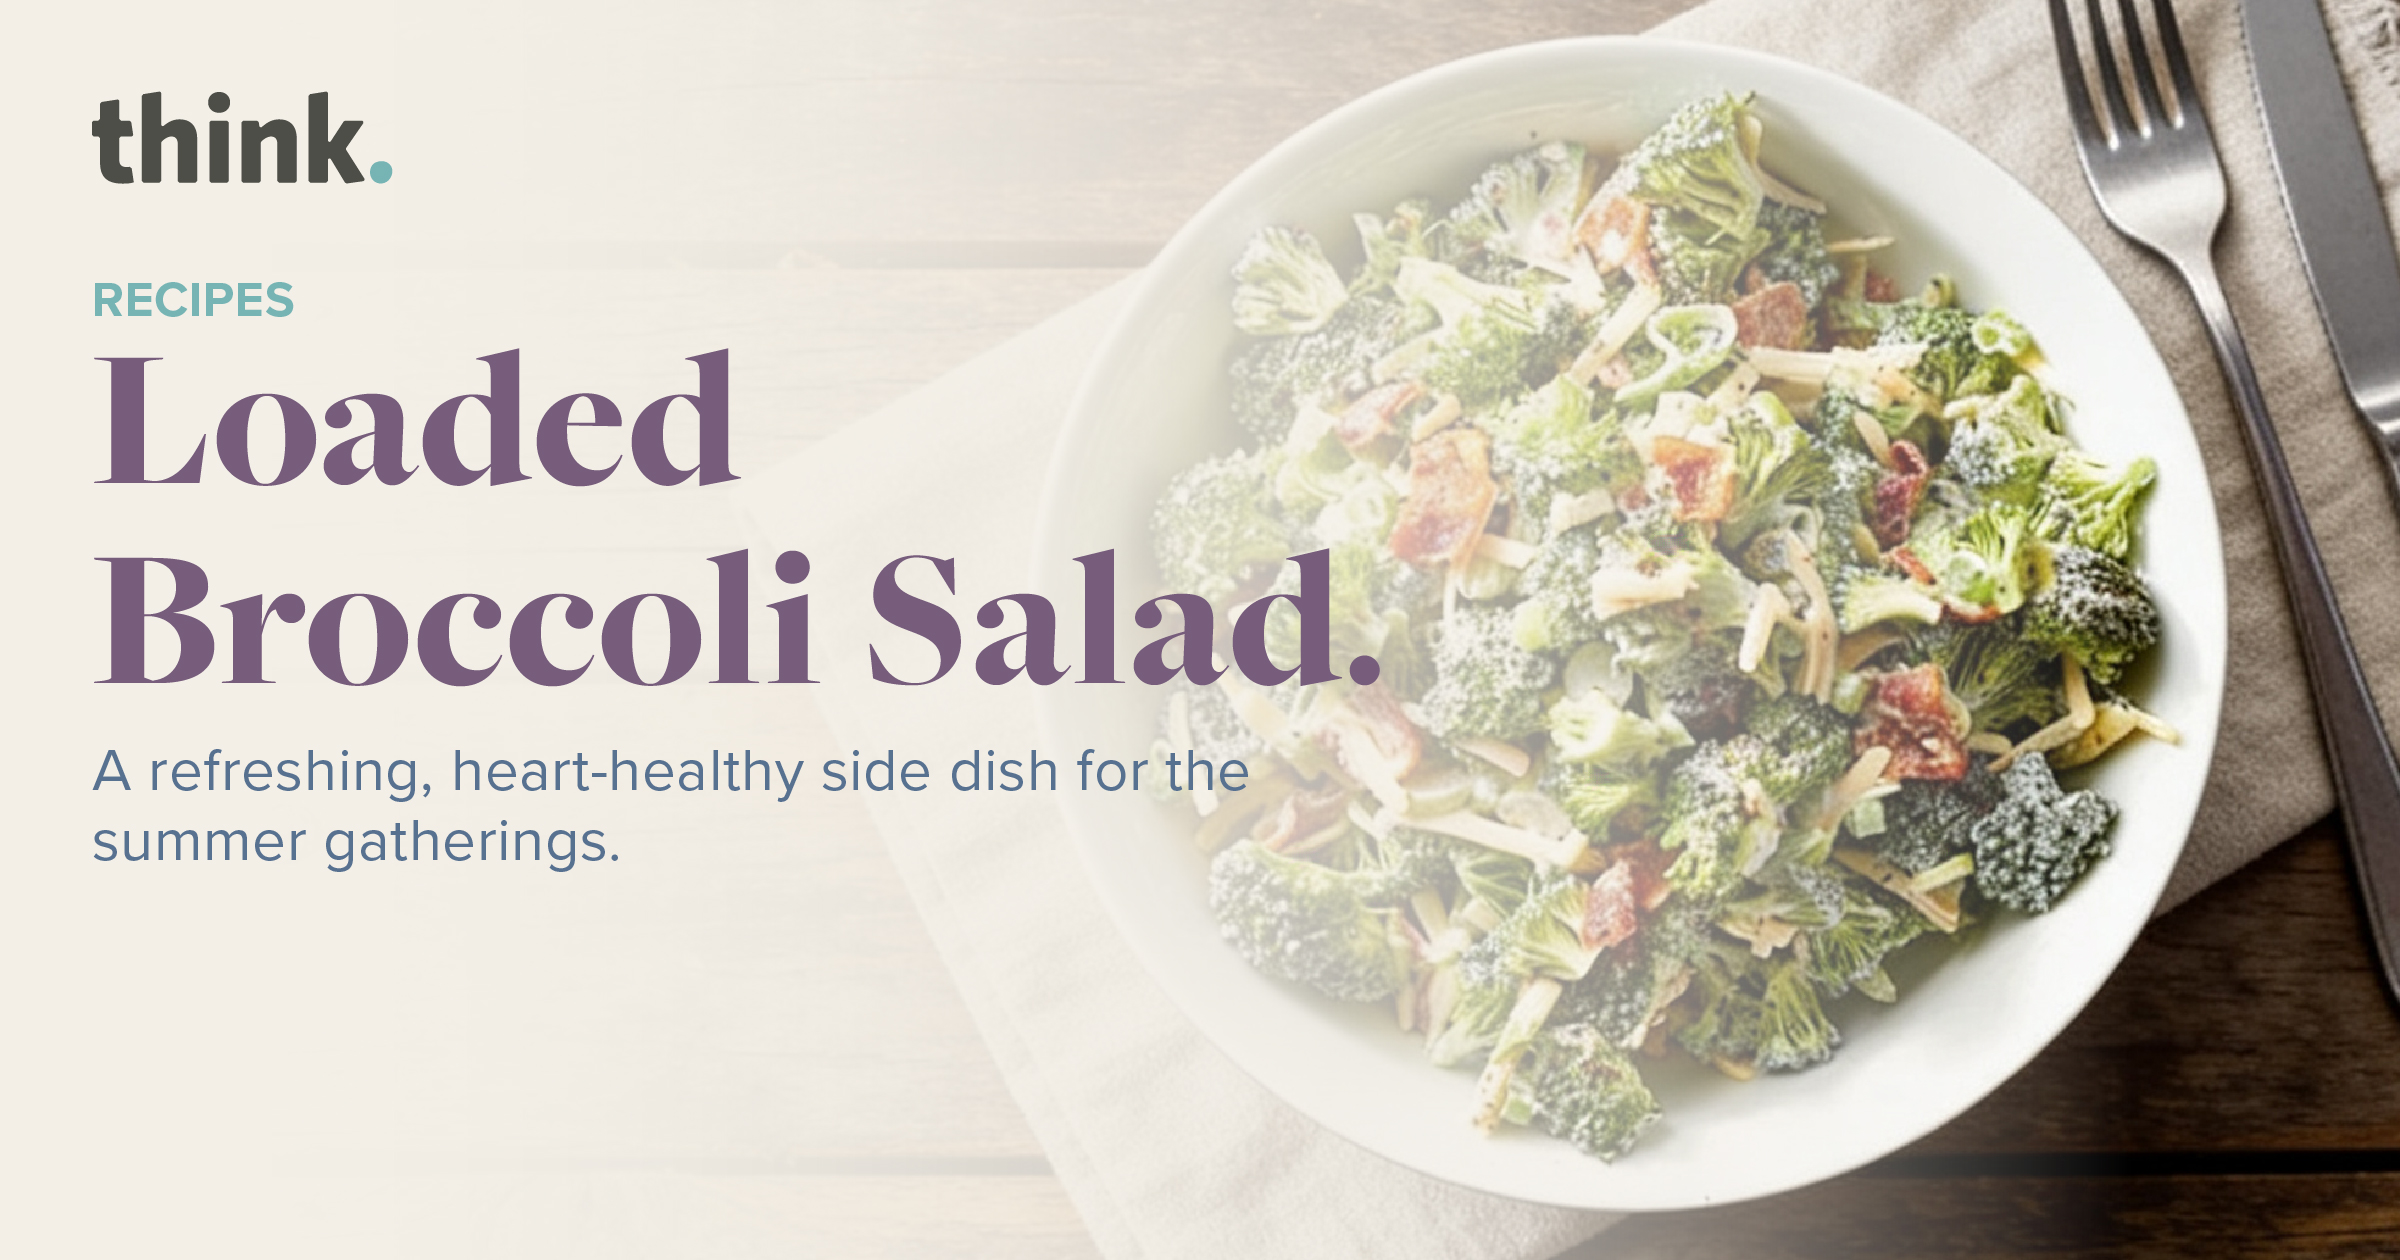
Loaded Broccoli Salad.

A bowl of broccoli salad with bacon, cheese, and dressing sits on a plate with a fork. Text reads Loaded Broccoli Salad and describes it as a heart-healthy side dish for summer gatherings.

A refreshing, heart-healthy side dish for the summer gatherings.

Eating a balanced diet can still be delicious. At think, we focus on preventive health care through proper nutrition. Fresh vegetables provide the foundation for long-term wellness, supporting cardiovascular health and metabolic function.

Our Loaded Broccoli Salad transforms raw, nutrient-rich vegetables into an enjoyable side dish. Combining fresh broccoli florets with sharp cheddar cheese, scallions, and a light, tangy dressing, this recipe delivers a satisfying crunch. It offers a balanced alternative to traditional, heavy potluck side dishes.

Prep Time: 
20 minutes
Cook Time: 
5 minutes
Total Time: 
25 minutes

Serving Size: 4 servings

Ingredients

  • 4 cups broccoli florets, finely chopped
  • ½ cup extra-sharp cheddar cheese, shredded
  • ½ cup scallions, sliced
  • 3 slices bacon (optional, can substitute with smoked sunflower seeds)
  • ¼ cup sour cream
  • ¼ cup mayonnaise
  • 4 teaspoons rice vinegar or apple cider vinegar
  • ¼ teaspoon ground black pepper

Cook Steps

Step 1: Cook the Bacon (If Using)

Place bacon slices in a skillet over medium heat. Cook until crisp, about 5 minutes. Transfer to a paper-towel-lined plate to drain. Once cooled, crumble into small pieces.

Step 2: Prepare the Vegetables

Wash the broccoli thoroughly and pat dry. Finely chop the florets into bite-sized pieces. Slice the scallions thinly.

Step 3: Whisk the Dressing

In a large mixing bowl, combine the sour cream, mayonnaise, vinegar, and ground black pepper. Whisk the mixture until the dressing is smooth and uniform.

Step 4: Combine the Components

Add the chopped broccoli, shredded cheddar cheese, and sliced scallions to the bowl with the dressing.

Step 5: Toss and Garnish

Toss the salad thoroughly until all components are evenly coated with the dressing. Fold in the crumbled bacon or smoked sunflower seeds just before serving to maintain their texture.


Tips for Success

  • Healthy eating is just one part of staying well. Making small, steady changes to what you eat each day can boost your energy and improve your health over time. Try serving this veggie dish with lean proteins like grilled chicken or baked fish for a balanced meal.
  • If you want to manage a health condition or improve your daily energy with food, meeting with a registered dietitian or your doctor can give you advice that fits your needs.

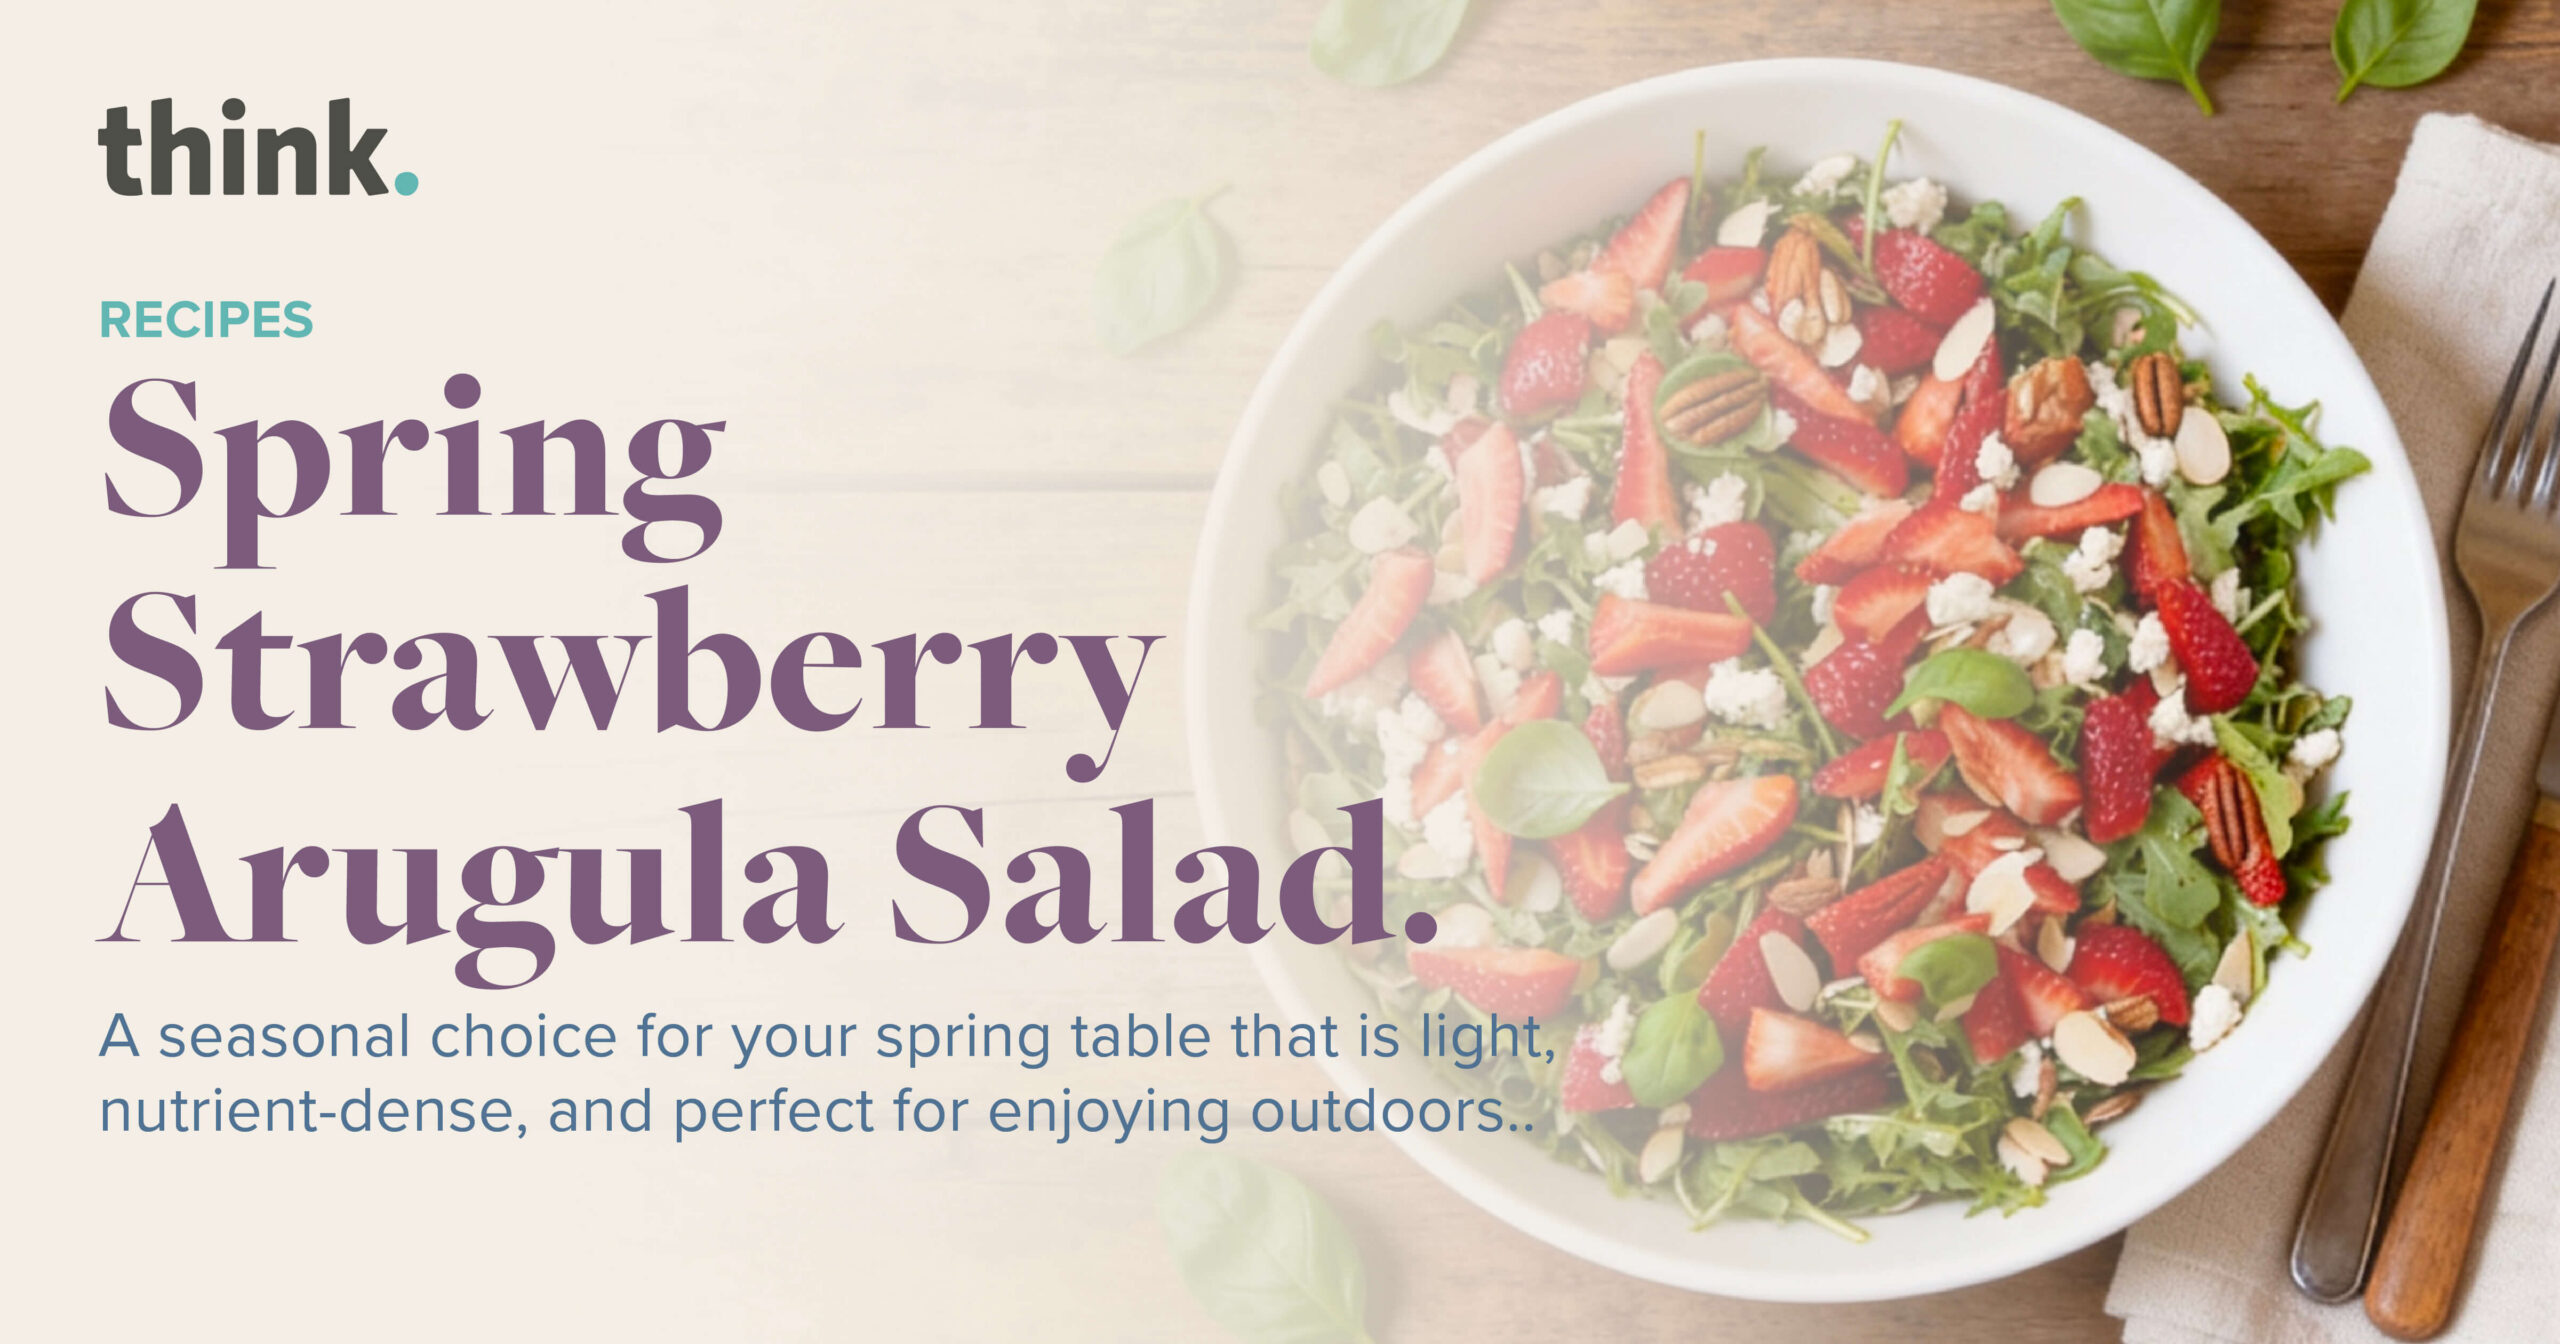
Spring Strawberry Arugula Salad.

A bowl of arugula salad with strawberries, goat cheese, and pecans sits on a wooden table beside text promoting a spring strawberry arugula salad recipe.

Nutrition is most effective when it aligns with the natural rhythm of the seasons. As we move into May, incorporating fresh, local produce is a straightforward way to support your body’s metabolic health and inflammatory response. This Spring Strawberry & Arugula Salad is created to be a high-performance meal that is light enough for an outdoor lunch yet nutrient-dense enough to support your daily energy needs.

We believe that your diet is a basic cornerstone of a healthy life. Moving beyond simple flavor, the Spring Strawberry and Arugula Salad offers functional benefits such as improved metabolic response and natural anti-inflammatory support. We invite you to try this “whole-person” meal as part of your Mother’s Day weekend or any outdoor gathering. It’s nutrition that can help you stay balanced, steady, and ready to enjoy the season ahead.

Prep Time: 
15 minutes
Cook Time: 
00 minutes
Total Time: 
15 minutes

Serving Size: 4 servings


Ingredients

For the Salad:

  • 5 oz Fresh baby arugula (or a spinach-arugula blend)
  • 1 lb Fresh strawberries, hulled and sliced
  • 1/2 cup Feta cheese, crumbled (provides a source of protein and calcium)
  • 1/2 cup Pecans or walnuts, toasted (for essential omega-3 fatty acids)
  • 1/4 Small red onion, very thinly sliced

For the Balsamic Vinaigrette:

  • 1/4 cup Extra virgin olive oil (a foundational healthy fat)
  • 2 tbsp Balsamic vinegar
  • 1 tbsp Pure maple syrup or honey
  • 1 tsp Dijon mustard (acts as a natural emulsifier)
  • Salt and black pepper to taste

Cook Steps

Step 1: Toast the Foundation 

Place the pecans or walnuts in a small skillet over medium heat. Toast for 3–5 minutes, stirring frequently, until they are fragrant and slightly golden. Toasting the nuts releases their natural oils, making the healthy fats more accessible and enhancing the texture of the dish. Set aside to cool.

Step 2: Emulsify the Dressing

 In a small glass jar or bowl, whisk together the olive oil, balsamic vinegar, maple syrup, and Dijon mustard. Season with a pinch of salt and pepper. This simple, transparent dressing avoids the hidden sugars and preservatives found in processed alternatives, supporting your long-term metabolic health.

Step 3: Prepare the Greens 

Place the arugula in a large wooden serving bowl. Arugula is a cruciferous vegetable that supports liver function and provides a sharp, peppery contrast to the sweetness of the fruit. If the leaves are large, you may tear them slightly for better management during the meal.

Step 4: Integrate the Seasonal Produce 

Add the sliced strawberries and thinly sliced red onions to the bowl. The onions provide quercetin, a natural plant pigment that supports immune stability, especially during the spring allergy season.

Step 5: Assemble and Finish 

Drizzle the vinaigrette over the salad and toss gently to ensure an even distribution. Top the salad with the crumbled feta and the cooled toasted nuts. Adding the cheese and nuts last ensures they maintain their texture and provide a clean presentation.

Step 6: Serve for Wellness 

Serve immediately to maintain the crispness of the greens. This salad can be enjoyed as a standalone light meal or paired with a lean protein like grilled chicken or salmon to create a comprehensive, “whole person” dinner.


Tips for Success

  • If you are preparing this for a gathering, keep the dressing on the side until the moment of service. This prevents the arugula from wilti

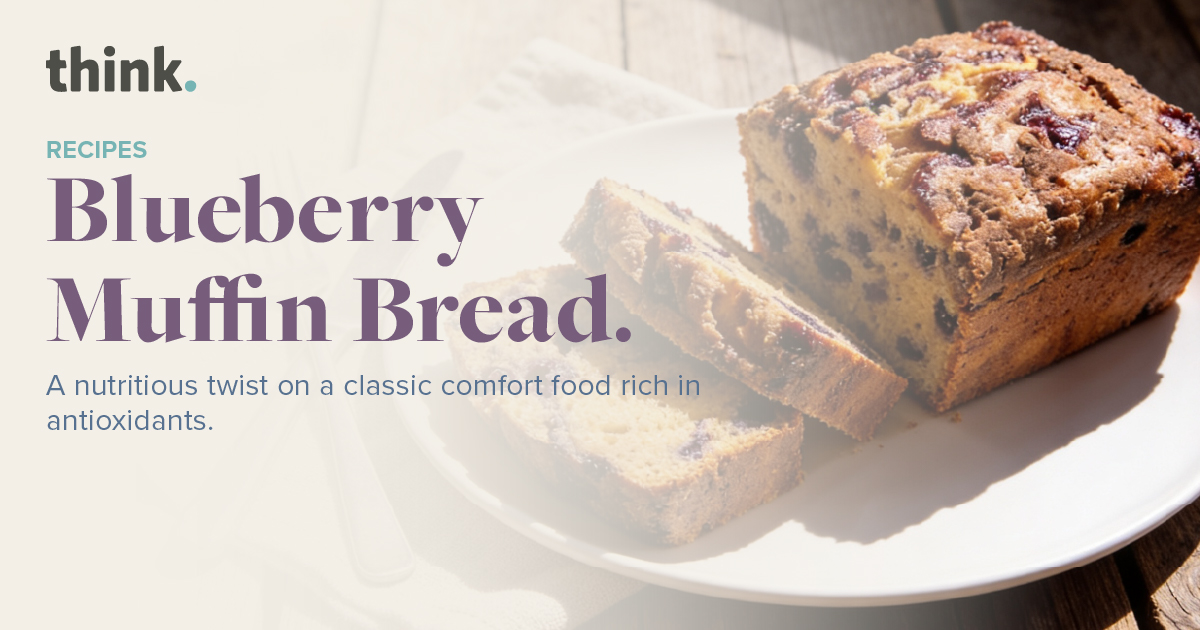
Blueberry Muffin Bread

Sliced blueberry muffin bread sits on a white plate in sunlight, with text describing it as a nutritious, antioxidant-rich recipe twist on a classic comfort food.

Nutrition is a key part of your whole-person health. Our Blueberry Muffin Bread recipe shows our commitment to using simple, high-quality ingredients to make a meal that is both healthy and easy to prepare.

The main benefit of this recipe is its high amount of blueberries, which are full of antioxidants called anthocyanins. These help keep your mind sharp and protect your heart. By choosing a nutrient-rich treat instead of processed snacks, you give your body lasting energy and support for daily life.

Prep Time:
15 minutes
Cook Time: 
60-65 minutes
Total Time: 
80 minutes

Serving Size: 1 Loaf (approx. 10–12 slices)

Ingredients

  • 1/2 cup Salted butter, melted and cooled
  • 1 cup Cane sugar (or a natural alternative)
  • 2 Large eggs, at room temperature
  • 1/2 cup Plain Greek yogurt (provides protein and probiotics)
  • 1 tsp Vanilla extract
  • 1 ½ cups All-purpose flour (or a whole-grain blend)
  • 1 tsp Baking powder
  • 1/2 tsp Baking soda
  • 1/4 tsp Sea salt
  • 2 cups Fresh or frozen blueberries (do not thaw if frozen)
  • Optional: 1 tbsp lemon zest for an added antioxidant boost

Cook Steps

Step 1: Preparation and Alignment 

Preheat your oven to 350°F (175°C). Lightly grease a 9×5-inch loaf pan with butter or line it with parchment paper. Proper preparation ensures an efficient process and an even bake for your foundation.

Step 2: Combine the Wet Ingredients 

In a large mixing bowl, whisk together the melted butter and sugar until smooth. Add the eggs one at a time, followed by the Greek yogurt and vanilla extract. The yogurt not only adds moisture but provides a subtle source of protein to support metabolic stability.

Step 3: Integrate the Dry Ingredients 

In a separate smaller bowl, sift together the flour, baking powder, baking soda, and salt. Gradually fold the dry ingredients into the wet mixture using a spatula. Be careful not to over-mix; a straightforward, gentle stir will keep the texture light and effective.

Step 4: Prepare the Blueberries 

Toss your blueberries in a small spoonful of flour before adding them to the batter. This simple step prevents the berries from sinking to the bottom, ensuring every slice provides a balanced distribution of antioxidants. Gently fold the berries into the batter.

Step 5: Execute the Bake 

Pour the batter into your prepared loaf pan and smooth the top. Bake for 60 to 65 minutes. To ensure clarity on doneness, insert a toothpick into the center; it should come out clean or with just a few moist crumbs.

Step 6: Cool and Restore 

Allow the bread to cool in the pan for 10 minutes before transferring it to a wire rack to cool completely. This resting period allows the structure to stabilize, making it easier to slice and serve.

Tips for Success

  • Pair a slice of this bread with a handful of walnuts or a hard-boiled egg. The addition of healthy fats and proteins will help maintain a steady glycemic response, keeping your energy levels stable throughout the morning.

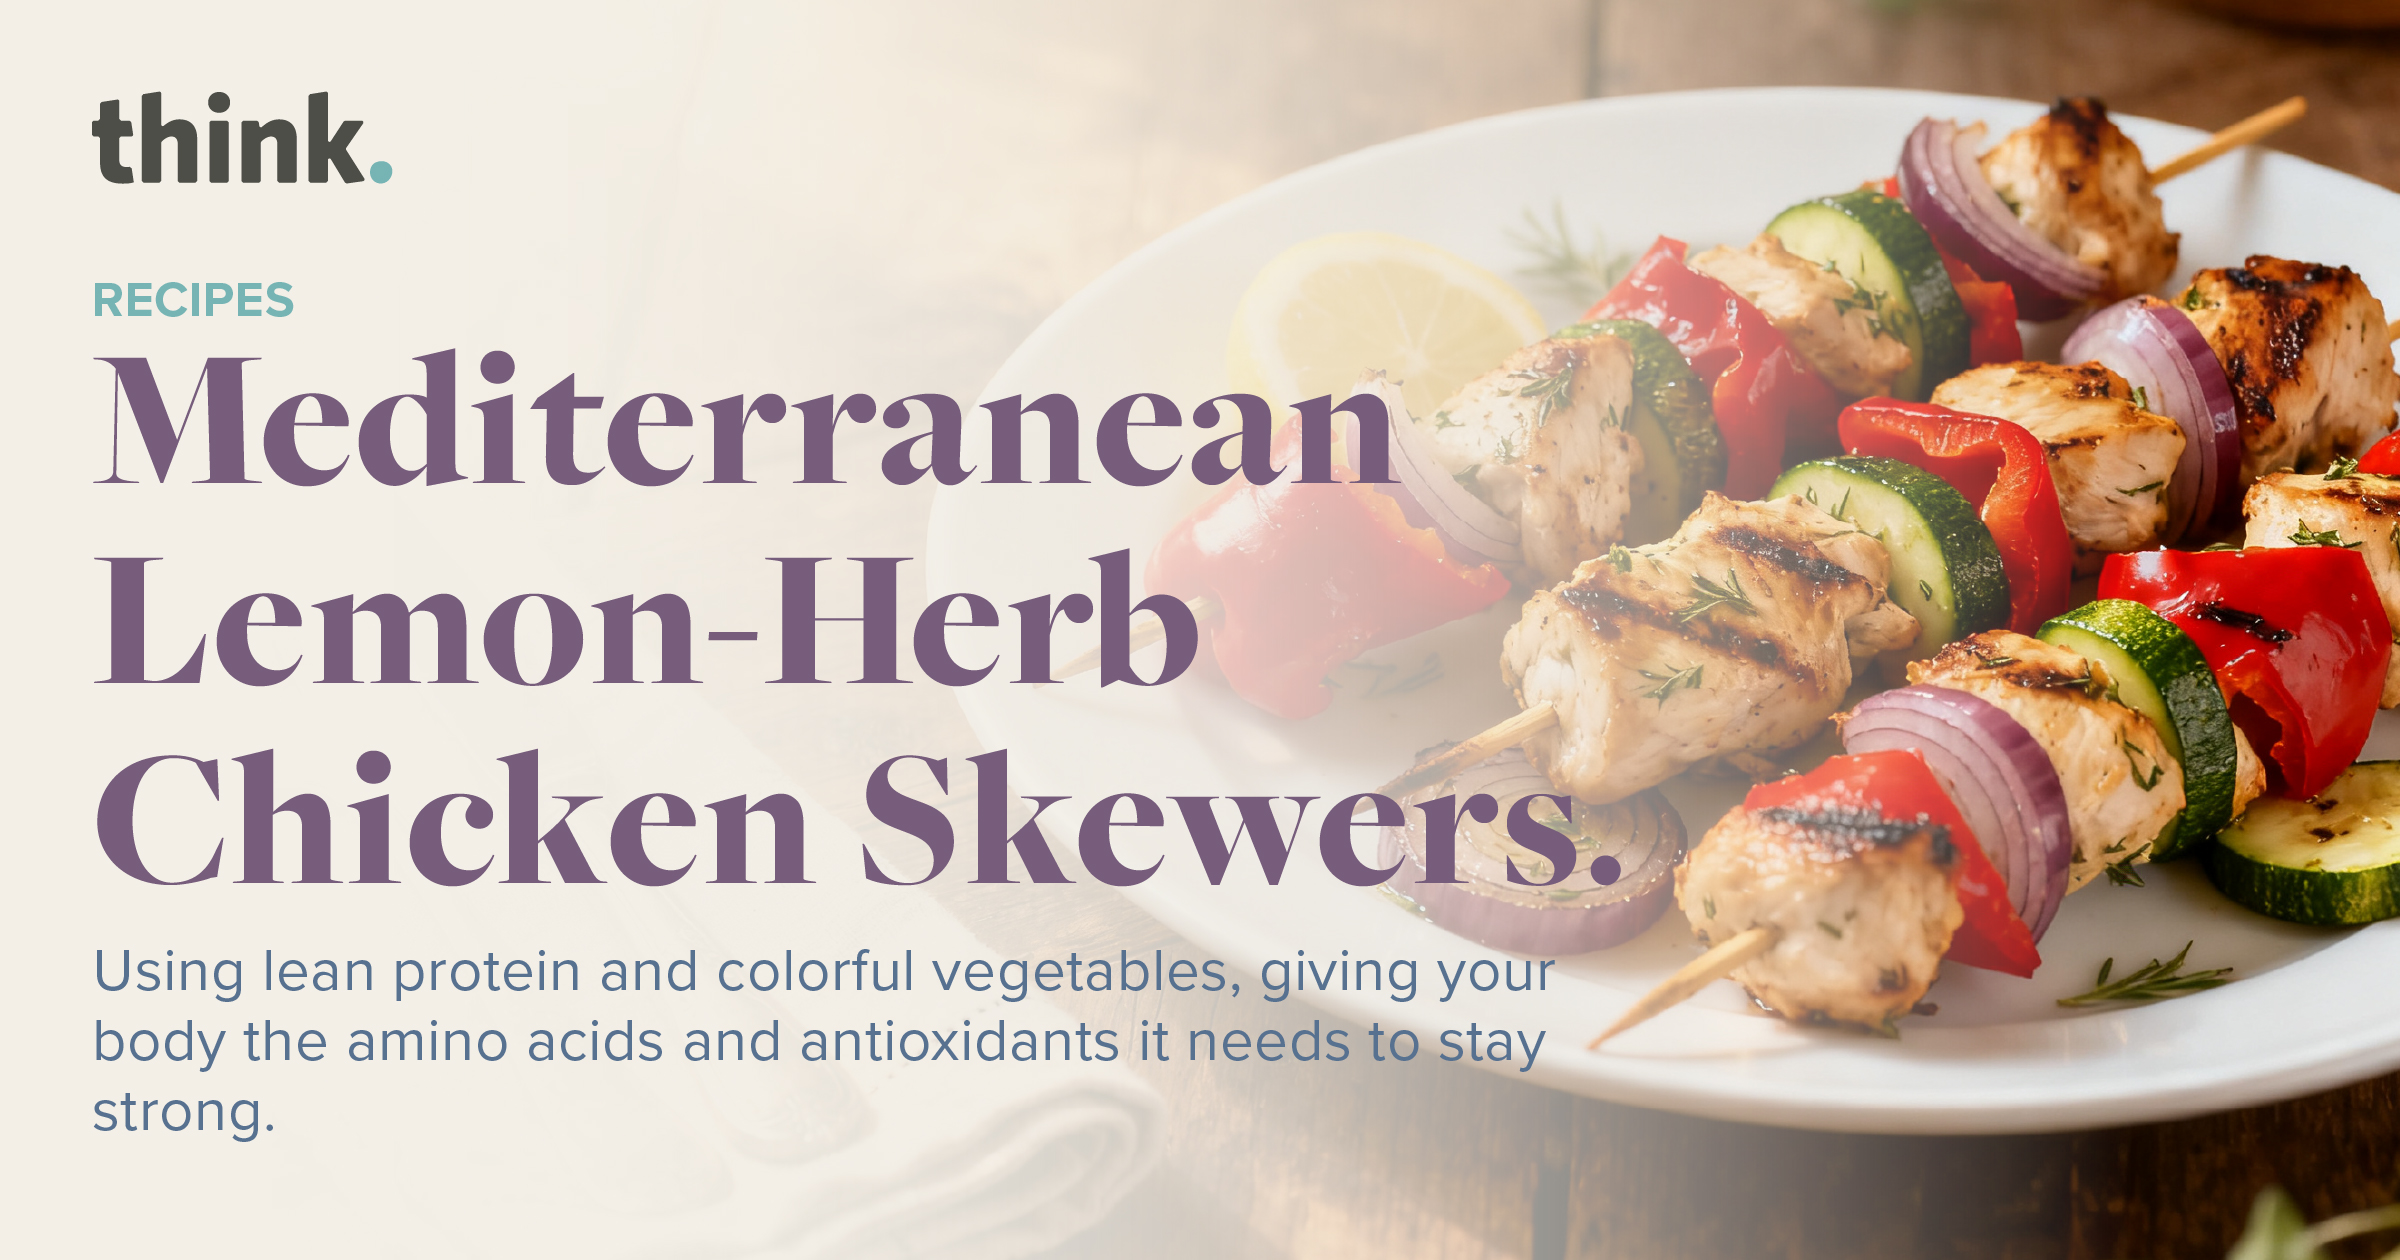
Mediterranean Lemon-Herb Chicken Skewers.

Plate of grilled chicken skewers with red onions, zucchini, and red peppers. Text reads: Mediterranean Lemon-Herb Chicken Skewers. Includes a description about lean protein and antioxidants.

With March bringing warmer weather, grilling is an easy way to make healthy meals that help you feel your best. Our Mediterranean-style skewers use lean protein and colorful vegetables, giving your body the amino acids and antioxidants it needs to stay strong. Using fresh herbs and olive oil adds flavor and supports heart health, all without making things complicated.

Making this recipe is a simple way to take care of your health. Every ingredient is picked to support your whole body, from the protein in the chicken to the vitamins in the peppers and onions. Whether you just finished a session with our Physical Therapy team or are relaxing outside in Nebraska, these skewers make it easy to enjoy a balanced and satisfying meal.

Prep Time: 
20 minutes
30 minutes for marinating
Cook Time: 
12 minutes
Total Time: 
62 minutes

Serving Size: 4 servings


Ingredients

  • 1.5 lbs Boneless, skinless chicken breasts, cut into 1-inch cubes
  • 2 Large bell peppers (red and green), cut into 1-inch pieces
  • 1 Large red onion, cut into 1-inch wedges
  • 1 Large zucchini, sliced into half-moons
  • 1/4 cup Extra virgin olive oil
  • 3 tablespoons Fresh lemon juice
  • 3 cloves Garlic, minced
  • 1 tablespoon Fresh oregano, chopped (or 1 teaspoon dried)
  • 1 teaspoon Smoked paprika
  • Salt and black pepper to taste
  • Wooden or metal skewers (soak wooden skewers in water for 20 minutes prior to use)

Cooking Steps

Step 1: Prepare the Marinade

In a medium glass bowl, whisk together the olive oil, lemon juice, minced garlic, oregano, smoked paprika, salt, and pepper. This combination provides a heart-healthy base that tenderizes the protein naturally.

Step 2: Marinate the Chicken

Add the cubed chicken to the bowl, ensuring each piece is thoroughly coated. Cover and refrigerate for at least 30 minutes. This proactive step allows the flavors to penetrate the meat, ensuring a high-quality result without the need for heavy, processed sauces.

Step 3: Assemble the Skewers

Thread the marinated chicken alternately with the bell peppers, red onion, and zucchini onto the skewers. Aim for a colorful variety on each skewer to ensure a balanced mix of vitamins and minerals in every serving.

Step 4: Preheat the Grill

Preheat your outdoor grill to medium-high heat (approximately 375°F to 400°F). Lightly oil the grates to prevent sticking.

Step 5: Grill to perfection

Place the skewers on the grill and cook for 10–12 minutes, turning them occasionally. The chicken should reach an internal temperature of 165°F and the vegetables should be tender with a slight char, preserving their nutritional integrity.

Step 6: Rest and Serve

 Remove the skewers from the grill and let them rest for 3–5 minutes. This allows the juices to redistribute, ensuring the protein remains tender. Serve alongside a fresh green salad or whole-grain pita for a complete, integrated meal.

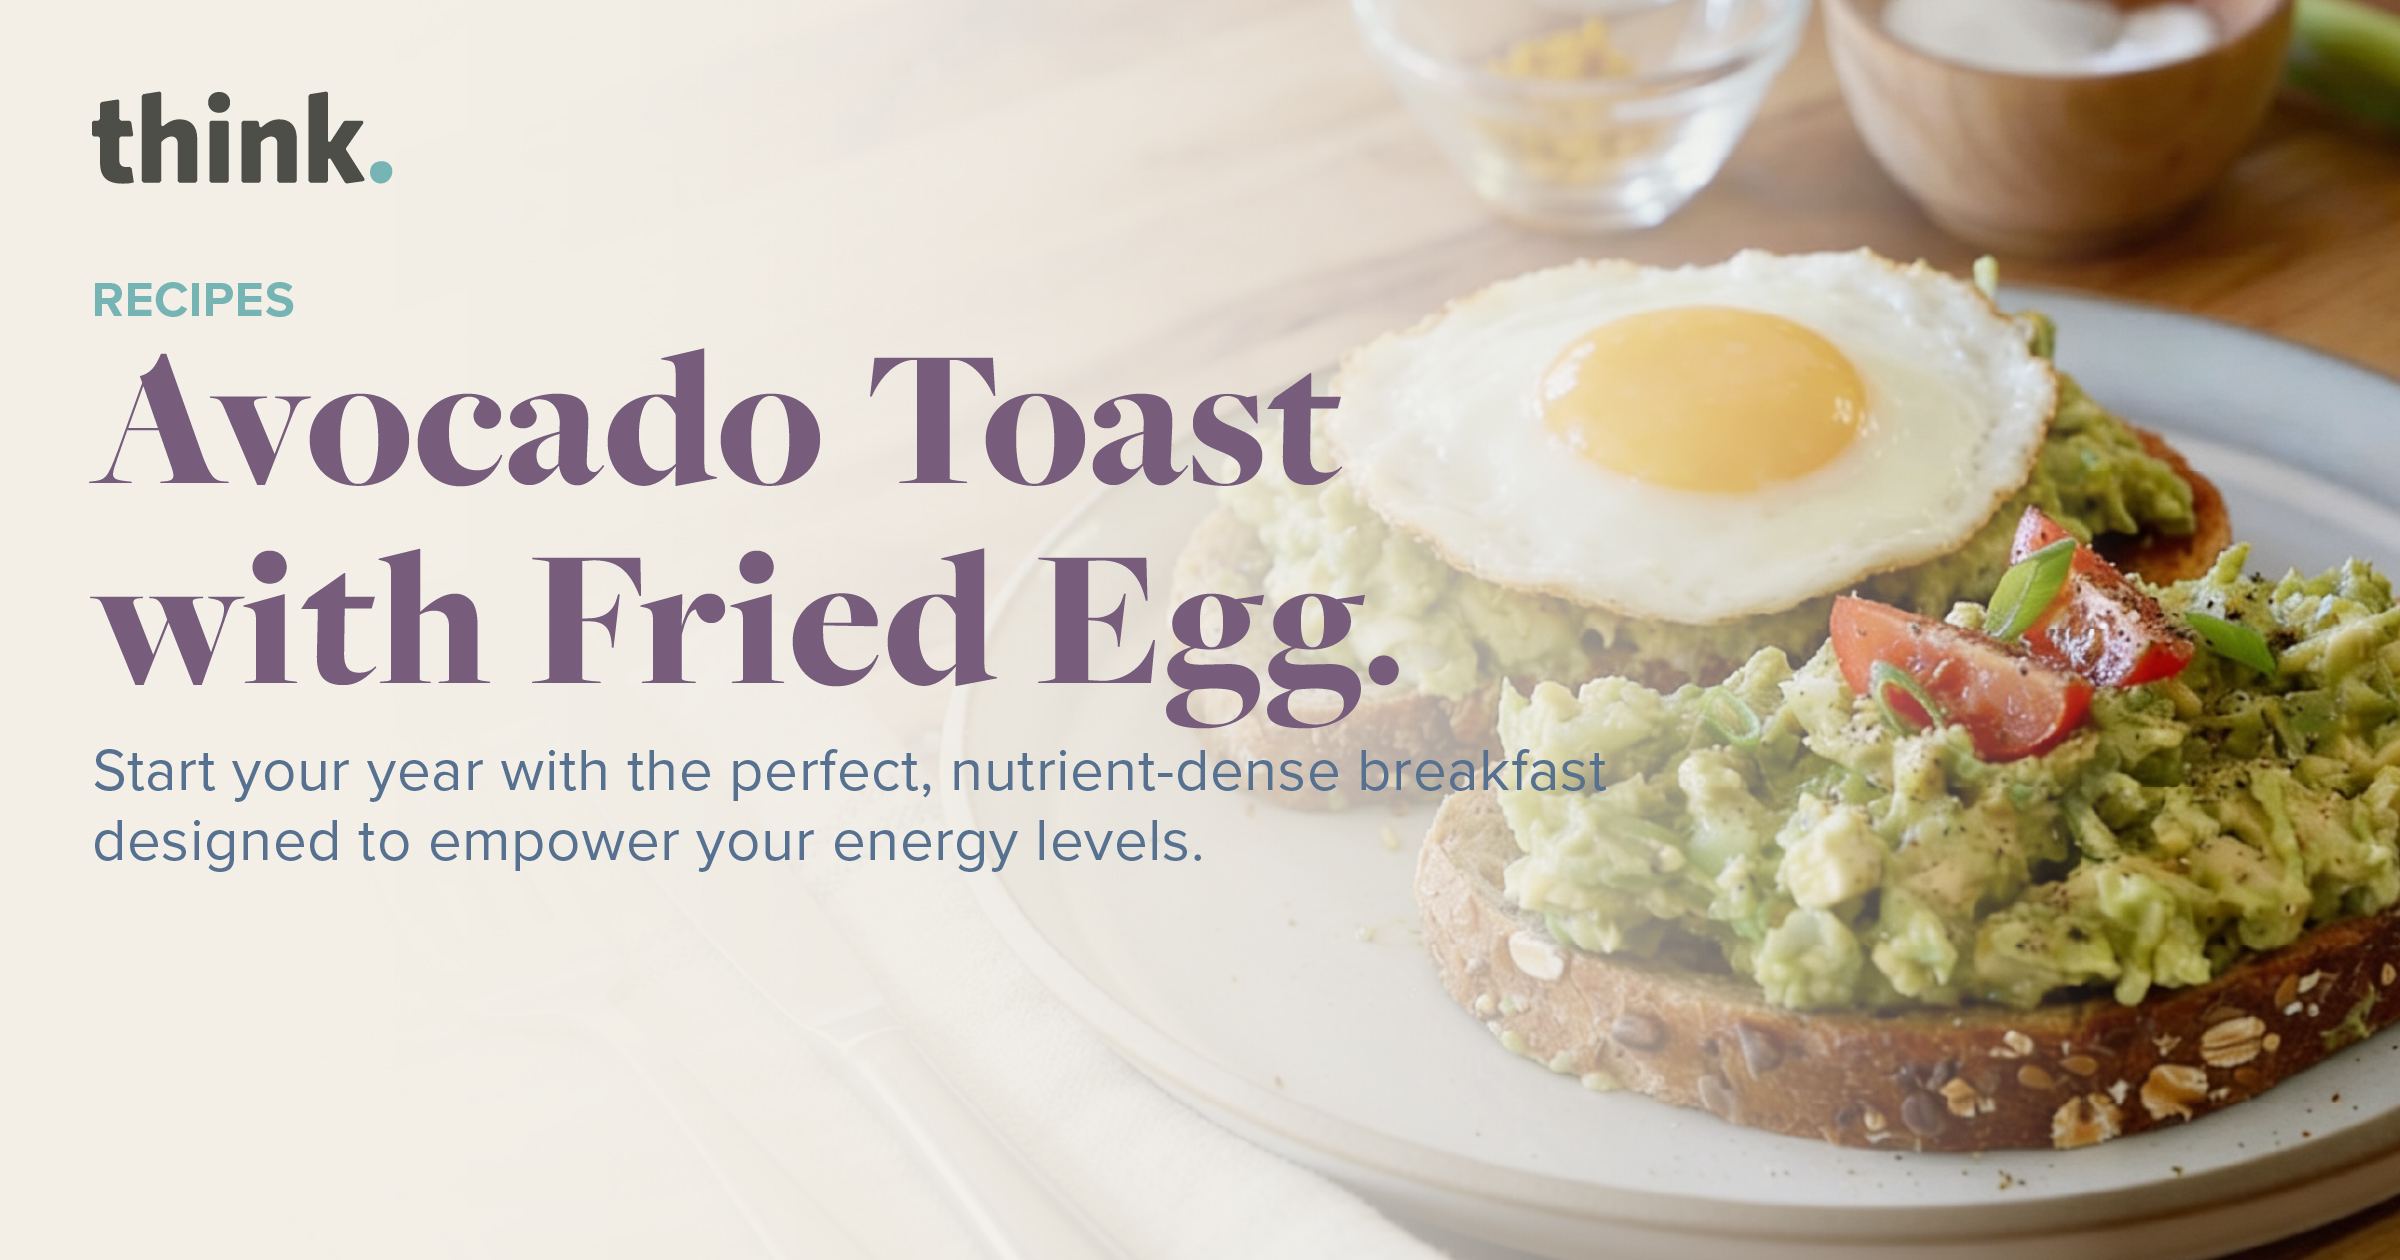
Avocado Toast with Fried Egg

A plate with avocado toast topped with a fried egg and cherry tomatoes sits on a table. Text over the image reads: Avocado Toast with Fried Egg..

A delicious and nutritious heart healthy breakfast option to jumpstart your day.

Avocado toast has become a breakfast staple for good reason. It’s simple, delicious, and packed with heart-healthy fats and fiber. Our avocado toast recipe, made with creamy avocado, whole-grain bread, and a variety of nutritious toppings, is satisfying and offers numerous health benefits.

Avocados are a nutrient-dense fruit known for their high content of monounsaturated fats. These fats are heart-healthy and can help lower bad cholesterol levels and reduce the risk of heart disease. Additionally, avocados are a good source of fiber, which aids in digestion, helps regulate blood sugar levels, and promotes feelings of fullness to prevent overeating.

Whole grain bread adds complex carbohydrates and additional fiber to this recipe, providing a steady source of energy and helping to keep you feeling full and satisfied throughout the morning. Top the avocado toast with fresh vegetables like tomatoes and spinach for the toast to become rich in vitamins, minerals, and antioxidants that support overall health and well-being.

The recipe is also fresh, easy, and fast, perfect for busy mornings when you need a nutritious breakfast in a hurry. With just a few simple ingredients and minimal prep time, you can have this delicious avocado toast on your table in just 10 minutes, making it a convenient option for anyone looking to start their day on a healthy note..

Prep Time
5 mins
Cook Time
10 mins
Total Time
15 mins

Servings: 2

Ingredients

  • 1 ripe avocado
  • 2 slices of whole-grain bread
  • 1 small tomato, sliced
  • Handful of fresh cilantro
  • 1 tablespoon of lemon juice or lime juice
  • Salt and pepper to taste
  • Optional toppings: thinly sliced red onion, red pepper flakes, sliced radishes, hemp seeds
  • 2 medium size eggs

Instructions

Step One: Prepare the Avocado

Cut the avocado in half, remove the pit, and scoop the flesh into a bowl. Mash the avocado with a fork until smooth but still slightly chunky.

Step Two: Toast the Bread, Fry the Egg

Heat 1–2 tsp of butter or oil in a non-stick skillet over medium-low heat. Crack the egg into the pan and cook for 3-4 minutes until the whites are set, adding a lid for the final minute to ensure even cooking. Season with salt and pepper to taste.  Toast the slices of whole grain bread until golden brown and crispy.

Step Three: Assemble the Toast

Spread the mashed avocado evenly onto each slice of toast, and place fried egg on top of slices.

Step Four: Add Toppings

Top the avocado with sliced tomato and fresh spinach leaves. If desired, add thinly sliced red onion for extra flavor.

Step Five: Season and Customize

Drizzle lemon or lime juice over the toppings to add a bright, citrusy flavor. Season the avocado toast with salt and pepper to taste. For an extra kick, sprinkle with red repper flakes, sliced radishes, or hemp seeds.

Step Six Serve and Enjoy

Serve the avocado toast immediately while the bread is still warm and crispy. Enjoy as a satisfying breakfast or snack!

This heart-healthy avocado toast is not only delicious but also provides a good source of fiber, vitamins, and minerals to start your day off right. Experiment with different toppings and seasonings to customize your avocado toast to your taste preferences.

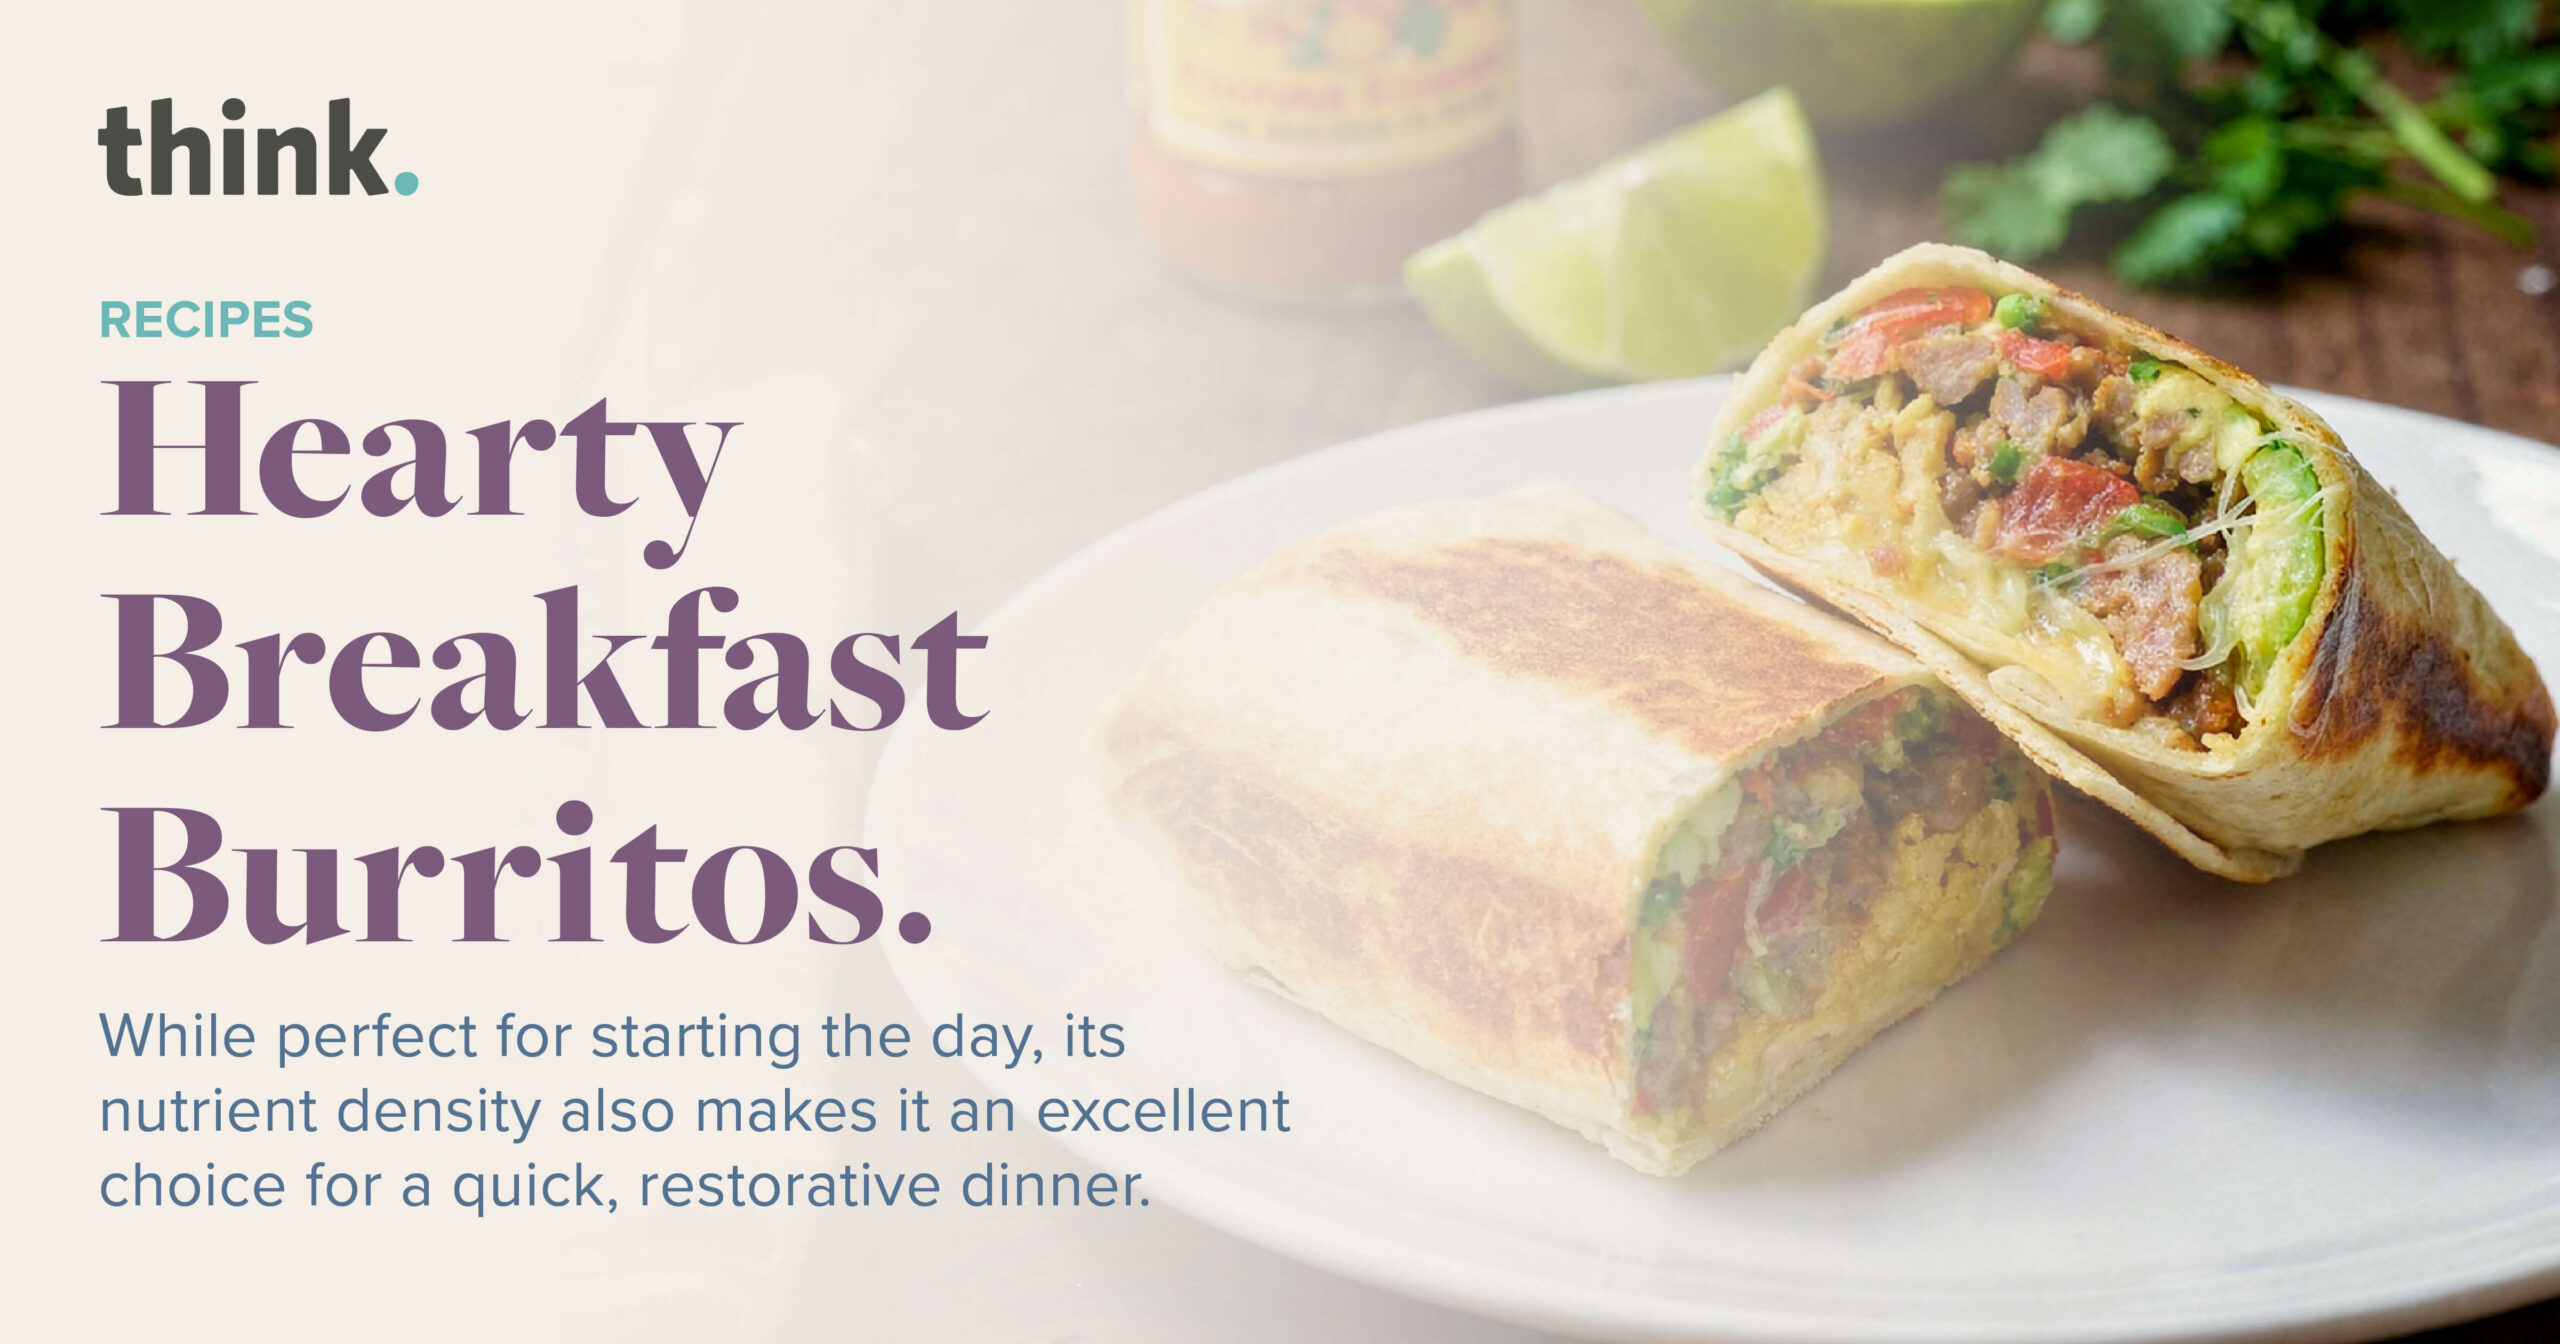
Hearty Breakfast Burrito

A sliced breakfast burrito filled with eggs, vegetables, and cheese sits on a white plate. Text reads: Hearty Breakfast Burritos. Perfect for breakfast or a restorative dinner due to their nutrient density..

Nutrition is one of the most accessible forms of preventive medicine. For healthy habits to endure, they must remain simple, adaptable, and realistic for our busy schedules.

Our Hearty Breakfast Burrito is thoughtfully created to reinforce your foundation of Body, Mind, and Spirit. While perfect for starting the day, its nutrient density also makes it an excellent choice for a quick, restorative dinner.

It provides balanced macronutrients to avoid energy crashes. Whole-wheat tortillas paired with fiber-rich black beans deliver complex carbohydrates that release energy gradually and steadily. High-quality protein from eggs or egg whites supplies essential amino acids needed for tissue repair, metabolic function, and overall vitality. Fresh avocado contributes heart-healthy monounsaturated fats that support both cognitive clarity and cardiovascular wellness.

It’s simple, satisfying, and effective. Give it a try this month to nourish your whole-person health.

This recipe is designed for “batch cooking,” a proactive strategy that empowers you to have high-quality meals ready even on your most demanding days.

Prep Time
15 Minutes
Cook Time
15 Minutes
Total Time
30 Minutes

Servings: 4 – 6 Burritos

Ingredients

  • 6 large eggs (scrambled)
  • 1 can black beans (rinsed and drained)
  • 1 cup fresh spinach or sautéed bell peppers
  • 1/2 cup shredded low-fat cheddar or Monterey Jack cheese
  • 4–6 whole-wheat tortillas
  • Optional: Fresh salsa, avocado, or Greek yogurt (as a high-protein substitute for sour cream)

Instructions

Step One: Scramble

Softly scramble the eggs in a non-stick skillet. If you are focused on heart health, consider using a ratio of two egg whites to every one whole egg.

Step Two: Assemble

Layer the eggs, beans, cheese, and vegetables in the center of each tortilla.

Step Three: Fold

Tuck in the sides and roll tightly to ensure the filling is secure.

Step Four: Sear (Optional)

Place the folded burrito seam-side down on a hot skillet for 1 minute to create a crisp seal.

Tip

One of the greatest barriers to healthy eating is a lack of time. These burritos are “freezer-friendly.” Wrap individual burritos in parchment paper or foil and store them in a freezer-safe bag. When you are short on time, simply reheat for a meal that supports your wellness goals without the complexity of starting from scratch.

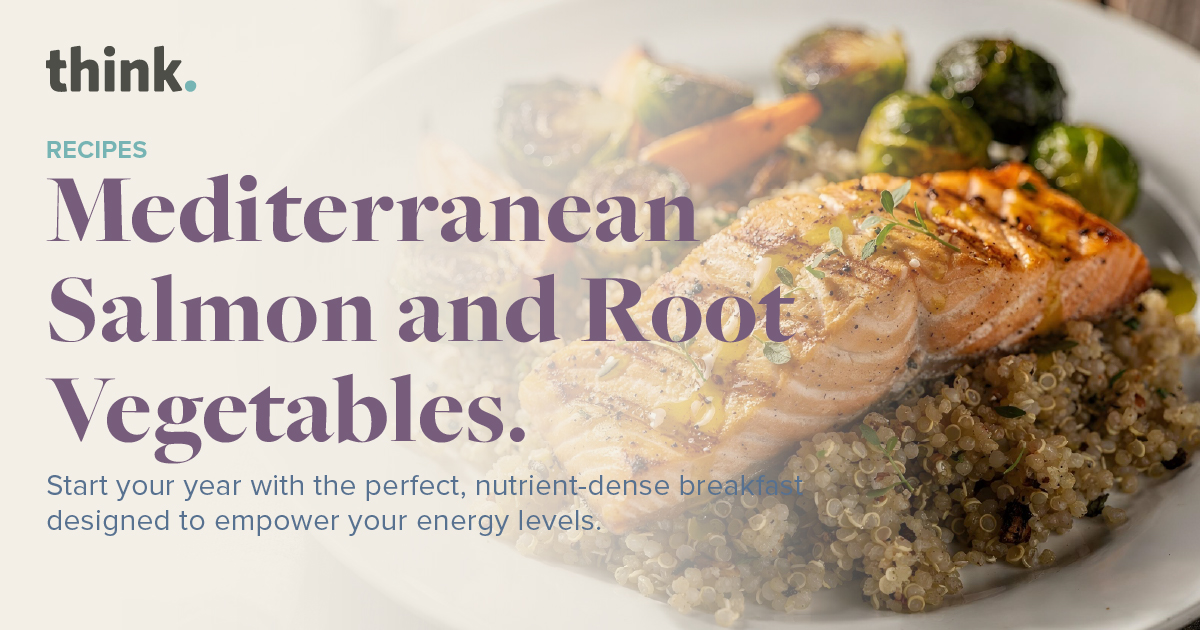
Mediterranean Salmon and Root Vegetables.

A plate of grilled salmon atop quinoa, served with roasted root vegetables and Brussels sprouts. Text reads: Mediterranean Salmon and Root Vegetables. Start your year with nutrient-dense breakfast..

A Nutrient-Dense Seasonal Favorite Designed for Simple Preparation.

Choosing a meal that supports your long-term wellness doesn’t have to be a complex project. Our Mediterranean Salmon and Root Vegetables dish is designed for simplicity, requiring minimal preparation while delivering a sophisticated flavor profile. By roasting the seasonal vegetables and salmon together, you minimize kitchen cleanup and allow the natural brightness of fresh lemon and garlic to enhance the ingredients. It is a straightforward, effective solution for a busy weeknight dinner that remains steady in its nutritional value.

From a health perspective, this meal is a powerhouse of nutrient density. The salmon provides a rich source of omega-3 fatty acids, which are essential for heart health and cognitive function, while the quinoa and root vegetables offer a stable supply of complex carbohydrates and fiber. This combination ensures you feel satisfied and empowered with steady energy throughout your evening. By prioritizing clean, whole ingredients like heirloom carrots and Brussels sprouts, you are supporting your body’s natural resilience through a balanced and delicious approach to preventative nutrition.

Prep Time
15 mins
Cook Time
20 mins
Total Time
35 mins

Servings: 6 – 8

Ingredients

  • Protein:
    • 4 fresh Atlantic or Sockeye salmon fillets (approx. 6oz each).
  • Base:
    • 2 cups dry quinoa or farro (cooked according to package instructions).
  • Vegetables:
    • 4 cups Brussels sprouts (halved), 
    • 2 cups heirloom carrots (sliced), and 
    • 2 large red bell peppers (chopped).
  • Flavor Profile:
    • 2 lemons (juiced and zested), 
    • 4 cloves minced garlic, 
    • cracked black pepper,
    • 3 tablespoons extra virgin olive oil.
  • Garnish: 1/4 cup fresh parsley, chopped.

Instructions

Step One: Roast the Vegetables

Preheat your oven to 200°C (400°F). On a large sheet pan, toss the Brussels sprouts, carrots, and peppers with 2 tablespoons of olive oil and cracked pepper. Spread them in a single layer and roast for 20 minutes until the edges are crisp and tender.

Step Two: Prepare the Salmon 

While the vegetables are roasting, rub each salmon fillet with minced garlic, lemon zest, and the remaining tablespoon of olive oil.

Step Three: Cook the Salmon

Move the vegetables to the sides of the pan to make space, or use a second baking sheet. Place the fillets on the pan and roast alongside the vegetables for the final 10–12 minutes. The salmon is done when it flakes easily with a fork.

Step Four: Assemble

Serve each salmon fillet over a generous bed of cooked quinoa or farro. Drizzle with a final squeeze of fresh lemon juice and a sprinkle of fresh parsley.

Blueberry Walnut Bake and Protein Smoothie.

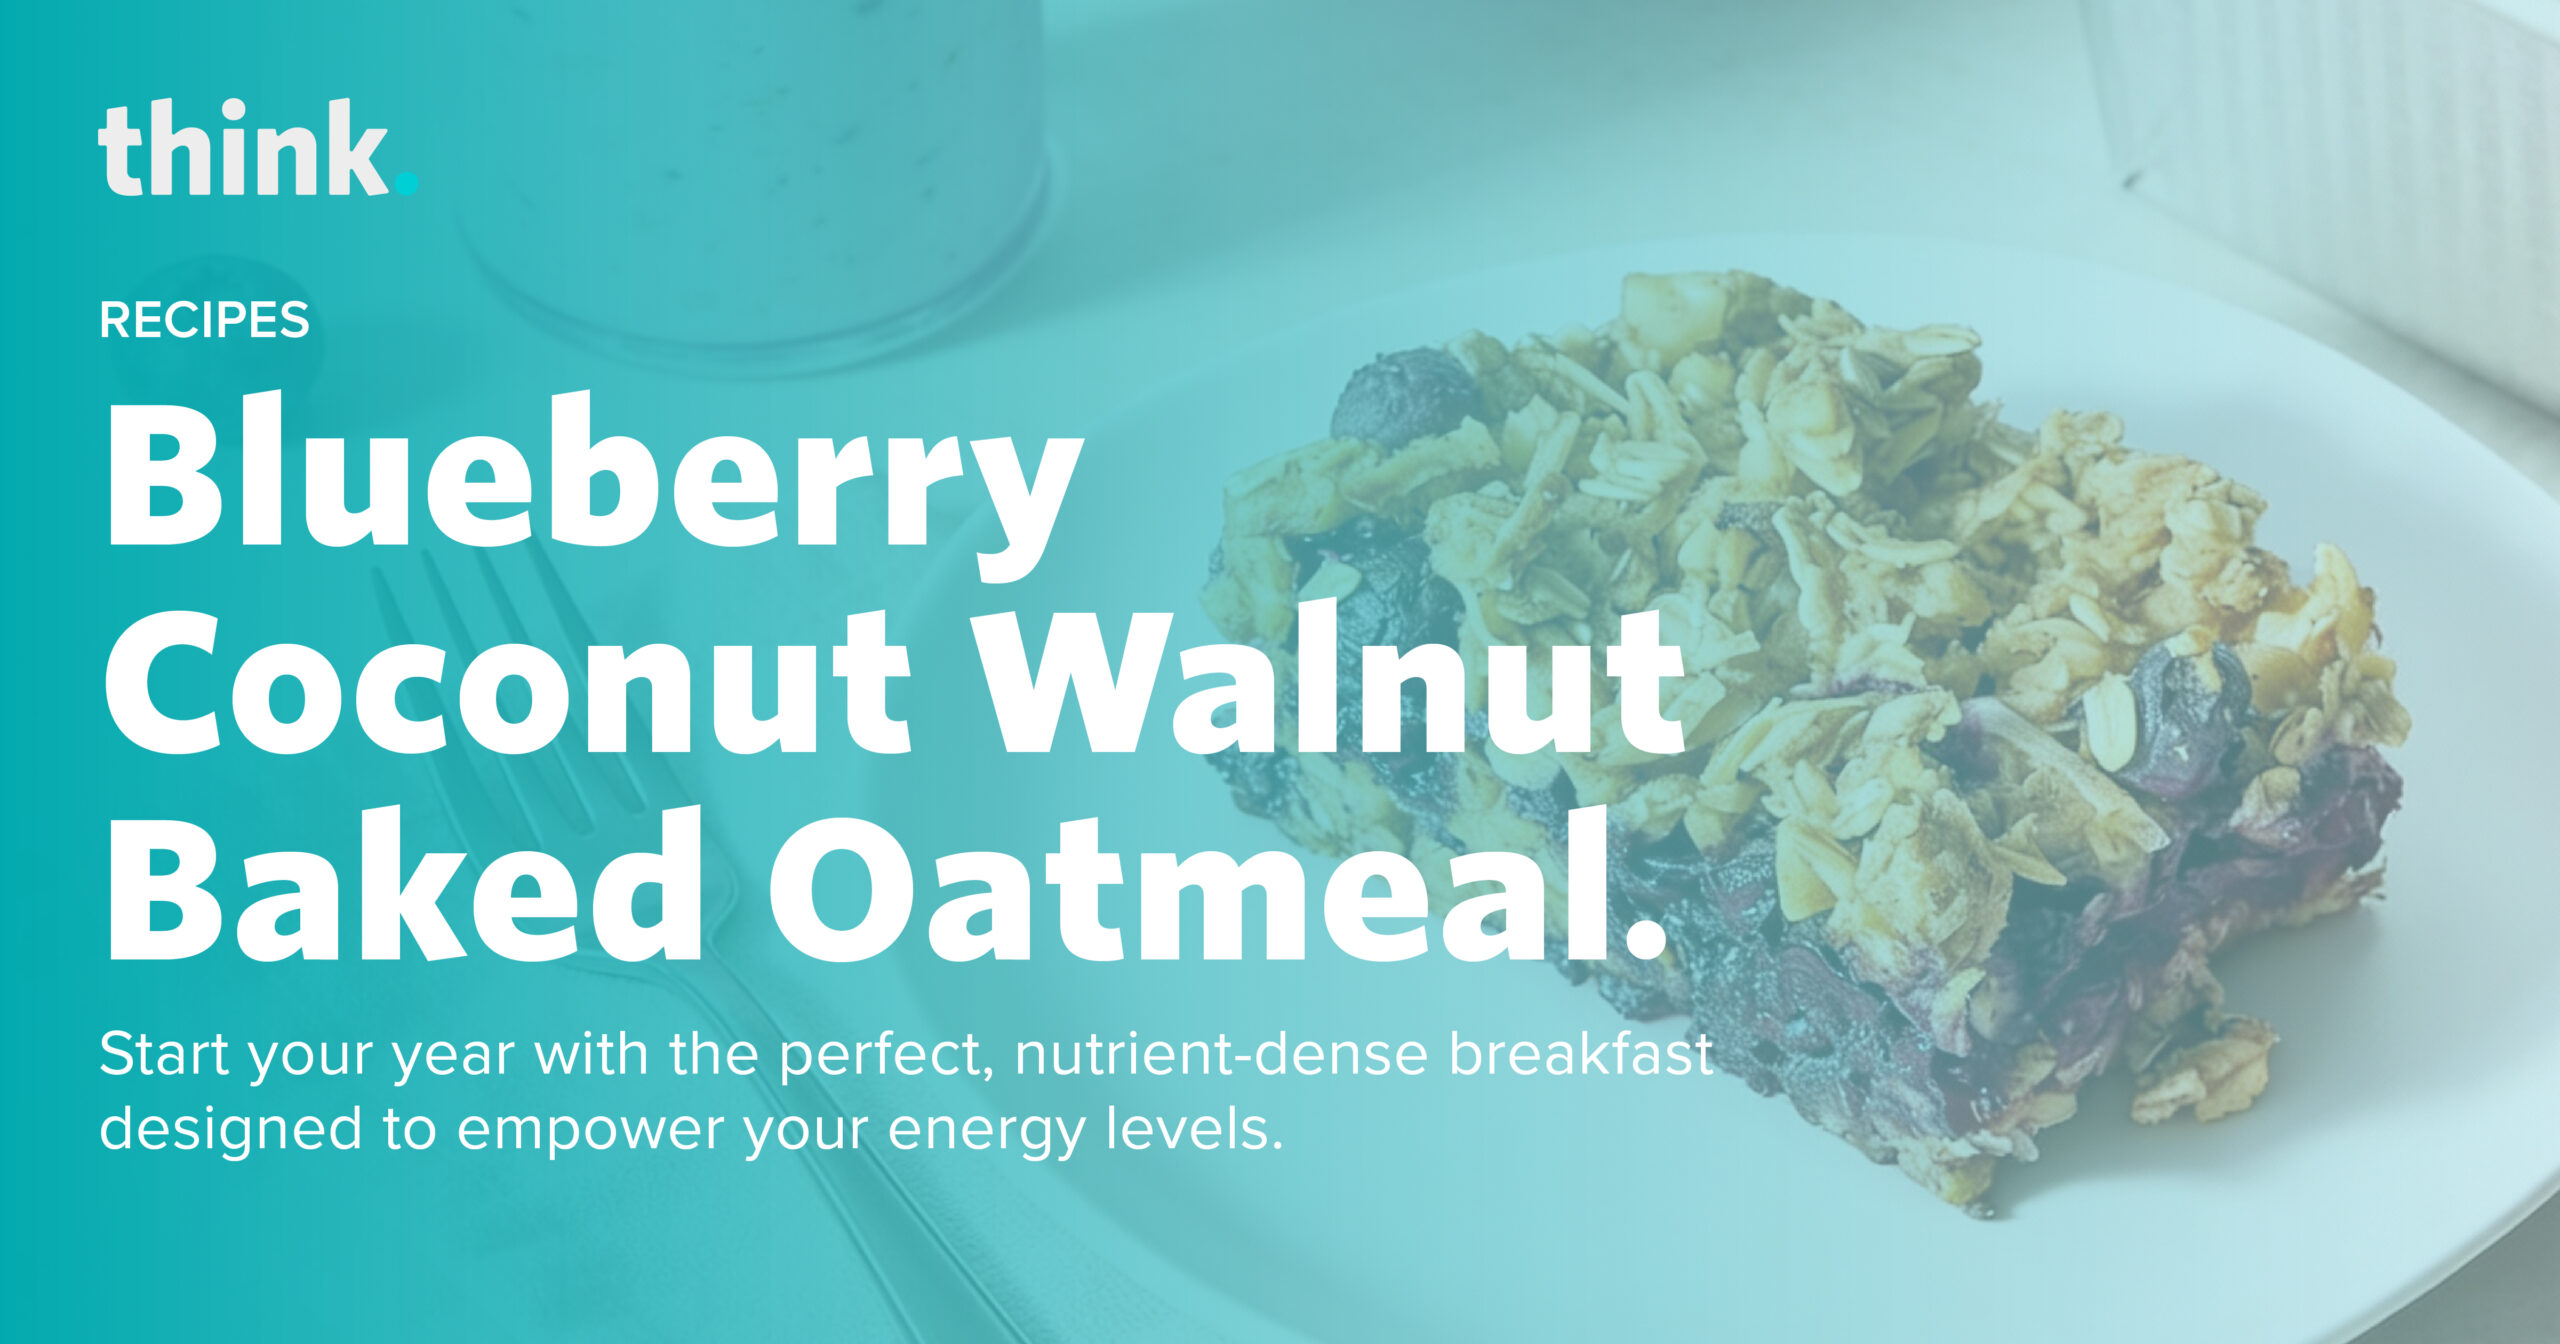
A square of blueberry coconut walnut baked oatmeal sits on a white plate, with a glass nearby. Text promotes the recipe as a nutrient-dense breakfast to boost energy, with a focus on starting the year well.

Blueberry Walnut Bake and Protein Smoothie.

A hearty, fiber-rich breakfast that supports heart health and cognitive function with a simple, three-ingredient solution for a quick protein and antioxidant boost.

We believe that providing your body with high-quality fuel is a fundamental step in proactive wellness. These two breakfast options focus on whole-food ingredients that support heart health and sustained energy without the need for added sugars or complex preparations. By choosing nutrient-dense foundations like oats, walnuts, and berries, you are not just eating a meal; you are managing your long-term health through simple, effective daily habits.

These recipes are designed to fit seamlessly into a busy lifestyle while prioritizing “whole person” nutrition. The baked oatmeal offers a perfect balance of fiber and omega-3 fatty acids to keep you satiated and focused throughout the morning, while the fruit and yogurt smoothie provides a quick, calcium-rich protein boost. Whether you are preparing a batch for the week ahead or blending a refreshing snack, these recipes empower you to take control of your well-being, one bite at a time.

Prep Time
28 mins
Cook Time
30 – 35 mins
Total Time
60 – 65 mins

Blueberry-Coconut-Walnut Baked Oatmeal

Ingredients

  • The Date Paste: ½ cup dried pitted Medjool dates (chopped) + 8 tbsp hot water (divided)
  • The Fruit Base: 2 cups frozen blueberries + 1 tbsp water + ½ tsp vanilla extract
  • The Liquid Mix: ½ cup unsweetened coconut milk + 1 ripe medium banana + 1 large egg + 2 tsp coconut extract + 2 tsp vanilla extract
  • The Dry Mix: 2 ¼ cups old-fashioned rolled oats + 1 ½ cups chopped walnuts + ¾ cup toasted unsweetened shredded coconut + 1 tsp baking powder + 1 tsp cinnamon + ¼ tsp salt
  • Folder-In: 1 cup frozen blueberries

Instructions

Step 1: Prep

Preheat oven to 375°F. Coat an 8-inch square pan with cooking spray.

Step 2: Soften

Soak dates in hot water for 20 minutes. Drain and pulse in a food processor, slowly adding 7 tbsp hot water to form a smooth paste.

Step 3: Simmer

Combine the fruit base ingredients in a saucepan. Bring to a boil, then simmer until thickened (6–8 minutes).

Step 4: Blend

Add coconut milk, banana, egg, and extracts to the date paste; process until smooth.

Step 5: Combine

Mix the dry ingredients in a large bowl. Stir in the date-banana mixture, then fold in the remaining 1 cup of blueberries.

Step 6: Layer & Bake

Spread half the oat mixture in the pan, layer the blueberry sauce over it, and top with the remaining oats. Bake for 30–35 minutes until set. Let cool for 10 minutes.

Fruit & Yogurt Smoothie

Ingredients

  • ¾ cup nonfat plain yogurt (or Greek-style for higher protein)
  • ½ cup 100% pure fruit juice (no added sugar)
  • 1 ½ cups frozen fruit (blueberries, raspberries, or peaches)

Instructions

Step 1: Start with Liquids

Place the yogurt and fruit juice in the blender first. Puree until smooth.

Step 2: Add Fruit

With the motor running, gradually add the frozen fruit through the lid opening.

Step 3: Final Blend

Continue to puree until the consistency is thick and smooth. Serve immediately.

Cozy Hearth Chicken and Corn Chowder.

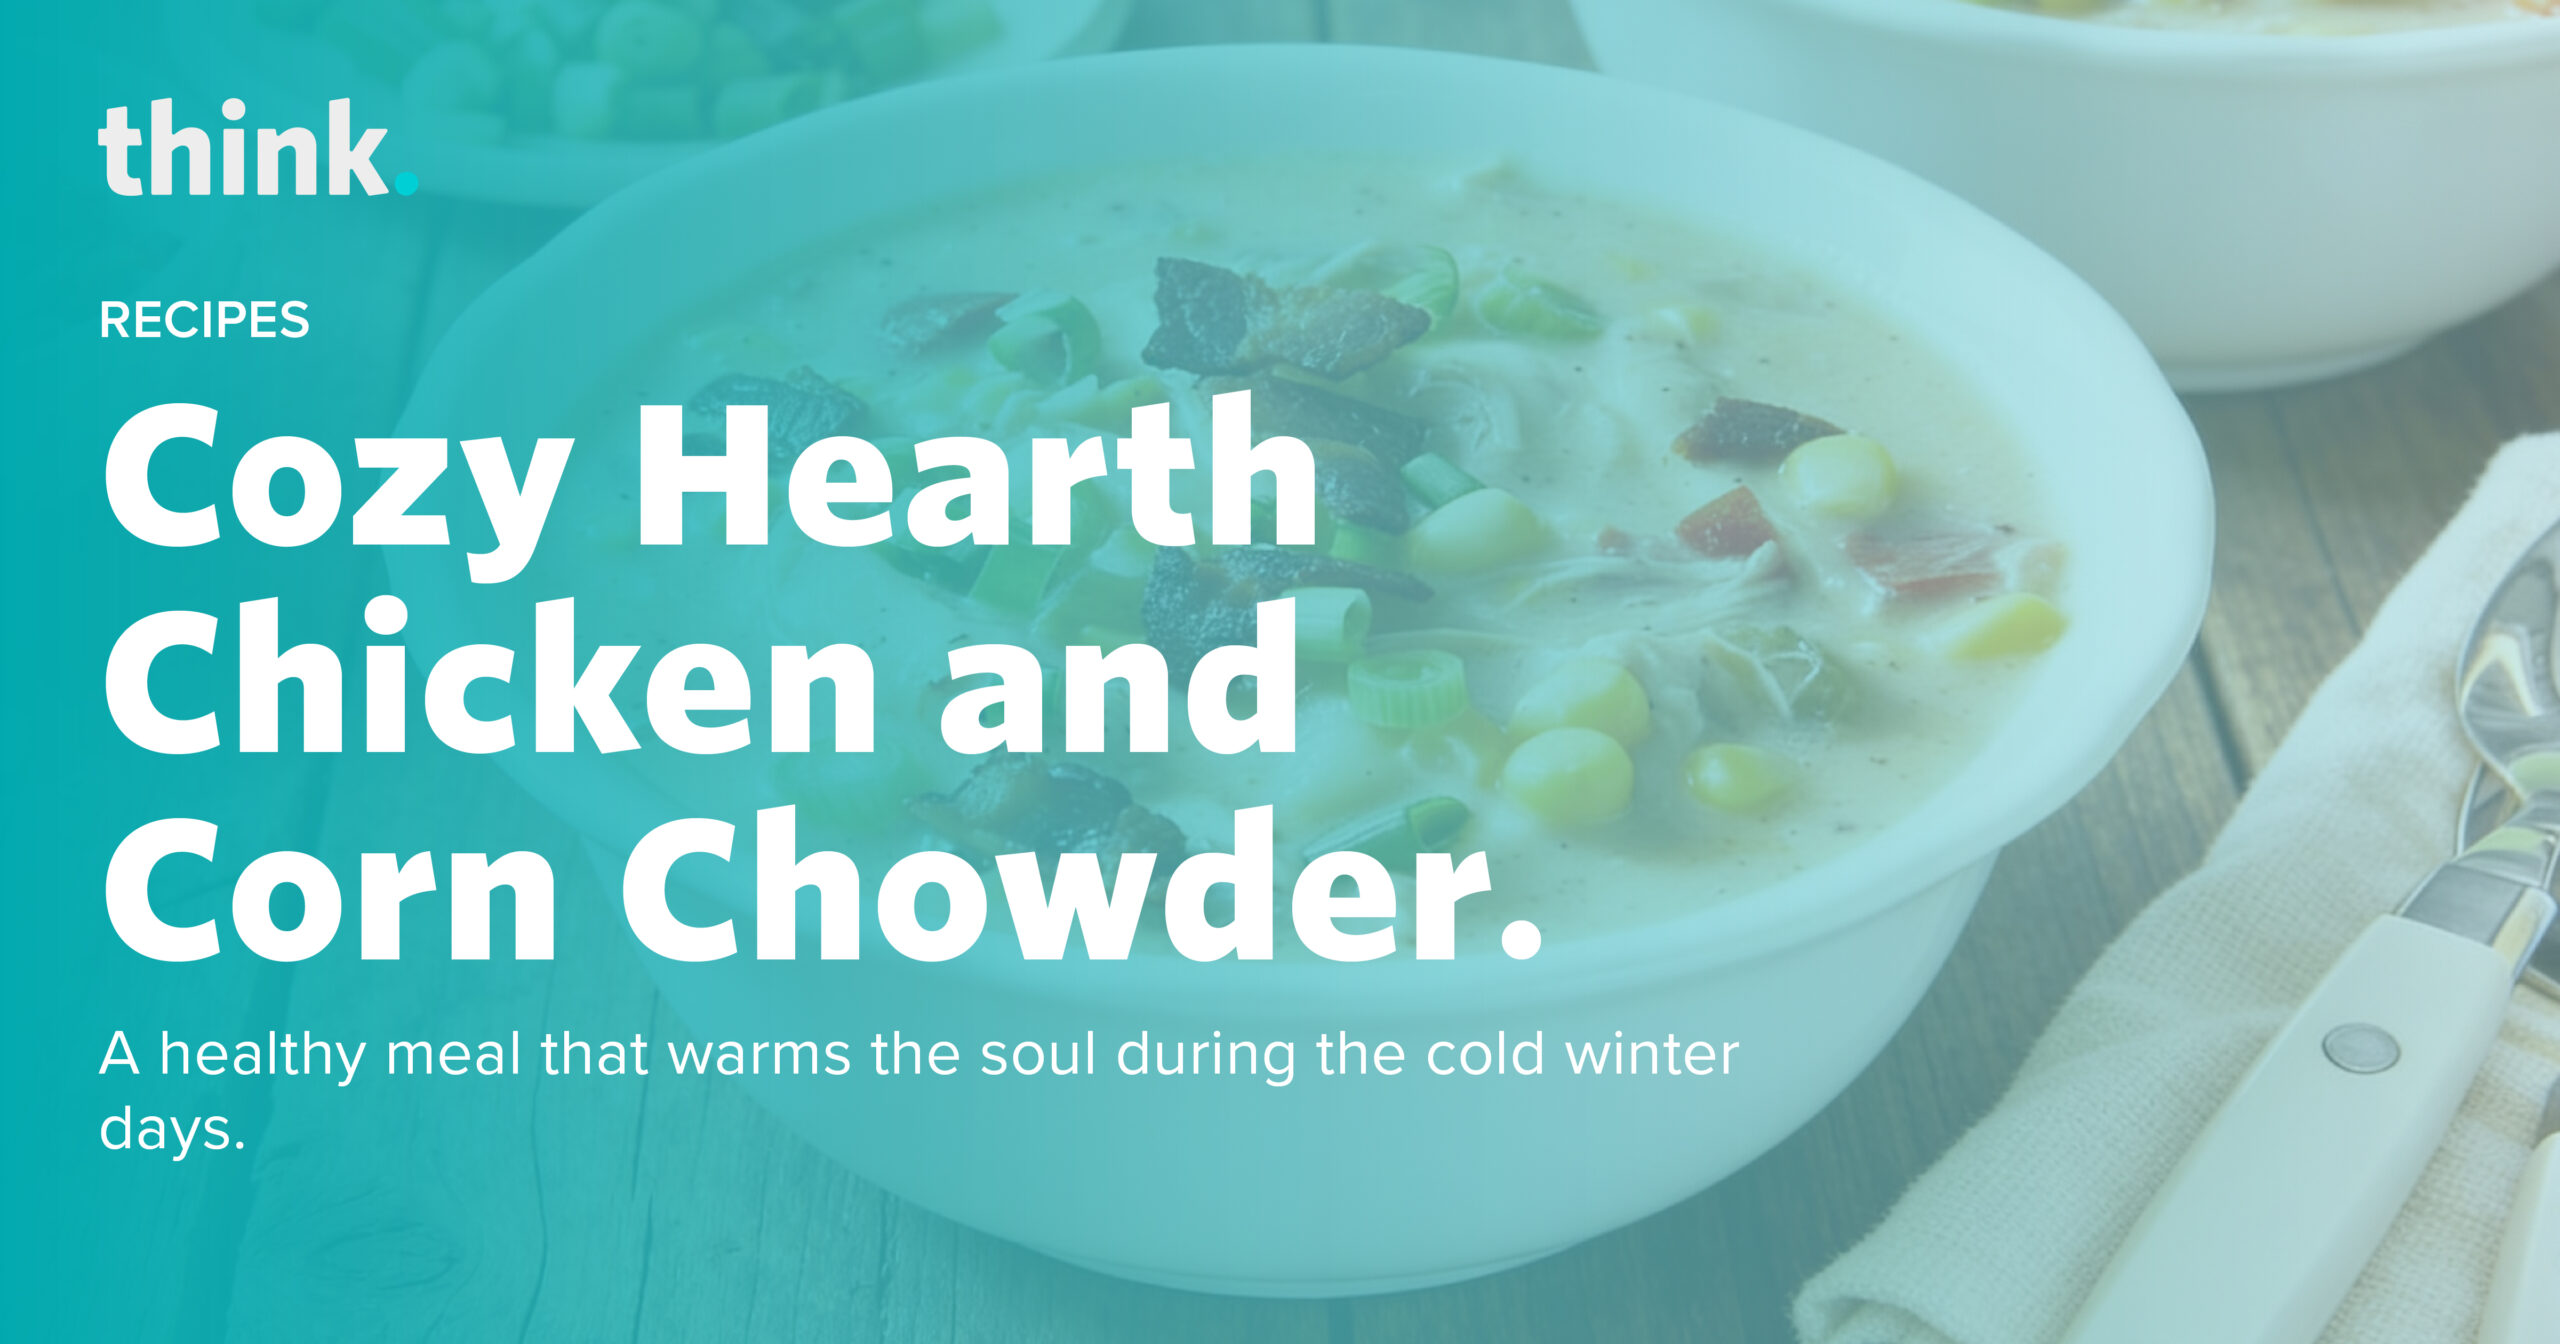
A bowl of chicken and corn chowder sits on a wooden table beside a napkin and utensils, with large white text describing the recipe.

A simple recipe that’s both sweet and spicy.

Our hearty chowder combines lean protein with nutrient-dense vegetables for a balanced cold-weather meal. The recipe utilizes whole ingredients to provide warmth and sustained energy.

The classic chowder offers a powerful nutritional profile ideal for winter maintenance. The chicken provides high-quality protein essential for immune function and muscle repair, while the corn and potatoes offer complex carbohydrates for sustained energy in colder temperatures. The addition of onions, celery, and bell peppers provides essential fiber and antioxidants that support digestive health and help combat seasonal oxidative stress. By cooking at home, you also control the sodium levels, avoiding the excessive salt often found in processed canned soups.

Beyond basic nutrition, warm, substantial meals play a role in mental well-being during the winter months. The thermal effect of hot soup helps regulate body temperature, promoting a physical sense of safety and relaxation known as the “rest and digest” state. This psychological comfort can help counteract the stress and low mood associated with shorter days and reduced sunlight. Taking the time to prepare a wholesome meal allows for a mindful pause in your day, reinforcing a positive relationship with food and self-care.

Prep Time
16 mins
Cook Time
26 mins
Total Time
42 mins

Servings: 6 – 8

Ingredients

What to buy at the store?

  • 6 slices bacon, chopped (optional)
  • 2 tbsp unsalted butter
  • 1 large yellow onion, chopped
  • 3 stalks celery, chopped
  • 1 red bell pepper, chopped
  • 2 garlic cloves, finely chopped
  • 1/3 cup all-purpose flour
  • 6 cups chicken stock
  • 2 medium russet potatoes, peeled and chopped
  • 4 cups corn kernels (fresh or frozen)
  • 3 cups shredded cooked chicken (rotisserie chicken works well)
  • 1 cup heavy cream (or half-and-half for a lighter option)
  • 3 green onions, chopped for garnish
  • 1 tsp salt
  • 1 tsp black pepper

Instructions

Step One: Render the Bacon 

In a Dutch oven or large pot over medium heat, cook the chopped bacon until crisp (5–8 minutes). Remove the bacon to a paper towel-lined plate, reserving the drippings in the pot.

Step Two: Sauté Vegetables

Add the butter to the pot with the drippings. Once melted, add the onion, celery, and bell pepper. Cook for 4 minutes until softened. Stir in the garlic and cook for an additional 30 seconds.

Step Three: Create the Base

Sprinkle the flour over the vegetables and stir constantly for 1 minute to cook out the raw flour taste. Gradually whisk in the chicken stock to ensure no lumps form.

Step Four: Simmer

Add the chopped potatoes, salt, and pepper. Bring the mixture to a simmer and cook for approximately 10 minutes, or until the potatoes are tender when pierced with a fork.

Step Five: Finish the Chowder 

Stir in the corn, cooked chicken, and cream. Return to a simmer and cook for another 10–15 minutes until the soup has thickened slightly.

Step Six: Serve

Ladle into bowls and top with the reserved crispy bacon and fresh green onions.